Monday, August 31, 2009

Here in the Midwest, grilling meat is close to a religion! There are organizations, societies, fests, and contests for the millions of experts in the art of grilling meat. There have been thousands of books written on the subject, and television series based on grilling meat. But my favorite way is to pan-fry. Bring out Granny's big old heavy cast iron skillet and you are ready to fix a steak that will make you smile. (If you don't have a cast iron skillet, go to your local hardware store and buy several sizes. You will find you use them daily! I will add directions for "seasoning" your new skillet at he end of this blog.)


Back to MEAT!


Pan-fried T-Bone Steak
2 to 4 servings
Ingredients
2 pound T-bone steak (about 1 1/2 inches thick)
Coarsely ground black pepper
Kosher salt
1 to 2 tablespoons oil, I prefer peanut oil


Directions
About 1/2 hour before cooking the steak, bring it to room temperature.
Preheat a large cast iron skillet over medium heat. Lightly brush the steak all over with oil and season generously with salt and pepper. Raise the heat to high, add the steak and cook, turning once, until well browned, about 7 minutes for the first side, and 4 minutes on the second side, for medium-rare. Hold the steak with tongs and sear the edges. (An instant-read thermometer inserted perpendicularly into the steak registers 125 degrees F for medium rare.)
Transfer the steak to cutting board and cover loosely with foil. Let rest for 5 minutes.
Cut the tenderloin and strip from the bone, and slice against the grain. Transfer to a serving platter and serve au natural, with mustard, compound butter, or horseradish sauce.


My sister has always said

“Fried Potatoes can cure anything!”


Unfortunately, the frying thing has been accused of all sorts of bad stuff. Actually, the carbohydrate thing has been discussed in a negative fashion also. But truly, is there a food that soothes as well as fried potatoes? You have this plate of wonderful crispy-on –the –outside, creamy-on-the-inside, seasoned heartily with salt and pepper (oh, that’s right….salt is not good for you either) and for me, sliced onions. We might as well get right down to the nitty gritty here, I prefer mine fried in bacon grease! Now that I’ve sent the younger generation’s finger flying to the delete button, I want to ask one question…..What can an occasional plate of fried potatoes do to you? I’m not saying you should eat this everyday, not even once a week. I’m saying occasionally! You know you drive thru McDonalds for a quick lunch which includes French fries. Wouldn’t you rather have wonderful fried potatoes at home, fried in Granny’s iron skillet with real bacon? You are lying to yourself if you say you don’t want them!
Now that I have you either totally turned off with the bacon grease thing, or turned on with the crispy, creamy thing, I am going to share a recipe with you that is an amazing substitute for fried potatoes. Granted, there is no bacon grease, no onion, no using Granny’s skillet, but they are very good and will be perfect with my pan fried steak.

Baked Pommes Frites

6 russet potatoes, with or without skins, your choice
1/4 cup extra-virgin olive oil
Salt and freshly ground black pepper

Preheat the oven to 400 degrees F. Peel potatoes and cut into half-inch thick slices (lengthwise) cut again into 1/2-inch thick fries. Place the potatoes into a pot with cold water and 1 tablespoon of salt. Bring up to a gentle boil and simmer until a paring knife tip goes through easily, cooked about 3/4 of the way through. Drain carefully and put potatoes in a bowl. Add olive oil, 1 tablespoon salt, 1/2 teaspoon black pepper. Toss well and lay out in 1 layer on baking sheet. Bake until light brown. Check for seasoning, adjust if needed by adding more while pommes frites are still hot.


How to season a cast iron skillet.

1. If the pan is new, be sure any adhesive label is completely removed.
2. Wash, rinse and dry the utensil.
3. Grease the inside surface with Crisco or other solid shortening. A medium-light coating, as you would grease a cake pan, is sufficient.
4. Put your greased utensil in a preheated 350°F oven for 1 hour.
5. Remove, cool and store the pan.
6. Never...NEVER put your skillet in the dishwasher! To clean, wipe it out with paper towels. If you feel you absolutely must wash it, rinse with a small amout of warm soapy water, rinse well, then dry extremely well!


You are going to use your cast iron skillt for breakfast, lunch and dinner. You can fry perfect fried chicken or pork chops. You can use it to make high, light cornbread or pineapple upside down cake.....the list goes on and on.

Friday, August 28, 2009

I have always said I have 3 great kids, inspite of me! How someone like me can come up with 3 wonderful adult children is beyond me. Yet, there they are. Cindy, Chuck and Betsy….all determined, self-reliant, extremely capable human beings who take joy in life and helping others. Who understand the world and what it takes to survive in it. Who are compassionate, kind and generous.
I know what you are thinking. “Kay is a typical Mom, her kids can do no wrong”. Not so, I always said “never say your kids would never do something wrong, because as soon as the words leave your mouth…..they do!” In reality, I am sure my kids did plenty, they were just smart enough to not let me know about it.
Now they are adults, parents themselves….but I’ll brag about my grandchildren another time. Today is the time to brag about my 1st child, Cindy Campbell Reynolds.
About 2 weeks ago Cindy called and asked if I could go to a luncheon with her on August 28th. I asked her if it was something special and her answer was, “Oh, it’s no big deal, I have a table at the luncheon, thought you might like to go”. Now Cindy has served on many boards, worked for many organizations, organized many charity functions, so I figured this was one of those luncheons. I accepted her invitation, and today was the event.
Being borderline elderly and clumsy, I did a great job of breaking a little toe earlier this week, so I emailed Cindy early this morning asking if I would embarrass her if I wore sandals, as I still can’t wear a regular shoe. She assured me it would be fine. I had asked Cindy who was sponsoring this lunch and she told me it was an awards program sponsored by the Kansas City Business Journal and the Kauffman Foundation.
Ding! A bell went off. I got on the Journals webpage and searched “Cindy Reynolds”. Thank God I did! My daughter was being honored as one of the top 25 Business Women in the greater Kansas City area!


I arrived at the Sheraton Hotel in Overland Park to find the large ballroom packed with over 50 tables seating 10 each. 2 giant video screens were set up, one on each side of the stage. There were large photographs of the recipients of the award out in the lobby! This was a major deal!
I looked up and there was my beautiful daughter and her family. There were friends there that she had known since grade school! Her brother read about it in the Journal and he came!
Each of the women were featured in a video about their career, their goals, their philosophy. Then they were brought up on stage, one at a time, given a beautiful award, and photographed awhile some quotes from each were read.
Yes, my kid, that bouncy, non-stop ball of fire who was an early over-achiever by walking at the age of 6 months and 1 week, has now been recognized as a truly fine woman. I could not be more proud. Congratulations, Cindy!

Tuesday, August 25, 2009


Whether it's called Shortbread or Shortin' Bread, everyone loves it, but then why not....butter, flour, salt and sugar! That's it, 4 ingredients, and you have one of the best cookies in the world!


This recipe is made with dark brown sugar, making it a cookie with a rich caramel flavor. Most shortbread cookies do not have an icing or glaze, but I put a light glaze on mine so I can sprinkle them with Sicilian Sea Salt. Hope you enjoy them!


Sicilian Salted Shortbread
2 cups sifted all-purpose flour
Generous pinch of salt
1/2 cup packed dark brown sugar
1/2 pound butter

Adjust the oven rack 1/3 of the way down from the top of the oven. Preheat oven to 375 degrees.
Place flour, salt and brown sugar in a mixing bowl. With a pastry blender cut in the butter until the mixture resembles coarse crumbs. Turn out onto a board or smooth surface. Briefly squeeze the mixture between your hands and then knead slightly only until the dough holds together smoothly. Do not handle more than necessary. The heat of your hands will melt the butter too much and you will need to chill the dough before you proceed.

On a lightly floured cloth with a lightly floured rolling pin, roll out the dough to 1/2" thickness. Cut with a floured 2" cookie cutter. Reroll and cut scraps. Place cookies 1" apart on an ungreased baking sheet. Pierce each cookie three times with a fork, going all the way through to the cookie sheet. If cookies appear to be sticky and soft, pop baking sheet into the refrigerator or freezer briefly.

Bake 20 to 25 minutes, reversing baking sheet's position during baking, until cookies are lightly colored. Do not overbake.
Remove with wide metal spatula to a rack to cool.
Now, these cookies are delicious at this point, but....mix 1/2 cup powdered sugar with a few teaspoons of warm water. Stir well until no lumps are evident. Drizzle this glaze over the cookies and immediately lightly sprinkle each cookie with a few grains of coarse sea salt. Absolutely delicious!
I also make a chocolate shortbread witht the same glaze and sea salt....wonderful!

Sea salt and Caramel are two amazing flavors, but you combine them and you have a powerful combination. The 2 flavors are popular in homemade caramels; sweet, salty and chewy. If you are in the mood to make candy, try this recipe. The combination of smooth, sweet caramel, crunchy salt crystals, and bittersweet chocolate may sound unusual, but it makes these candies impossible to put down.
Sea salt has become a fashionable ingredient, and should not be hard to find in a well-stocked grocery store. If you like, you can substitute kosher salt for the sea salt. Table salt is not recommended, but if you must use it, use less than the recommended quantity. Do not use rock salt.


Sea Salt Caramels from about.com
1 1/3 cup heavy cream
2 cups granulated sugar
1/2 cup light corn syrup
1/3 cup honey
6 tbsp butter, cut into small pieces
1 tsp vanilla extract
3 tsp sea salt, such as fleur de sel
1 lb bittersweet chocolate, chopped
Preparation:
1. Prepare an 8-inch baking pan by lining it with aluminum foil and spraying the foil with nonstick cooking spray.
2. Place the cream in a large saucepan over medium-high heat and bring it to a boil. Stir in the sugar, corn syrup and honey and stir until it begins to boil. Periodically wipe down the sides of the pan with a pastry brush dipped in water to prevent sugar crystals from forming.
3. Cook the candy, stirring occasionally, until it reaches 257 degrees on a candy thermometer.
4. Remove the pan from the heat immediately and stir in the butter, vanilla, and 2 teaspoons of salt.
5. Pour into prepared pan and let set at room temperature until firm enough to cut.
6. Cut the caramel into small squares or strips with a chef’s knife.
7.
Temper the chocolate and dip the caramels in the chocolate one at a time. Place them on a baking sheet covered with waxed paper or foil to set. While chocolate is still wet, sprinkle on the remaining salt and allow to set completely.


to temper chocolate go to


Day One Still Life Project!

It was a blast! Not too successful for me, but fun! Vicki Johnston, Winnie Davis, and Joanne Carlton joined me for a great day of painting! Day 2 tomorrow!
Thanks to Becky Pashia and all the wonderful people at ARTichokes for giving us this opportunity.


Monday, August 24, 2009

The Still Life Project at

ARTichokes


I was surprised the still life setup went so quickly, then I realized Vicki had painstakingly set it up at home the evening before! She looked at it from all angles, tried different elements, textures, colors. By the time we arrived at ARTichokes this morning, Vicki knew exactly what we needed and what went where. There were a few little changes, due to the lighting, the size of the space, etc., but basically, it went fast.


Tomorrow, Tuesday morning at 10:00am the doors will open and I hope painters come to paint Vicki's creation....it is a beauty! I took these photos, and yes, it changed slightly as it was built, but they will give you an idea of the elegance in design. Please, if you love to paint, come join us. The still life will remain in place until Friday afternoon.

Paint the whole beautiful arrangement, or pick your favorite part!

Tuesday through Friday, 10:00am to 5:00pm. Hope to see you there!

ARTichokes Gallery, Mission Farms, 107th and Mission Road, Leawood, Kansas.

Sunday, August 23, 2009


This is a busy season coming up for me….! #1. HARVEST! Thought I’d be retired by now, but doing one more harvest season. #2. My 50th High School Class Reunion…I know, it is hard to believe I have been out of high school 50 years, but it is true! #3. I am catering a dear friend’s wedding reception. And finally, #4. I am going to start painting again! I miss it! Three weeks without being covered in oil paint is just too long! I personally hope ARTichokes never closes again….too hard on me, messes with my mind! I’ve been working in soft pastels, but they just don’t do it for me, yet. I’m still just learning the techniques and papers, etc, so I have a long way to go.
Cooking, on the other hand, is still going on. This week starts the 4 to 5 week long harvest season and we had to close the reservations for the first three weeks. Dennis sent out the newsletter announcing the first 3 dates and within 2 hours we were completely full! What that means for me is cooking for 100 people every Sunday for the next 3 weekends. After that comes the harvest dates for the red varietals!

Thank goodness I have excellent companions in the kitchen, Mike and Christine Hursey. And, we are cooking in their brand new professional kitchen at their new Casa Somerset, just down the road from the vineyard. It will almost be like retirement!

The menus for these first 3 events are Mediterranean, French and Greek. Should be lots of fun out in the vines; good wine, good food, good music, and as always, good company!
Tomorrow, Monday, Vicki Johnston and I set up the large still life at ARTichokes for our 4 day Still Life event. I am really looking forward to it. We will be able to paint for 4 days, Tuesday through Friday, leaving the still life set up the entire time, giving us an opportunity to complete a large intricate painting or several smaller, quicker studies. Who knows, I may even try a pastel. I hope all you painters have it on your calendar!

The Somerset Painters are not painting this coming Wednesday, due to the still life event.
We will return to our weekly painting out in Miami County eventually, but we plan to visit Ada Koch’s studio the following Wednesday.

Now, finally, deciding what recipe(s) to share with you today. This weather has me thinking fall and cooler weather, but I know we won’t be that lucky for long. However, I do think I might start sharing cooler weather recipes with you….it will turn to fall eventually!
This one is not right off the farm….Grandmother Ogg didn’t use pimientos or chives in her dumplings, and the peas were out of the garden, or out of the cellar where all of the jars of her home canned vegetables were stored! Chances are, the onions, salt and pepper were her only seasonings, and you can count on bacon fat being used rather than olive oil! Other than that...it is just like her's!


Beef Stew with Dumplings 10 to 12 servings

2 pounds boneless beef chuck roast, cut into 1” cubes
2 tablespoons olive oil
8 ounces sliced fresh mushrooms
1 large onion, thinly sliced
1 large clove garlic, minced
28 ounces beef broth, I use low sodium variety
2 sprigs fresh thyme
1 sprig rosemary
1 teaspoon salt
½ teaspoon black pepper
1 bay leaf
1/3 cup all-purpose flour
½ cup water
1 10oz package frozen baby peas

For dumplings:
1 ½ cups biscuit mix
2 tablespoons finely diced drained pimientos
1 tablespoon finely minced chives
½ cup milk

In a Dutch oven over medium heat, brown the meat in the olive oil. Add the mushrooms, onion and garlic; cooking until onion is tender, stirring occasionally. Stir in the broth, herbs,and seasonings. Bring to a boil, cover, lower temperature and simmer for 1 ½ hours.
Discard the bay leaf, then combine the flour and water until smooth; stir into stew. Bring to a boil; cooking for 2 minutes to thicken. Reduce the heat and stir in the peas.

For dumplings, combine the biscuit mix, pimientos and chives in a bowl. Stir in enough milk to form a soft dough. Drop by tablespoonfuls on to simmering stew. Cover and simmer 10 to 12 minutes, until dumplings are cooked through. Do not peek before 10 minutes. Lid must remain on during the cooking time. When done, serve immediately.

The nice thing about dumplings is they taste so good! They simmer in the meat broth and get light and puffy. When you have dumplings, you don’t need potatoes or bread, just a nice salad will do the trick. And for dessert…I think a couple of Swedish Butter Cookies and a cup of coffee hit the spot!

Swedish Butter Cookies….makes 6 dozen

1 cup softened butter
1 cup sugar
2 teaspoons maple syrup
2 cups all-purpose flour
1 teaspoon baking soda
Powdered sugar

In a mixing bowl, cream the butter and sugar. Add the syrup and blend well. Combine the flour and baking soda, then gradually add to creamed mixture.
Divide dough into 8 portions. Roll each portion into a 9 inch log.
Place logs 3” apart on ungreased baking sheets. Bake at 300 degrees for 25 minutes, until lightly browned. Cut into 1 inch slices. Remove to wire rack to cool. Dust with powdered sugar.

Saturday, August 22, 2009


What a glorious evening! The opening for the new show at ARTichokes took place on a perfect evening. It was mild with a beautiful sky and gentle breeze. Thank heavens....the crowd spilled out onto the sidewalk! It was amazing how many people came to enjoy the new art pieces and ARTichokes' newly designed space.


Becky Pashia and Megan Sutherland spent the first 3 weeks of August redesigning their gallery and studio in Mission Farms at 107th and Mission Road in Leawood, Kansas. I thought it was perfect before, but you should see it now!

Becky, co-owner and artist, has a brand new painting space right in the middle of the gallery. Her former studio is now a space designed for classes. (Go to www.artichokeskc.com/ and click on class schedule. Pick a class! You can sign up on line.)


I arrived at ARTichokes at 3:30 in the afternoon for a painting demonstration by Arkansas artist, Barry Thomas. Barry is known as an American Impressionist. Visit his web page and view his paintings. http://www.barrythomasart.com/


Barry is a big man, tall and strong....its a good thing, he paints huge! He also paints heavy....there is paint on the 6' piece he did during the demo which will take well over a year to dry.

Barry talked to Audrey Benskin, Kristin Howard and me for an hour, explaining his palette, his canvas, studio, education....you name it, we asked it, he answered it! It was such an amazing opportunity for us and he was so kind to indulge us!


The other artists in this show are Sue Adams, Sara Cameli, Angie Jennings, Bruce Mayfield, Pam Peffer and Mike Savage. There are several wonderful new pieces hanging by Kristin Goering, ARtichokes instructor. Becky Pashia found some time during all the remodeling to paint several exciting new pieces!
Kristin Goering and Becky Pashia

The show is one of ARTichokes' best! Take the time to visit the gallery. Go to http://www.artichokeskc.com/ for the gallery hours, artist information and photos of some of the pieces in the show. While you are there, check out the classes offered starting after Labor Day! Get those creative juices flowing again!
The recipe for today: Last night's appetizers were delicious, provided by Room 39, ARTichokes' nextdoor neighbor. There were crab cakes, spicy cheese balls, stuffed mushrooms, watermelon cubes wrapped in prosciutto and endive petals with blue cheese. For the dessert tray, warm almond cake with a dallop of whipped cream. All were bite-sized but BIG in flavor. Room 39 always does a great job.
One of my favorite appetizers is one that I can make several hours before the party and stick in the refrigerator. This recipes makes about 15 servings, but if you are having a large crowd, it is way too simple to increase the number of servings...won't even take a calculator! Just remember to prepare the tomatoes and onions at least 8 hours before you are ready to assemble the sandwiches.
Roma Tomato Sandwiches
1 loaf white sandwich bread...not Wonder Bread, but a good loaf from the bakery
Roma Tomatoes, peeled
1 large white onion
1/4 cup mayonnaise
1 tablespoon mustard
salt and pepper
Slice the peeled tomatoes and onions and layer them in a plastic container. Cover and refrigerate them for 8 hours. You are infusing the tomatoes with the onion flavor.
Cut the bread slices into 2" rounds, using a 2" biscuit cutter. Spread each slice generously with a mixture of the mayonnaise and mustard.
Remove the onions from the container of tomatoes. Drain the tomato slices well, then place one slice of tomato on a bread round. Sprinkle generouly with salt and pepper. Top with another bread round.
When all sandwiches are complete, place on a tray and cover with slightly damp paper towels and then with plastic wrap. Refrigerate for 2 hours before serving.


Friday, August 21, 2009

Is America the Beautiful becoming America the Cruel?


Fair Warning! I am about to get political …. ….delete if you don’t wish to hear me rant again, however, there is a recipe at the end! Last time my rant was on hotdogs….today? Health care and Politics.

I have been on Medicare for several years now, basically haven’t used it, but it is nice to know it is available.
With all the news on the health care situation, I am sure most people age 60 and up are feeling pretty uncomfortable. (I am envisioning railroad tracks being built straight to the Arctic Ocean, where chunks of ice are being corralled, waiting for the boxcars of the elderly to arrive. We will be stripped of clothing and our dignity then set adrift to die on the ice!)
In most cultures, the elderly are respected and taken care of. They are honored members of the family and community. Here in the United States, we are suddenly being seen as drains upon society, using up resources that can be better used on people with a "future." Will we be told “No medical treatment for you, here’s a pain pill”? If there is a plug to pull, is it going to be pulled?

In all honesty, I am not so sure I will want to live after I become badly impaired, but shouldn’t that be my decision? Shouldn’t I have the opportunity to sit down with my three children and discuss my choices with them? Or is there going to be a “Death Panel” that will make that decision for me?

We need to be very careful here, Folks. Those arrogant idiots in Washinton are, unfortunately, our employees, they work for us. There is no “new god” in Washington, DC. The God in our nation’s capitol is still the One whose name is carved into the marble monuments, the One who our forefathers wrote about so eloquently in our Constitution.

I want to see the elderly of America standing tall, standing strong, standing smart! Our eyes may be going, our joints may be arthritic, our organs may be suffering from years of use, but

Our hearts belong to America the Beautiful!

We will not go quietly!

I am not sure this is the time for a recipe, but I think I will print one anyway. After all, you read this blog for recipes, not politics!

American Pecan Bars

18 tablespoons unsalted butter, room temperature (1 cup plus 2 tablespoons)
3/4 cup light-brown sugar, firmly packed
1/2 teaspoon salt
3 cups all-purpose flour
8 tablespoons unsalted butter (1 stick)
1/2 cup light-brown sugar, firmly packed
6 tablespoons honey
2 tablespoons granulated sugar
2 tablespoons heavy cream
1/4 teaspoon salt
2 cups pecan halves (8 ounces)
1/2 teaspoon pure vanilla extract

1. Place rack in center of oven. Heat oven to 375 degrees. To make the crust: In the bowl of an electric mixer fitted with the paddle attachment, mix butter and brown sugar on medium speed until light and fluffy, about 2 minutes. Add salt, and mix to combine. Add flour 1 cup at a time, on medium speed, mixing until fully incorporated after each addition. Continue mixing until the dough begins to come together in large clumps.
2. Press dough about 1/4-inch thick into a 9-by-13-by-1-inch baking pan. Prick the pastry with the tines of a fork. Chill until firm, about 20 minutes. Bake until golden brown, 18 to 20 minutes. Transfer pan to a wire rack to cool completely.
3. Reduce oven to 325 degrees. To make the filling: Place butter, brown sugar, honey, granulated sugar, heavy cream, and salt in a medium saucepan over high heat. Bring to a boil, stirring constantly until mixture coats the back of a spoon, about 1 minute. Remove pan from heat; stir in nuts and vanilla.
4. Pour filling onto the cooled crust. Bake until filling bubbles, 15 to 20 minutes. Carefully transfer pan to a wire rack to cool completely. Run a paring knife around edges of the pan, and invert onto cooling rack, leaving the pastry on the rack. Invert rack with pastry onto a cutting board, leaving the pastry on the board, filling side up. Use a sharp knife to cut into 1-by-3-inch bars. Store in an airtight container up to 1 week.

Wednesday, August 19, 2009

The Somerset Painters
from left to righ: Ada Koch, Maria Johnson, Kay Tucker, Vicki Johnston and Audrey Benskin


Yesterday was Somerset Painters Day. I have to say, I love Wednesdays; the camaraderie with the painters, the day outdoors, the creative juices flowing, and LUNCH! Not only did we set up on the veranda and paint for 3 hours, but we also went to Casa Somerset where Chef Michael prepared a delightful lunch for us. Mike gave us a tour of their new 3 story Tuscan style home that is destined to be a fabulous Bed and Breakfast! Go to his web site http://www.casasomerset.com/ and check out the photographs of the building's progress over the last year and a half. While you are there, go to the archives and click on the entry for September, 2008. There you will find Mike's recipe for Limoncello Cake that is served with a delicious sauce. Mike served it to us for dessert at lunch today and it was incredible! If you are looking for a very special cake, this is it!


I am really into Southern Foods right now; grits, fried green tomatoes, fried chicken, peach cobbler, mint juleps, pecan pralines keep running through my head! Wonderful Southern cooking, like turnip greens with bacon and onion, pimento cheese, deviled eggs, cornbread dressing, fried ham with redeye gravy....okay, I need to go to the kitchen, I am hungry!


Here is a recipe for you to try while I'm cooking! It is from Food and Wine. Photo by Kristen Strecker


Fried Green Tomatoes


1/4 cup all-purpose flour
Salt and freshly ground pepper
2 large eggs, beaten
2/3 cup plain dry bread crumbs
1/3 cup freshly grated Parmesan cheese
1 pound green tomatoes or large tomatillos, sliced 1/2-inch thick
1/2 cup extra-virgin olive oil
Old Bay Seasoning, for serving
Hot sauce, for serving


In a medium bowl, season the flour with salt and pepper. Put the eggs in another medium bowl and toss the bread crumbs and grated Parmesan in a third bowl. Dredge the tomato slices in the flour, then coat them in the egg, letting any excess drip back into the bowl. Coat in the bread crumbs, pressing to help them adhere.
In a large nonstick skillet, heat the olive oil until shimmering. Add the breaded tomatoes in a single layer and cook them over moderately high heat, turning once, until deeply golden and crisp, 5 to 6 minutes. Transfer the tomato slices to paper towel—lined plates. Sprinkle with salt and Old Bay and serve immediately with hot sauce.


Tuesday, August 18, 2009

As you can see, I am trying a new look for my blog….may not keep it, so don’t be surprised if it changes again….and again.


I just received this photograph of my good friend, Willie Kirst, who will be playing at our OktoberArtFest in the vineyard on Sunday, October 11th! Oktoberfest celebrations are so much fun, and this one will be one of the best! Art in the Vines, Great Wine, Delicious German Food, and Willie Kirst playing his accordion as he strolls around the vineyard!
Don’t miss it! Willie will also be playing on Sunday, October 25th.

Tomorrow is Somerset Painters day. We are painting at or around the vineyard, then going to Casa Somerset for lunch. Chef Michael will be preparing pasta for us. Life is good! The chance of rain is 80%...but we are going!

Speaking of Chefs, Chef Jasper Mirabile quoted insignificant me on NBC Action News on Monday! He used a line from this blog concerning Julia Child’s Boeuf à la Bourguignonne. He prepared the dish on the program, with the magic of television, had it done in 5 minutes!
Thanks for plugging my blog, JJ, I appreciate it!

Everything this week is still Julia, Julia, Julia. I wish she was still with us, she would love the press, the excitement, and I am sure, the movie! I just watched one of her television shows on making French Bread. I’ve said before, when I have a question about food, I go one of two places…Julia Child and/or Martha Stewart. I love all of the cooking shows, and the Food Network, but most of those shows are hosted by someone who specializes in a particular cuisine, or an entertainer. For extensive information on a wide variety of foods I feel Julia and Martha are far more qualified and experienced. If it is a science of cooking question, I check Howard Hillman’s book, The New Kitchen Science. If I have a question on Italian foods, I text dear Jasper and email my friend in Tuscany, Judy Witt Francini. How lucky I am to have friends that I can rely on for a little help!

Today is my sister Ann’s birthday. She and Bruce were here last week and participated in our grilled cheese contest, but more importantly, she gave me a recipe for a Gouda Cheese Spread that she developed one day when she needed another appetizer. Sometimes we get really lucky, and this was one of those times! I took this to the Artist’s Party for Cindy and Dennis and was asked to please print the recipe…here it is, Winnie!

Ann’s Gouda Cheese Spread

1 round of Gouda, grated
1 can of Santa Barbara Ripe Green Olives
(available at Whole Foods)
Diced red onion
Mayonnaise
Freshly Ground Black Pepper

Grate the cheese into a mixing bowl. Drain the can of olives and slice each olive 3 or 4 times. Add to cheese along with diced onion. Stir in enough mayonnaise to make it as moist as you like it. Season with a good amount of black pepper.
This is excellent! Thanks, Ann, and Happy Birthday!
Here is some information on gouda cheeseGouda cheese [GOO-dah, Du. , KHOW-dah]Holland's most famous exported cheese is Gouda, with its characteristic yellow interior dotted with a few tiny holes. It has a mild, nutlike flavor that is very similar to EDAM, but its texture is slightly creamier due to its higher milk fat content (about 48 percent compared to Edam's 40 percent). Gouda can be made from whole or part-skim cow's milk, and aged anywhere from a few weeks to over a year. The younger the Gouda, the milder the flavor. When aged over a year, it takes on almost a cheddarlike flavor. It comes in large wheels ranging from 10 to 25 pounds, and usually has a yellow wax rind. Baby Gouda, which comes in rounds weighing no more than a pound, usually has a red wax coating. Some Goudas are flavored with CUMIN or herbs. Though Gouda is also made in the United States, the domestic version is rarely aged and is extremely mild-flavored. Gouda is particularly good with beer, red wines and dark bread. The Dutch make a dish called kaasdoop , a Gouda FONDUE served with potatoes and rye bread, (My goodness, that sounds wonderful! I'll try to find a recipe for us!)

Sunday, August 16, 2009

A Treasure From The North

We used to take a week of vacation and drive to Lake Clitherall in Otter Tail County, Minnesota. We would stay in a rustic old fishing camp and my in-laws would go fishing twice a day, morning and again in late afternoon/early evening. The Walleye was wonderful, the fresh tomatoes were perfect, the corn-on-the-cob delicious. But what I really loved was the Raisin Rye bread from a small Swedish bakery in the town of Clitherall!
The combination of the rye flour with the raisins and pecans made this bread a real treat The subtle, earthy flavor of rye, the nuttiness of the pecans, and the offsetting sweetness of raisins combined to make a bread whose flavor seemed to delight the taste buds.. You could toast it for breakfast with some great local fresh butter and fold it around a big thick slice or two of crispy fried country style bacon and think you’d died and gone to heaven!
And at cocktail time….nothing beats a slice of the bread thickly spread with Roquefort or another assertive cheese and a glass of Somerset Ridge Ruby Red Wine!

I thought about that bread so many times through the years and finally decided to research it. The closest I have come to matching the Clitherall Bread is what I call

Minnesota Raisin Rye
Biga (starter)

1/8 teaspoon instant yeast

1 cup (4 1/4 ounces) Unbleached All-Purpose Flour

1/3 cup (2 5/8 ounces) cool water

Dough

1 1/4 teaspoons salt

3 tablespoons dark brown sugar

1/2 cup medium or light rye flour

1/2 cup pumpernickel flour

1 cup Unbleached All-Purpose Flour

3/4 cup lukewarm water

2 teaspoons instant yeast

2 tablespoons butter

1/2 cup chopped pecans

1 cup raisins


Make the biga by stirring together the yeast, flour, and water. The dough will be very stiff and dry. Place it in a lightly greased bowl, cover it, and let it rest at room temperature overnight.


Next day, combine the biga with the remaining ingredients (except the pecans and fruit) in a large mixing bowl, or in the bowl of an electric mixer, mixing to form a shaggy, sticky dough. Knead the dough until smooth (even though it's smooth, it'll still be very sticky), then place it in a lightly greased bowl and let it rest for 1 hour; it will become quite puffy, though it may not double in bulk. The heavier rye and pumpernickel flours keep dough from becoming as light as white bread dough.Transfer the dough to a lightly greased work surface, gently deflate it, and knead in the nuts and fruit. Shape the dough into a slightly flattened ball and place it on a greased sheet pan, or into a greased 9" round cake pan. Cover the pan with a proof cover or some lightly greased plastic wrap. Let the loaf rise for about 90 minutes, until it's puffy. Preheat the oven to 350°F. Bake the bread for about 50 to 55 minutes (tenting it lightly for the final 15 minutes), until its interior registers 190°F to 195°F on an instant-read thermometer. Remove the bread from the oven and cool it on rack. Yield: about 16 servings.

Hope you try it! God, I love to bake bread!

Saturday, August 15, 2009

Live! From Jasper's Kitchen
Popular Local Chef Hosts Radio Show
Presented by The Hen House Markets
Kansas City, Mo. - Jasper Mirabile, Jr., renowned chef at the popular Italian restaurant that bears his and his father's name, hosts a weekly radio show on KCMO 710 AM radio Saturday mornings at 11 AM.


I haven't talked much lately about my good friend, Jasper Mirabile. He has a wonderful radio program on every Saturday morning at 11am that is full of information about food, Italian food in particular, restaurants in Kansas City, travel, the Slow Foods organization and what is happening in the Kansas City area. He has great guests and terrific topics. Tune in to hear the latest in food news!


Jasper and I collaborated on a dinner held at his restaurant. We called it "Pig 101..From Snout to Tail". I loved the experience! Jasper also attends our harvest events, at leastone each harvest season. He says being at the Somerset Ridge Vineyard for harvest is just like being in Italy! I agree!

Jasper's New Cookbook!

Jasper's Ristorante Presents Jasper's Kitchen Cookbook Dinner

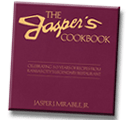
Join Jasper Mirabile Jr. for the premier book signing of his new cookbook Jasper's Kitchen Cookbook from Andrews McMeel Publishing Universal Press.The Jasper's Kitchen Cookbook is a nostalgic collection containing more than 100 recipes from the beloved family-run institution. It is more than a cookbook; it's a rich family history that began long before the opening of the first Jasper's in 1954. The book is full of life and flavor, spanning from antipasta to dolci and celebrates the Italian tradition of shopping local markets and eating what is in season. This will be a true collector's item, filled with stories and photos from the Mirabile Family, chronicling the history of their successful restaurants throughout the years. Jasper Jr. understands that a love of food and family are essential to cook the very best authentic Italian. He passes on these lessons and his reverence for the past, creating a truly unique culinary offering. September 21, 2009 6:30 PM 55.00 per person includes dinner & one cookbook
Tax & Gratuity not included Jasper's Wine Selections will be available.
Jasper's Ristorante 1201 W. 103rd StreetKansas City, MO 64114
Please call for reservation!


816.941.6600

I will be there, so anxious to get his new cookbook! His last cookbook is still in print and is available at the restaurant.

Friday, August 14, 2009

I am such a lucky person….here I am at 67, almost 68, years old and I have a wonderful life going on with an amazing family, a grand combination of both old and new friends, and 3 wonderful interests, painting, cooking, and the vineyard, that keep me active and happy. I never have a day when I wonder “what should I do with myself today?” I have the opposite, “Just how many of these things on my ‘to-do-list’ can I accomplish today?”!
I’m not saying that I don’t have days when I want to stay in my pjs and read a book, because I do… it is because I love a day like that and I figure I deserve one every now and then!
I’m pretty sure all of you have figured out that I love to write my blog. I hope I don’t bore people, but I like to write about the things I know. And to have such a full exciting life at this stage and age is amazing! I must admit, it is also tiring at times, but I seem to pop out of bed the next morning, ready to start another new day and tackle another to-do-list!

The other day I tried to figure out how many hours it would take for me to do all the things I would like to do in one day. Between painting for 4 or 5 hours; cooking for 4 or 5 hours; spending 4 or 5 hours with family, eating, drinking, talking and laughing; Blogging for 2 to 3 hours; spending 4 or 5 hours with friends painting, eating, drinking, laughing, learning, maybe seeing a movie…I figured out there just isn’t enough time for me to have a “perfect day”. Maybe I need to arrange for a perfect weekend!

I am thinking French Food today, I suppose the Julie&Julia movie is still having an affect on me. I want my house to be filled with the aroma of French Braised Pork Shanks with Rosemary infused White Beans. I want to inhale the aroma of Normandy Apples with Cinnamon and Honey. I want a warm crusty Baguette with real French Butter. I think a simple green salad would be perfect to serve with this menu. My choice of wine would, naturally, be a dry red from Somerset Ridge Vineyard, if only I had saved a bottle of the Cabernet Reserve! I suppose I should whip up a dessert. I am remembering the first time I made Julia’s Whipped Cream Torte, must have been in 1970….OMG! Was it good! But then, I’ve never tried anything from Julia that wasn’t!
This recipe is for her Apricot Gateau, the cake that she chose for her own birthday celebration. She called it her "Los Gatos Gateau Cake”. She described it as a Dacquoise type of apricot-filled torte. She prepared this on one of her television shows and said she loved the rectangular shape because she could prepare the recipe, cut off the end piece, eat it and then frost the cut end again and no one was the wiser! Here is the PARAPHRASED recipe. (paraphrased by Pat Goldberg in 2003) The photograph is of an Apricot Orchard in Provence, France

Meringue-nut layers

3/4 c each toasted and skinned hazelnuts and blanched toasted almonds

1 c sugar

3/4 c (5 to 6) egg whites

pinch salt

1/4 tsp cream of tartar

3 Tb additional sugar

1 Tb vanilla

1/4 tsp almond extract

Pulverize the nuts with the sugar in a blender or food processor. better done in two batches. preheat oven to 250. Butter and flour two pastry sheets and, using a spatula mark out a total of 4 12x4 inch rectangles on them.Beat the egg whites until stiff and shining, adding in the salt and cream of tartar when they have foamed. Add the 3 Tb sugar at the end while you are still beating, and then the extracts. Fold in the pulverized nuts and sugar, put the resulting meringue in a pastry bag, and fill in the four squares, from the outside to the inside. Bake about an hour on two oven racks, exchanging the two pans about every 20 minutes. They are done when you can push them loose from the pan - but don't force them. Put on a rack to cool.

The Apricot Filling

1 lb dried apricots

1 c dry white French vermouth

2 c water

1 stick cinnamon

zest of one orange

2/3 c sugar

2 Tb orange or apricot liqueur

1 Tb cognac or rum

Soak the apricots in the vermouth and water for several hours. Add the cinnamon and zest and simmer at least 10 minutes until the apricots are very tender. Drain the fruit, reserving the cooking liquid.Puree the fruit in a food processor or with a food mill (she doesn't say what to do with the cinnamon stick). Boil the cooking liquid until it is a thick syrup, stir in the puree and the liquid and the liqueurs. Cool, cover, and refrigerate.

Confectioners Butter Cream (make just before using)

8 oz unsalted butter

10 oz confectioners sugar (2 cups sifted directly into cup)

2 egg yolks

1 Tb vanilla

3 to 4 Tb orange or apricot liqueur, cognac, or rum

Beat the butter over hot water until it has just softened, then add sugar. Beat another minute or two until it is light and fluffy. Add the egg yolks and beat another minute, then add the vanilla and liqueur. Beat over cold water if it is too runny.

Putting the damn thing together

1 c confectioner's sugar in a sieve or shaker

2 c shaved almonds, lightly toasted

lightly whipped and sweetened cream to pass with the cake {optional}

Be careful with the cake layers, they are easy to break (but can be disguised as you put the cake together. Save the best one for the top. You will use only two more, the last one is "just in case." Put the ugliest meringue layer on the serving plate or board, and slip a couple of layers of wax paper under it in a way that allows you to pull them out later. Put aside almost 2/3 of the butter cream. Of the remaining butter cream, spread half of it on the meringue, then spread that with half the apricot stuff. Put on another meringue layer and repeat. Top with the most beautiful meringue. If it looks good, dust it with powdered sugar. If it is cracked in a way that the sugar can't cover up, ice it with a bit of the butter cream. In any case, spread the butter cream on all the sides of the cake. Then pat on the almonds. You can put some on top to cover imperfections too. Chill the cake. It can be refrigerated for up to two days or it can be frozen. In that case thaw in the refrigerator for several hours.

Our Julia sure knew how to eat well!

Thursday, August 13, 2009

What a fun time I had tonight! I was invited to go see Julie and Julia, the new Meryl Streep/Amy Adams movie about the amazing Julia Child and a young New York blogger. My hosts were the Benskins, Audrey and Joe, who invited me to come by their home before the movie. The house was beautiful and Audrey's paintings are incredible! They have such movement and light! And she paints BIG! I love them!


Now, for Julie and Julia....what a fun movie! Meryl Streep as Julia Child was amazing! She had her pegged right down to her voice. Julia was 6'2" and I wondered how they would manage that. You almost never see Julia's feet in this movie, so I suspect they had her standing on a box or she was wearing lifts.! Whatever they did, it only enhanced the movie. Stanley Tucci played the part of Paul Child, Julia's husband, and played it very well. Cute Amy Adams was Julie, the young blogger who decided to change her life by cooking over 500 recipes from Mastering the Art of French Cooking by Julia and Simone Beck, and do it in 365 days. She was as cute as ever!


Julia's time in Paris was a wonderful time for her, and the rest of the world has been enjoying the results since then. She attended le Cordon Bleu and learned to cook!


One of the recipes featured in the movie was Boeuf à la Bourguignonne , or to Americans, Beef Burgundy. The following is Julia's recipe, straight out of Mastering the Art of French Cooking. It looks daunting, but truly, it is worth it!


Boeuf à la Bourguignonne
For 6 people
6-ounce chunk of bacon
9- to 10-inch fireproof casserole, 3 inches deep
1 tablespoon olive oil or cooking oil
A slotted spoon
3 pounds lean stewing beef cut into 2-inch cubes
1 sliced carrot
1 sliced onion
1 teaspoon salt
1/4 teaspoon pepper
2 tablespoons flour
3 cups of a full-bodied, young red wine such as one of those suggested for serving, or a Chianti
2 to 3 cups brown beef stock or canned beef bouillon
1 tablespoon tomato paste
2 cloves mashed garlic
1/2 teaspoon thyme
Crumbled bay leaf
Blanched bacon rind
18 to 24 small white onions, brown-braised in stock
1 pound quartered fresh mushrooms sautéed in butter
Parsley sprigs

Remove rind and cut bacon into lardons (sticks, ¼-inch thick and 1½ inches long). Simmer rind and bacon for 10 minutes in 1½ quarts of water. Drain and dry.
Preheat oven to 450º. Sauté the bacon in the oil over moderate heat for 2 to 3 minutes to brown lightly.
Remove to a side dish with a slotted spoon. Set casserole aside. Reheat until fat is almost smoking before you sauté the beef.
Dry the beef in paper towels; it will not brown if it is damp. Sauté it, a few pieces at a time, in the hot oil and bacon fat until nicely browned on all sides. Add it to the bacon.
In the same fat, brown the sliced vegetables. Pour out the sautéing fat.
Return the beef and bacon to the casserole and toss with the salt and pepper. Then sprinkle on the flour and toss again to coat the beef lightly with the flour. Set casserole uncovered in middle position of preheated oven for 4 minutes. Toss the meat and return to oven for 4 minutes more. (This browns the flour and covers the meat with a light crust.) Remove casserole, and turn oven down to 325 degrees.
Stir in the wine and enough stock or bouillon so that the meat is barely covered. Add the tomato paste, garlic, herbs and bacon rind. Bring to simmer on top of the stove. Then cover the casserole and set in lower third of preheated oven. Regulate heat so liquid simmers very slowly for 2½ to 3 hours. The meat is done when a fork pierces it easily.
While the beef is cooking, prepare the onions and mushrooms. Set them aside until needed.
When the meat is tender, pour the contents of the casserole into a sieve set over a saucepan. Wash out the casserole and return the beef and bacon to it. Distribute the cooked onions and mushrooms over the meat.Skim fat off the sauce. Simmer sauce for a minute or two, skimming off additional fat as it rises. You should have about 2½ cups of sauce thick enough to coat a spoon lightly. If too thin, boil it down rapidly. If too thick, mix in a few tablespoons of stock or canned bouillon. Taste carefully for seasoning. Pour the sauce over the meat and vegetables.
Recipe may be completed in advance to this point.
For immediate serving: Cover the casserole and simmer for 2 to 3 minutes, basting the meat and vegetables with the sauce several times. Serve in its casserole, or arrange the stew on a platter surrounded with potatoes, noodles or rice, and decorated with parsley.
For later serving: When cold, cover and refrigerate. About 15 to 20 minutes before serving, bring to a simmer, cover and simmer very slowly for 10 minutes, occasionally basting the meat and vegetables with the sauce.


Bon Appetit!


By the way, I have a chance to see the movie again....and I'm going! I love movies that make me happy!

Now, as promised....here is Winnie Davis' recipe for her delicious Fresh Tomato Pie!

FRESH TOMATO TART

Basic pastry dough (refrigerated-ready-made is fine)
8 oz. mozzarella cheese, shredded
2 Tbs. chopped fresh basil
4-5 ripe tomatoes, ½ “ slices
Black olives, sliced (optional)
Garlic salt to taste
Coarse black pepper to taste
2 Tbs. extra-virgin olive oil
Chopped fresh basil for garnish

· Preheat oven to 425 degrees
· Line a 10” loose-bottom tart pan with pastry dough. [A 9” deep-dish pie pan works well, too.]
· Prick the bottom & sides of the raw pastry with a fork – and bake the empty shell for approx. 10-15 minutes
· While still hot, cover the bottom of the pastry with cheese [and olives slices if desired]; sprinkle with basil
· Arrange the tomato slices to cover the cheese as evenly as possible. [Cut the tomato slices in half & ring the pan for a pretty presentation.]
· Sprinkle the tomatoes with garlic salt & pepper and drizzle with oil.
· Bake 20-30 minutes – until cheese is bubbly
· Garnish with chopped basil.
Slice in wedges & serve warm or at room temperature.
Serves 8

Thanks, Winnie!


Art in the Vines Party

The painting has been delivered!
The day of the Art in the Vines at Somerset Ridge Vineyard, the artists who participated in the show worked as a group on a painting to be given as a gift to the vineyard owners, Dennis and Cindy Reynolds. With summertime activities and vacations, last night was the first opportunity we had to gather everyone around to present the painting to the Reynolds.
The party was held at the home of artist Vicki Johnston and her husband, Tom. We asked each artist to bring an appetizer…. the food was Spectacular! And Beautiful! Winnie Davis brought 2 gorgeous Tomato Cheese Pies that were to die for! I will try to get her recipe for the blog!
We served Somerset Ridge wines and everyone enjoyed talking to Dennis about making wine. They told us of a new “secret” wine to be released soon! The labels are being printed now, so soon we will have the chance to go to the vineyard for another fun release party!

Plans for the next Art Show at the Vineyard were discussed with much enthusiasm. It will be during our Oktoberfest celebration at the vineyard, October 11th, Sunday, from 12 noon to 5:00pm. There will be a strolling German musician, our good friend and a mighty cute little German in his lederhosen, Willie Kirst, playing traditional German music on his accordion. There will be food and games, and ART! Once again, we will be out among the vines, hopefully enjoying a beautiful fall day!Watch this blog and go to the vineyards webpage to sign up for the newsletter! http://www.somersetridge.com/

Sunday, August 9, 2009

Every American knows, from birth, that a grilled cheese sandwich is the #1 comfort food.
In fact, it is a staple for the under 10 crowd! Last year I held a grilled cheese contest in my family. It was so much fun!

Well, we’ve done it again! This weekend was the

2nd Annual Johnston Family Grilled Cheese Contest
We had contestants from as far away as Raleigh, North Carolina, & St Louis, Missouri. There were 21 people present, ages 4 through 90. From those 21 people, a total of 10 types of grilled cheese sandwiches were created. Actually, one of those types was good old white bread with American cheese. The little ones much prefer the traditional sandwich. The adults, on the other hand, have spent the last year thinking and creating a variety of grilled cheese sandwiches.
Each contestant had a few guide lines to follow.
1) They were to bring all their ingredients and prepare 4 sandwiches, each to be cut into 6 pieces (trust me, you don’t want to eat 10 whole sandwiches!)
2) Cheese must be the main ingredient of the sandwich. All condiments are acceptable, but meat, poultry and seafood must not be more than 10% of the sandwich. There has been and will be much discussion on this point. I think as long as 50% of the sandwich fillings is cheese, any and everything else is acceptable. The 10% number was set by my son, Chuck, who just likes to stir things up a bit. It is always fun when he is around!

Last year’s contest was won by my brother, Tom Johnston, stunning everyone with a simple farm style bread with sharp cheddar and dill pickles! As reigning champion, Tom acted as judge and he and Vicki hosted this year's event.

The nine gourmet grilled cheese sandwiches entered were as follows:

From Raleigh, Ann and Bruce Wilkinson, my sister and brother-in-law, made a sandwich that came from an idea suggested by a cousin in Dublin, Ohio. They prepared a Bacon Cheddar Cheese on Jalapeno Sour Dough. Right in the middle of the sandwich was a layer of Macaroni and Cheese! After receiving some grief and teasing from the other contestants, namely Chuck, the sandwich drew applause. It was wonderful! It was given the name “Cousin Sarah’s Grilled Cheese” In Chuck's own words..."Uncle Bruce, that is pretty damn good!"

The 2nd sandwich was prepared by my niece, Courtney. Named the “St Louis Special”, she used an excellent Rosemary Olive Oil Bread, Smoked Provolone Cheese and fresh Roma Tomato slices. The simplicity was wonderful!

The 3rd sandwich was my daughter-in-law Michelle’s creation called “la Provence”. She started her sandwich by marinating fresh goat cheese in a local honey infused with lavender flowers. It was tucked inside two slices of a multi-grain bread then grilled…and was absolutely delicious!

“Betsy’s Bitchin’ Grilled Cheese” was a hot and spicy sandwich, prepared on a Jalapeno Focaccia, The flat round loaf was split horizontally, then stuffed with Mexican Queso and Gouda cheeses, then topped with Pico de Gallo. Grilling the whole round loaf created a rich crispy crust!

Betsy’s husband, Ben, (my son-in-law) decided to enter his own creation, and it was a big hit! “il Bastardo” started with Cheddar Cheese Bread, layered with Oceola Cheese company’s Oceola Melting Cheese with sautéed red and green bell peppers and onion, and fresh cilantro. Both Betsy’s and Ben’s sandwiches were served with a side of Pico de Gallo and Guacamole!

My sandwich, “the International”, was the next to hit the griddle. I started with Challah, a Jewish bread , then built the sandwich by layering Gouda cheese from Holland, caramelized Italian cipollini (onions), thinly sliced American Heirloom Tomatoes, and fresh Basil (Overland Park, Kansas!). It was actually too thick to heat through and difficult to turn over on the griddle, but it did have a great flavor.

My niece, Ashli, was next with her “Stanley Special”. Ashli said she changed her mind 4 times during the day, trying to decide which of her creative sandwiches she would prepare for us. The Stanley Special was an excellent choice! Large slices of perfect sourdough bread were covered with slices of smoky chipotle cheese…just that simple, and simply marvelous!

Note: by this point in our evening, everyone was feeling really stuffed and we had two more sandwiches to go! We all understood the importance of the contest and decided to hang in there and continue on with the challenge. Dedication!

Next up were Cindy and Dennis, my daughter and son-in-law. They chose to prepare a “Rosemary Focaccia Robusto”. The combination of the Rosemary bread, the Italian Robusto cheese and the grilled red bell pepper strips thrilled everyone.

Last, but certainly not least, my sister-in-law, Vicki, prepared “The Kiki”. She started with a delicious dark and robust Pumpernickel bread, spread with Honey Dijon mustard, then topped with thinly sliced red onion and Provolone cheese. What a finale! Excellent.

Want me to tell you who won? Sure, but first, I should say we each received a ballot and were asked to write down our three favorite sandwiches. A description of each sandwich was given again to help us decide on our favorites. Judge Tom collected the ballots and retired to the “counting room” with his assistants (2 grandchildren). After a while they returned with the results of the balloting.

Announced by Alton of St Louis, the winner was


Michelle Campbell with her “la Provence”!

The lavender honey marinated goat cheese was simply spectacular! Congratulations, Michelle!

I know that all of the contestants will spend some time tomorrow trying to think of a way to top this year’s grilled cheese sandwiches! There will be 12 months of testing, 12 months of eating all of the trial sandwiches!

By the way, a total of 9 sticks of butter were used to grill our sandwiches! That is 2.25 pounds of butter! Luckily, we had 2 salads with our sandwiches, but then we turned right around and ate a cherry pie and a French Silk pie!

I’m not going to step on the scales for at least a week!

Wednesday, August 5, 2009


Just wanted to let you know... Kay Tucker will be teaching a class at:

Class Name: Create an Heirloom Cookbook
Class Dates: Sept 10, Sept 17, Sept 24 and Oct 1
Time: Thursdays, 10:00 am - 12:00 pm
Location: 10557 Mission Rd, Leawood, KS in Mission Farms
Visit the class schedule on the website to reserve your spot!
http://www.artichokeskc.com/


Another exciting adventure!


My dear friend and fellow Somerset Painter, JoAnne Carlton, had an accident and is stuck at home for a few days. When I asked her what I could do for her, she said.." Just keep blogging. I enjoy hearing about your adventures!” How sad is that! Having to sit at home and wait for my blog to have some entertainment! My adventures are pretty tame. How I wish I could suddenly become a super heroine to report my latest world altering adventure for JoAnne.
Instead, I am writing about our trip to the chicken farm to see and photograph the roosters and hens! Sad, but true, sorry JoAnne.
Actually, the road trip to 339th and Somerset Road in Miami County, Kansas, was full of fun and activity. My sister-in-law and another Somerset Painter, Vicki Johnston, and I took some of our grandchildren with us so they could check out the chicken scene.
The farm is owned by Annie Cassidy and her husband and daughter. They have approximately 60 birds at this point, but baby chicks are being delivered on the 13th and we have an invitation to return for the occasion.
I had “met” several of their chickens and the number one rooster, Bravery, several times, as Annie brings them to the vineyard on special occasions to “play” with the children and to sell their eggs. Let me take this occasion to say, unless you have eaten an egg that was gathered from the nest that morning….you have never eaten an egg! OMG! You open the carton and immediately have to decide if you want a white egg, maybe a brown one, or blue, pink, green! It looks like the Easter bunny has been here! And when you crack open the egg into a skillet, there is no splattering, no spreading….no, instead you have an egg that stays tight and round, with a yolk that stands tall and has a deep golden color. Absolutely amazing!
Okay, back to the chickens and roosters. Annie’s flock is made up of so many colors and types of hens. Some are very old breeds, some are “naturals” or new combinations of breeds. There is a great deal of “messin’ around in the chicken house, but there is a “pecking order”.
Bravery, the boss rooster, is huge, beautiful and very proud. He knows he is a hunk, and struts his stuff for all his “girls”, and they adore him. There are other roosters in the yard,
but they have to go through quite an ordeal to score with one of Bravery’s girls. Yes, Bravery does share, sometimes, but he does not necessarily have the final approval. The girls have a great deal to say about it.


Have you ever wondered where the term “hen-pecked” came from? Well, let me fill you in! These younger and definitely lesser roosters learn to strut, crow…and beg! As they flirt with the hens, they soon learn loving a woman is not an easy thing to accomplish. See this poor rooster with no neck feathers? Those missing feathers were payment for being allowed to “hang out” with a hen. She extracts payment, one feather after another, and he thinks it makes him look cool! He now has proof for the other boys that he has been successful! He is willing to look like this! And she can come back for more feathers when ever she feels like it, he is completely under her control….thus, hen-pecked!
Now, as I said, Bravery does have something to say about it, occasionally. Take for instance, this poor rooster. Notice he has all of his neck feathers…but look at his backend! No tail feathers! He was picked out by Bravery as the one rooster in the flock that would not be allowed to fraternize with the girls. He gets near one and Bravery descends upon him and plucks out his tail feathers as they race around the yard! Poor guy, what a depressing situation to be in…here the other roosters are doing their bare-necked strutting, and he has to keep his butt up against the side of the barn! Oh well, there is always next year.


Here are some special egg recipes, all tried and true.
Thank you Martha!
Breakfast:
Egg in a Basket, Serves 6
5 tablespoons unsalted butter, softened
12 slices extra-thin whole wheat bread
1/2 pound prosciutto or Serrano ham, thinly sliced
12 medium eggs
Coarse salt and freshly ground black pepper
1/4 cup heavy cream
Chopped fresh chives, for garnish
1/2 cup grated Parmesan or Manchego cheese, for garnish
Directions
Preheat oven to 375 degrees.
Butter a 12-cup muffin tin. Butter one side of each slice of bread. Press each slice of bread, buttered side up, gently into the bottom of a muffin cup. Transfer to oven and bake for 3 minutes.
Gently press ham into each bread cup. Carefully, crack one egg on top of ham. Repeat process until all bread cups are filled. Season each with salt and pepper; top with 1/2 teaspoon cream.
Carefully transfer muffin tin to oven and bake eggs until whites are just set, 10 to 15 minutes. Using an offset spatula, remove bread cups from muffin tin and transfer to a serving plate. Garnish with chives and cheese; serve immediately.
Lunch:
Huevos Rancheros
Serves 4
2 mild to medium-hot dried chilies (such as New Mexico or Anaheim), cut in half lengthwise, seeds removed
1 small yellow onion, cut lengthwise into 6 wedges with a bit of root end attached
2 tablespoons canola oil
3 cloves garlic, skin on
1 jalapeno chile
2 canned chipotle peppers in adobo sauce
5 whole canned tomatoes, without juice
1/2 teaspoon dried oregano
1/2 teaspoon ground cumin
1 teaspoon coarse salt
1/4 teaspoon freshly ground black pepper
1 teaspoon honey
1 tablespoon freshly squeezed lime juice
8 large eggs
8 corn tortillas (6 inches each), warmed
Cotija, Chihuahua, or Monterey Jack cheese, shredded, for serving
Cilantro, coarsely chopped, for serving
Sour cream, for serving
Directions
Preheat oven to 450 degrees.
Place a large cast-iron skillet over high heat. Add dried chiles to dry skillet and toast on all sides, pressing down on them with a spatula, about 1 minute per side. Remove from heat and place in a large bowl; pour 1 1/2 cups boiling water over chiles, and place a small heatproof plate on top to keep them submerged. Let soak for 20 minutes.
Add a teaspoon of oil to the skillet and swirl to just coat the bottom. Add onion, garlic, and jalapeno. Cook until charred on all sides, about 8 minutes, removing garlic if skins begin to burn. Remove skins from garlic and place in the jar of a blender. Cut jalapeno in half lengthwise, removing ribs and seeds; add to blender along with onion, chipotle peppers, tomatoes, oregano, cumin, salt, pepper, honey, chiles, and their soaking liquid. Blend until smooth. In the same skillet over high heat, heat remaining 5 teaspoons canola oil until almost smoking. Add sauce to the pan, being careful as it will splatter. Bring to a boil, reduce heat and simmer about 2 minutes. Stir in lime juice, and remove the skillet from the heat. Crack eggs into the skillet and transfer to oven. Cook until egg whites are cooked through and yolks are still runny, about 5 minutes.
Place 2 tortillas each on 4 individual plates. Top each with 2 eggs and sauce. Garnish as desired with cheese, cilantro, and sour cream.
Dinner:
Caesar Salad
If you prefer not to use the raw egg yolk in this recipe, substitute one tablespoon of store-bought mayonnaise. The croutons are best made as close to serving time as possible. Note: Raw eggs should not be used in food prepared for pregnant women, young children, or anyone whose health is compromised.
Serves 4 to 6
FOR THE CROUTONS
2 tablespoons unsalted butter, melted
1/3 cup extra-virgin olive oil
1 loaf (8 to 10 ounces) rustic Italian bread, crusts removed, cut into 3/4-inch pieces
1 teaspoon salt
1/4 teaspoon cayenne pepper
1/2 teaspoon freshly ground black pepper
FOR THE SALAD
2 cloves garlic
4 anchovy fillets
1 teaspoon salt
1 teaspoon freshly ground pepper
1 tablespoon freshly squeezed lemon juice
1 teaspoon Worcestershire sauce
1/2 teaspoon Dijon mustard
1 large egg yolk
1/3 cup extra-virgin olive oil
2 heads (10 ounces each) romaine lettuce, outer leaves discarded, inner leaves washed and dried
1 cup freshly grated Parmesan or Romano cheese, or 2 1/2 ounces shaved with a vegetable peeler
Directions
Make the croutons: Preheat oven to 450 degrees. Combine butter and olive oil in a large bowl. Add bread cubes, and toss until coated. Sprinkle salt, cayenne pepper, and black pepper; toss until evenly coated. Spread bread in a single layer on an 11-by-17-inch baking sheet. Bake until croutons are golden, about 10 minutes. Set aside until needed.
Make the salad: Place garlic, anchovy fillets, and salt in a large wooden salad bowl. Using two dinner forks, mash garlic and anchovies into a paste.
Using one fork, whisk in pepper, lemon juice, Worcestershire sauce, Dijon mustard, and egg yolk
Using the fork, whisk in the olive oil.
Chop romaine leaves into 1- to 1 1/2-inch pieces. Add croutons, romaine, and cheese to the bowl, and toss well. If you wish, grate extra cheese over the top. Serve immediately.
To make a version of this dressing that you can store, simply mince garlic and anchovies, and place with remaining ingredients in a jar. Screw the lid on the jar tightly, and shake to combine. Shake the jar before each use. Store, refrigerated, for up to 4 days.


Ponte Vecchio, Florence, Italy

Ponte Vecchio, Florence, Italy
oil painting by Kay Tucker

Somerset Autumn on Wea Creek

Somerset Autumn on Wea Creek
Oil Painting by Kay Tucker, Private Collection

Floral

Floral
oil painting by Kay Tucker

Kansas Storm

Kansas Storm
oil painting by Kay Tucker, Private Collection

Watercolor Collage

Watercolor Collage

Tempo al Tempo....All in Good Time

Tempo al Tempo....All in Good Time
48"x36" sculptural painting by Kay Tucker