Saturday, February 28, 2009


Final Gathering for Abstract Class


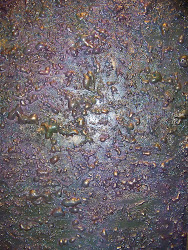
The seven of us have just completed one of Becky Pashia's Abstract classes at Artichokes. This morning at 8:30am we met Becky (front on left) for breakfast at Room 39, the gallery's next door neighbor. In spite of a snowstorm outside, we found the breakfast and the company warming and delightful. With breakfast over, we moved to the studio to paint our 4th and final painting for the class. We prepared our pallets, grabbed our brushes and pallet knives and went to work on our canvases, hoping to make Becky proud of her students! The results today amazed me, each of my fellow students carried home 4 paintings, 1 for each week of class. You could stand back and see the improvement with each painting, but what surprised me was you could see a very clear style emerging for each student! Becky Pashia brought out the best in us!

ARTichokes is located in the Mission Farms development at 106th & Mission Road in Leawood. Stop by and see the newest show hanging in the gallery, and if there is a class in progress, check it out, it would probably be perfect for you! Go to http://www.artichokeskc.com/ for gallery hours and class schedules.


Friday, February 27, 2009


So, yesterday was indeed amazing….today…just plain weird! This morning I woke up and decided today I am going to study “head cheese”. Don’t ask me why, but I thought with the classes on pork, featuring the pig from snout to tail, that Jasper and I will be teaching, I should at least understand the process of making head cheese. Let’s just say I learned a little more than I wanted to know!
For instance, it is called head cheese because it is made by boiling a whole pigs head. The ears and snout contain a great deal of natural gelatin which is what holds the meat together in the head cheese, which is a type of sausage or lunchmeat. So far, not hard to understand, and the ingredients list certainly easy to obtain, other than the pig’s head. But then I needed to find out how to prepare the head for boiling. You can’t just lop it off and throw it in the pot!
You might want to sit down now, this is where the “weird” comes in….You will need a sharp pointed knife (a fishing knife works well). First remove the ears by cutting deep inside the cavity. To remove the eyes, it’s best to cut the skin around it first, then grab the skin and eye – carefully cut around and deep. Remove the brain, glands, snout, gums (OH GOD!) – as much as you can. Brush the teeth with a toothbrush. (WHAT?????) Remove the skin and excess fat. You can use the tongue – wash well, and remove the skin from the tongue after it’s cooked.
About this point I started thinking Jasper and I don’t need to include head cheese and was about to move on to Pig’s feet, called Trotters, when I see a recipe for head cheese calling for pork butt roast instead of the head. Apparently you can throw a couple of fresh pork hocks into the pot and they supply plenty of the gelatin. Thank God! Now my only problem is what to call it. If you use a head it is called head cheese…
if you use the butt?....................
I think I’m moving on to the Trotters. Do you think I’ll have to give them a pedicure first?

Thursday, February 26, 2009


Kay Tucker's Most Amazing Day

Have you ever seen two people looking this serious over pork bellies?

That is Jasper Mirabile and me working in Jasper's kitchen, creating a wonderful new treat for Kansas City!

Thank You!


First of all, I must thank George Richter, CEO of Smithfield Foods, the mother company of Farmland Foods. Jasper and I had the finest pork to work with, hand picked by my favorite pig man!


Second, many thanks to Judy Witts Francini of Tuscany for sharing with us, a
traditional Tuscan recipe for pork belly roll. Jasper and I spent 13 lovely days in Sicily with Judy guiding us through 1000 year old market places and dining with us in the finest restaurants. She will be returning to Kansas City soon for several days, and we look forward to seeing her again.

Now, back to my most amazing day.....

I arrived at Jasper’s Restaurant shortly after the lunch crowd returned to their jobs or home to sleep off a delicious lunch. I was carrying our precious pork, Judy’s recipe and my camera, everything we needed to start, except for the herbs and spices. Jasper had those all lined up and waiting, ready for us to start blending and testing.
It turns out the two of us make a pretty good team. We worked side by side, and in the end, we had 5 beautiful rolls full of fresh rosemary and sage, seasoned with our very own blend we named Sicilian Rub, They will “cure” for approximately a week, then they will be braised with aromatics and red wine.
With the remainder of the pork belly, we took 3 5”x 5”x2” squares of the meat, seasoned each liberally with our Sicilian Rub, stacked them one on top of the other with fresh rosemary and sage between, tied them into a lovely bundle and braised it for a couple of hours….guess what! It was fabulous!
As gratifying as all this is, the part I am really pleased with is Jasper and I have plans in the works for teaching cooking classes together….currently being referred to as Pork 101! We will keep working, continuing to plan, and soon we will release our schedule of classes. How exciting is that!?
Our friend, Judy, will be arriving in Kansas City, around the first of April. We are planning an event at the vineyard, so as soon as I know the details, you will know also.

Goodness!....What a Wonderful Day!

Words From Jasper:

So.........................When Kay called me last month and asked about making pancetta, I was so excited..........I couldn't wait until she brought the pork bellies over to my restaurant.

Pancetta is cured pork belly, the Italian equivalent of bacon. Unlike American bacon, however, pancetta is cured with a variety of herbs, spices, and garlic, and is left unsmoked. Pancetta is usually rolled and tied.

We began the process by making our own "Sicilian Rub" which contains a mixture of Sicilian Salt that Kay and I brought back from Sicily, fresh rosemary, fresh sage, black pepper, sodium nitrate, brown sugar, nutmeg, fennel seeds and cinnamon.

Kay trimmed the pork belly and scored them, I generously rubbed our salt & herb rub on both sides and inserted a fresh stick of rosemary and sage leaves in the middle and rolled like a jelly roll. Kay performed her art of tying the rolled pork belly with butchers twine and I wrapped in cello. I placed in my refrigerator and we will check on it in one week.

On another note, while Kay and I were working, her daughter, Cindy, dropped in to take pictures and as the two of us were cooking, she suggested we do a cooking class together so.....................the rest is history......we are planning a series of classes at Somerset Ridge, our first will be Pork 101 and we hope to do this in early April so stay tuned....it's going to be exciting!


Chefs J & K's Braised Pancetta
with Sicilian Rub


Wednesday, February 25, 2009


the Good Old Days


Do you remember the lunch counter at Woolworth's?


Check out the prices.....you could order a triple decker BLT for 50 cents! Or how about a triple decker combinnation of ham sald and egg salad?It was also 50 cents.


Add a King Size Coke for a dime!


Now for dessert, how about a Super Jumbo Banana Split for 39 cents? Too expensive? okay, then order the Apple Pie for only 15 cents!


Gee, I loved the 50s!


Jasper Mirabile, jr


Tomorrow is going to be a fun day! My friend and fellow Sicily traveler, Judy Witts Francini of Tuscany, had a recipe on her blog for Pancetta Arrotolata that sounded like something I wanted to try. I contacted my good friend and leader of the Sicily trip, Jasper Mirabile of Jasper’s Restaurant, and asked him if he was interested in trying the recipe. He responded with much gusto, so tomorrow is the day.
This “pancetta” part of the recipe is several pounds of fresh pork belly. Not knowing where to go shopping for such an item, I contacted Mr Pork himself, my friendly pig-killer, George Richter. CEO of Smithfield Foods. George is definitely the man to turn to with pork questions.. I told him what I was looking for and he very kindly said he would order one for me. Out of concern for me, he had the 10 pounds of pork belly cut into 8 pieces so I could handle it more easily. And he had the butchers remove the skin. In hindsight, I see I should have emailed the recipe to him so he would have known I needed it in one piece, with the skin. To make things right for me, he has reordered the pork belly..
Now, I have these hunks of pork to deal with! Jasper has been in Boston teaching a cooking class for the last several days, so when he arrives home he is going to find an email and this blog telling him I am relying on his genius to come up with the perfect way to use the pork belly! I can’t wait to see what we do with it!
Of course, I intend to have our picture taken in his kitchen so that I can post it here on my blog. Stayed tuned….more to come!


While you are waiting, check out Judy's blog. She went to Tuscany 28 years ago with $4000.00 to see what she could learn. She learned she loved Tuscany, she loved Italy, so she stayed! Go to http://divinacucina.blogspot.com/ and read her "Over a Tuscan Stove" blog. It is delightful!


All it takes are a few nice days and I want to go down to the vineyard and simply stand among the vines! I want to watch the leaves pop out, see the miniature clusters of grapes emerge. I want to watch the meadows turn green again and hear the bluebirds singing in the vines. I want to wander down to the pond and watch the huge catfish greet me with flapping tails, telling me to feed them. But most of all, I want the beautiful Kansas skies over me. I want to see the sunrise over the vineyard, slowly burning off the inevitable fog down among the lower vines. I want to watch our incredible gold and pink sunsets. And in the spring when storms build in the west, I will have a front row seat with a perfect view from the veranda. You know that old saying “you can’t go home again”? It isn’t true. I’ve been to vineyards in Germany, France, Austria, Italy and Sicily. I still love Somerset Ridge the best. That other old saying…”Home is where the heart is”…It’s right!


For some reason, a simple sauce can make an ordinary dinner an extraordinary experience. A perfect sauce can make you smile and your mouth water years later, just remembering that taste. At the same time, the thought of making a sauce sends fear rippling down the spines of some cooks! So, today’s blog is about making sauces, good sauces, successful sauces. Read on, then get your saucepans and wooden spoons ready, you are going to want to try a few!
The number one thing to remember when making a sauce is don’t ever cut corners! If it calls for butter, use the real thing. If it calls for 2 cups of heavy whipping cream, don’t start thinking about your waistline. If you have a weight problem or heart disease, skip the sauce, eat extra veggies instead.
To be a good saucier, a sauce chef, you need to think like a sauce purest.

That said, let’s get going on some savory sauces!

The most basic of sauces, is Classic Bechamel: White Sauce

1 cup milk
2 bay leaves
2 tablespoons unsalted butter
2 tablespoons flour
1 Pinch salt and white pepper
2 garlic cloves, crushed

1. In a small saucepan, heat the milk and 1 bay leaf to a gentle simmer, stirring so it doesn't scorch the bottom of the pan. Keep the milk on low heat.

2. Make a white roux by melting butter over low-medium heat in a thick-bottomed saucepan. Just as the foam subsides, add the flour, stirring constantly with a wooden spoon or whisk to prevent lumps. Cook for 2 to 3 minutes to coat the flour and remove the starchy taste. Do not allow to brown. Remove from heat, then gradually add a bit of the warm milk to the roux and whisk vigorously. Return the saucepan to the heat and bring up to a low simmer, continuing to add more milk and whisk. Cook for 5 minutes until sauce is thick enough to coat the back of a spoon. Check seasoning; add salt, white pepper, garlic and the remaining bay leaf.

3. To prevent a skin from forming as the sauce cools, lay a piece of plastic wrap directly on the surface.

4. Serve with fish, shellfish, vegetables or egg dishes. Bechamel is also an ingredient in Lasagna.


The next sauce to master is Classic Beurre Blanc: White Butter Sauce

1/3 cup champagne vinegar
1/3 cup dry white wine
2 shallots, finely chopped
1/2 lemon, juiced
2 bay leaves
1/2 cup heavy cream
1/2 pound unsalted butter (2 sticks) cubed
Salt and pepper
2 tablespoons chopped chives

1. In a heavy 2-quart saucepan, combine vinegar, wine, shallots, lemon, and bay leaves to make an infusion. Simmer over medium heat for 5 to 8 minutes until the mixture is reduced to a wet paste, about 2 tablespoons. Add the cream and continue to simmer until reduced again to about 2 tablespoons. Cream is added to make the sauce more stable and less likely to separate.

2. Reduce the heat to low and remove the bay leaves. Whisk in the chunks of butter in small batches. The butter should melt without the sauce getting too hot, producing a creamy emulsified sauce. Do not let the sauce go over 130 degrees F, where it will separate. If the sauce starts to break, remove from heat, add 2 ice cubes and whisk until it cools down and comes back together. Season with salt and pepper, fold in the chives, and serve immediately. Keep covered in a warm place for a few hours, if needed.

3. Serve with fish or vegetables.

Now for Classic Mornay Sauce

2 1/2 tablespoons butter
3 tablespoons all-purpose flour
2 cups warmed milk
1/4 teaspoon salt
1/8 teaspoon white pepper
1 pinch freshly grated nutmeg (optional)
2 ounces grated cheese, such as Gruyere

1. In a medium saucepan melt the butter over medium-high heat. Add the flour and cook, stirring constantly, until the roux is pale yellow and frothy, about 1 minute. Do not allow the roux to brown. Slowly whisk in the milk and continue to whisk until the sauce thickens and comes to a boil, about 2 to 3 minutes. Reduce the heat to a simmer and season with the salt, pepper and nutmeg. Allow to simmer for 2 to 3 minutes. This is now called a bechamel sauce, and may be used as is to top any number of dishes.

2. Stir in the cheese and whisk until melted. If the sauce seems to thick, thin with a little milk.

3. The sauce is now called a Mornay Sauce. Pour over steamed vegetables and serve immediately. If not using right away, cool, cover surface with plastic wrap and refrigerate for several days

Classic Hollandaise Sauce

1/2 cup butter
3 large egg yolks
1 tablespoon plus 1 teaspoon of lemon juice
1/8 teaspoon salt
1 dash cayenne pepper or hot pepper sauce
2 tablespoons hot water
finely chopped fresh parsley, if desired

1. Heat butter in a heavy saucepan until hot and foamy, but not browned. In a small bowl, whisk or beat egg yolks with lemon juice, salt, and cayenne pepper or hot sauce. Gradually beat in butter, then water. Return mixture to saucepan and beat over very low heat until mixture is slightly thickened. Serve immediately or let stand over warm water for up to 30 minutes. If desired, sprinkle with chopped fresh parsley before serving.

2. Makes about 2/3 cup of hollandaise sauce


Classic Brown Butter Sauce with Sage

3/4 cup butter (1 1/2 sticks)
2 tablespoons torn fresh sage leaves
1/4 teaspoon kosher salt, plus more to taste
1/4 teaspoon freshly ground black pepper, plus more to taste


1. melt the butter in a large, heavy skillet over medium heat.

2. Add the sage, let cook until the butter starts to brown, about 3 minutes. Turn the heat off and season with salt, and pepper.


And finally, Classic Brown Sauce

1 veal shank
2 veal knuckle bones
Salt and pepper, to taste
2 tablespoons olive oil
5 tablespoons tomato paste, divided
2 tablespoons unsalted butter
1 onion, cut in half
1 garlic bulb, cut in half
2 celery ribs, cut in chunks
2 carrots, cut in chunks
1 bunch fresh thyme
1 bottle dry red wine
1 quart water
1 quart beef broth, low sodium
Bouquet Garni (thyme, parsley, bay leaves, peppercorns)

Place the veal shank and knucklebones in a roasting pan, season with salt and pepper and drizzle with olive oil. Roast in a preheated 350 degrees F oven for 45 minutes. When the veal pieces are brown, brush them with 3 tablespoons of tomato paste and season again. Raise the oven temperature to 450 degrees F and return the pan to the oven for 15 more minutes. Melt butter in a large stockpot over medium heat. Saute the mirepoix vegetables and thyme in the butter to coat then stir in the remaining tomato paste and continue cooking until the vegetables are caramelized. Pour in the red wine to deglaze, stir. Transfer the browned bones to the stockpot. Whisk in the water and broth. Add the bouquet garni and bring the sauce to a boil. Simmer gently for about 3 hours, skimming periodically. Strain the sauce through cheesecloth or a chinois to remove the bones and vegetable solids. Continue to cook for 1 hour more, skimming any foam that rises to the top, until the sauce is reduced to 2 cups and nicely thickened. Taste for strength and seasoning. May whisk in a pat of softened butter to finish the sauce.

. Serve with meats or poultry.

I’ll do Dessert/Sweet sauces soon!

Monday, February 23, 2009


Porky is safe to wallow another day!


So Sad! I will be unable to celebrate


National Pig Day at the Vineyard!


Just not enough time to get it organized so that it is fun for everyone, including the cook! The weather also enters into the decision, still just too cold!


I will definitely have a day to grill at the vineyard as soon as it warms up! Hope you will join us then.


fix a big pot of Cioppino!

Cioppino is not only one of my go to meals when I am having company, but it is one of my favorite foods! Although its history has never been verified, most agree that cioppino was created in San Francisco. The story goes that cioppino was invented by the Italian and Portuguese fishermen who concocted the stew based on the day's catch. Cioppino was originally prepared on the boats while the fishermen were at sea, with fresh catch straight from the water. Its name was supposedly derived from ciuppin, a possible corruption of the Genovese word for suppin, or "little soup." Another theory is that the name came from the foreigner slang to "chip-in-o," or, to chip in, as the fisherman partaking in the stew were expected to contribute fish to the meal.
As a result of the haphazard ingredients, based on what the ocean yielded, cioppino is a happily versatile dish. It's usually a stew based comprised of tomatoes, onion and garlic, but the herbs run the gamut from thyme to sage, and within the soup itself clams can be substituted with mussels, different white fish can be used, and red wine occasionally replaces white wine (I prefer Red). It's really a matter of preference and availability.

Cioppino


1/4 cup olive oil or salad oil
1 large onion, chopped
2 cloves garlic, minced or pressed
1 large green bell pepper, stemmed, seeded and chopped
2/3 cup chopped parsley
1 can (15 ounces) tomato sauce
1 can (28 ounces) tomatoes
1 cup dry red or white wine
1 bay leaf
1 teaspoon dry basil
1/2 teaspoon dry oregano leaves
12 clams in shell, suitable for steaming, scrubbed
1 pound large shrimp, (30 per pound), shelled and deveined
2 live or cooked large Dungeness crab (about 2 pounds each), cleaned and cracked

Preparation:In 6-8 quart pan over medium heat, combine oil, onion, garlic, bell pepper, and parsley. Cook, stirring often, until onion is soft. Stir in tomato sauce, tomatoes (break up with spoon) and their liquid, wine, bay leaf, basil, and oregano. Cover and simmer until slightly thickened, about 20 minutes. To broth, add clams, shrimp, and crab. Cover and simmer gently until clams pop open and shrimp turn pink, about 20 minutes. Ladle hot broth and some of each shellfish into large bowls. Serve with warm sourdough bread. Yield: 4 to 6 servings


Ferrara. Italy


Genealogy:
Nothing gives me goose bumps like discovering a place, a date or better yet, a person that has been unidentified up to this point as being a significant part in the history of my family. It is so fun to identify and log another ancestor that has not appeared in our written history until I tied two loose strings together. I would imagine that seems a bit overstated, but trust me, it is quite a moment!
And then there are those moments of failure ......thank goodness patience is a virtue!

My never-ending search for the Este ancestor who left Northern Italy’s Lake Como Region is and will continue to keep me very busy and probably frustrated. If my Grandfather hadn’t told a reporter that his “Mother’s family came from the Lake Como region in Northern Italy”, I’d still be searching the records in Scotland! Now, it looks like I have possibly discovered a link to the Estes family of the Veneto region, to Ferrara to be exact. As thrilled as I am to discover the link, I must admit having the family described as “infamous” has been rather disturbing. There is a moated fortress that was built by the Estes in Ferrara, and it is said they ruled with a “heavy hand”.
The Este Family ruled Ferrara and Modena in Northern Italy from the 13th century to the end of the 16th. During those many years, they played an important role in the political and cultural life of Italy, founding the University of Ferrara and making their courts major centers of literature and the arts. One of the leading members of the family was Isabella d'Este
The dynasty was established when Obizzo II (love that name! Should have named my son Obizzo instead of Chuck!) became perpetual lord of Ferrara in 1264, isn’t that cool! Perpetual lord! Este power was considerably extended by Niccolò III d'Este (lord 1393–1441), and by Borso d'Este (lord 1450–71), who became Duke of Modena and Reggio in 1452 and Duke of Ferrara in 1471. And then, along came Ercole I d'Este (Duke 1471–1505), who married into the royal family of Naples, definitely cinching the deal!

What does all of this power mean? I think it means I am the Queen of Italy!

This is all great news, but it doesn’t answer that big question….who the hell was the one who left Ferrara and why did he go to Lake Como? And then, why did he leave Como and head for Scotland? Why would anyone leave Lake Como? I suppose I should be thankful because he left Scotland and came to America! It is all so convoluted. While I work on this mystery maybe you should try a traditional recipe from Northern Italy. In my opinion, this is the best food on the face of the earth, hope you enjoy it!

Osso Buco with Citrus Gremolata

8 meaty veal shanks, cut 1 1/2 inches thick (7 pounds)
Kosher salt and freshly ground pepper
6 tablespoons extra-virgin olive oil
6 carrots, cut into 1/4-inch dice
6 celery ribs, cut into 1/4-inch dice
2 onions, cut into 1/4-inch dice
6 garlic cloves-4 whole, 2 minced
3 bay leaves
4 cups chicken stock or low-sodium broth
2 cups dry white wine
1 15-ounce can diced Italian tomatoes
6 thyme sprigs
2 2 1/2-inch strips orange zest, minced
2 2 1/2-inch strips lemon zest, minced
2 tablespoons minced flat-leaf parsley

Preheat the oven to 375°. Season the veal shanks with salt and pepper. In a very large, deep skillet, heat 3 tablespoons of the olive oil until shimmering. Working in batches, cook the veal over moderately high heat until browned on both sides, about 8 minutes total per batch. Transfer the osso buco to a large roasting pan.

Add the remaining 3 tablespoons of olive oil to the skillet. Add the diced carrots, celery, onions, 4 whole garlic cloves and the bay leaves and cook over moderate heat until they are softened, about 12 minutes. Add the chicken stock, white wine, diced tomatoes and thyme sprigs and bring to a boil. Pour the vegetables and liquid over the veal, cover the roasting pan with foil and transfer to the oven. Braise the shanks for about 2 1/2 hours, until very tender.

Meanwhile, in a small bowl, mix the orange zest, lemon zest, parsley and the 2 minced garlic cloves. Lightly season the gremolata with salt and pepper.

Transfer the veal shanks to a baking sheet and cover with foil. Carefully strain the cooking liquid into a large bowl. Reserve the vegetables; discard the bay leaves and thyme sprigs. Pour the cooking liquid back into the roasting pan and boil over high heat until it is reduced by half, about 25 minutes. Season the sauce with salt and pepper. Stir in the reserved vegetables and simmer over moderately low heat for 2 minutes. Transfer the osso buco to shallow bowls. Spoon the sauce and vegetables on top and sprinkle lightly with the gremolata. Serve with the remaining gremolata at the table.
Serve with……

Soft Polenta
1 1/2 cups chicken stock
1 1/2 cups heavy cream
1/2 teaspoon freshly grated nutmeg
3/4 teaspoon salt
1 Pinch ground white pepper
5 tablespoons polenta
5 tablespoons semolina
1/4 cup freshly grated Fontina or Telme
1/4 cup freshly grated Parmesan, plus extra for dusting

In a heavy saucepan, combine the stock and cream, and bring to a boil. Add the nutmeg and salt. Whisk in the polenta and semolina and cook over low heat for about 20 to 30 minutes, stirring often, until the grains are soft. Fold in the cheeses. Serve immediately or reserve.

To encourage polenta to come cleanly out of the pan, cook over medium heat. Run a spatula or wooden spoon around the sides of the pan to clean off the polenta. Do not stir, but wait and watch for a few seconds until a large bubble begins to form and pushes the polenta upward. Pour immediately into a warm dish.

The polenta can be made ahead and reheated: add 1/4 to 1/2 cup water or stock, cover the dish, and reheat in the microwave or over low heat. Whisk well before serving. Grate a dusting of Parmesan over the top just before serving


.

Sunday, February 22, 2009


1933 Chicago World's Fair


During my Mom's recuperation following her recent stay at the hospital, we were relaxing in her sitting room. We were talking about what a hard worker my Dad's mother was, my Grandmother Johnston. This woman never stopped! She cooked morning, noon and night, both at the family's drugstore, that had a lunch counter with the best home cooked food you ever tasted, and at the family's Fireside Inn, a lovely old restaurant right off the MU campus in Columbia. She made millions of pies in her life, the majority of them being cherry!


Anyway, we were chatting and my Mom tells me that Grandmother, who was an avid contest entrant, saved some particular food labels for months, filled out an entry form in my 15 year old Dad's name and low and behold, Dad won an all expense paid trip to the 1933 Chicago World's Fair. Can you imagine what an experience that was for a boy of 15! He talked about it every now and then, how I wish
I had paid more attention to what he said. But I do remember how amazed he was at everything he saw. The trip was sponsored by the University of Missouri and the City of Columbia. Two teens were chosen as recipients of the trip. I cannot help but feel that trip influenced both of those teens as they matured. To travel from a small college town to a giant city in 1933 was enough to change their lives, but then add the World's Fair!


As for the fair, "A Century of Progress Exposition" was conceived as a 100 year anniversary commemorating the city of Chicago and a testament to the industrial and scientific achievements up to that time.
The selected site was the land and water areas, under the jurisdiction of South Park commissioners. It was located adjacent to the shore of Lake Michigan between 12th and 39th streets. Located south of the Navy Pier in Chicago, the site of A Century of Progress had 424 acres of lakeshore and was within walking distance of Chicago's downtown. The Fair Grounds comprised of two man-made lagoons and Northerly Island.
The fair was opened on May 27, 1933, when the lights were turned on with energy from the rays of the star Arcturus. The rays were focused on photo-electric cells in a series of astronomical observatories and then transformed into electrical energy which was transmitted to Chicago.
Unlike any fair before it, A Century of Progress celebrated color and lighting. The architecture of the fair as drawn was influenced by great depression of the time. Rather than focusing on architecture, the fair focused on scientific and technological progress and the manufacturing processes behind them.

The World's Fair - View of the Exposition
from Lake Michigan
"A Century of Progress Exposition" was a unheralded success and hosted over 48 million visitors in two years it ran. It provided an uplifting glimpse into a future of embodied by technology while honoring the achievements of past. So, yes, I am sure it had an influence on my Dad.
Here is a recipe near and dear to my heart. Cherry pie is just about the easiest fruit pie to make. Sour cherries--the kind you need for pie--are rarely available fresh or frozen, so the canned variety usually is the only option for most cooks. Not only do canned cherries make good pies, but there's also no peeling, coring, seeding, pitting or slicing the fruit. Just drain, dump, sweeten, flavor and thicken, and you're in business. As for the crust, lard was used in both of my Grandmother's kitchens. I still think it makes the very best pie crust....but I know.....blah, blah, blah! She didn't have a food processor, but I do, and the crust recipe is so easy and very good.
Grandmother's Cherry Pie
Flaky Food Processor Pie Crust
1 1/2 cups all-purpose flour
4 tablespoons unsalted butter, cubed
5 tablespoons shortening
1/2 teaspoon salt
3 tablespoons ice water

Measure the flour into the processor with the regular blade attached. Add the unsalted butter, cut into cubes, and shortening, cut into cubes. (Your fat should be frozen or very cold. You may vary the proportions, or use some lard, but the total should be 9 tablespoons.) Add salt. Pulse three times with three counts per pulse to lightly mix the ingredients.
With the motor running, pour ice water into the workbowl just until the dough just starts to get noticeably crumbly. Don't wait until it is a big clump or it will be way too wet and will turn out tough.
Stop the machine, dump the crumbly dough into a bowl, and gather the dough into a ball with your hand. you can squeeze it a bit to make it stick together. If it just won't form a ball, add a tiny bit more water. (Note that if you are making crust in the food processor, you will use less water than most recipes call for.)
Wrap your dough ball in wax paper or plastic wrap and chill it about 30 minutes in the refrigerator. Roll it out on a cool surface if you can. Then follow your pie recipe for baking.
Now for the Cherry part!
1 (20 ounce) can pitted sour cherries
1 cup white sugar
1/3 cup all-purpose flour
1/8 teaspoon salt
2 tablespoons butter
1/4 teaspoon almond extract
1/4 teaspoon red food coloring (optional)
1 egg yolk
Preheat oven to 425 degrees F (220 C). Make pastry and refrigerate.
Drain cherries, reserving 1 cup liquid. In a saucepan combine sugar, flour and salt. Stir in cherry liquid and bring to a boil, stirring often. Reduce heat and simmer for 5 minutes. Mixture will thicken.
When mixture is thickened, add butter, almond extract, food coloring and cherries. Cover and refrigerate.
On lightly covered surface, roll out half of the pastry into an 11 inch circle. Put into 9 inch pie dish. Roll other half of pastry into another 11 inch circle. With a knife or pastry wheel, cut eight 1/2 inch strips.
Pour cooled cherry filling into pie dish. Place pastry strips horizontally, then vertically, across the top of the pie and lightly brush with egg yolk. Bake 30 to 35 minutes, and cool before serving.

Saturday, February 21, 2009

National Pig Day is Coming!


Sunday, March 1st.


I think this calls for Pork on the Grill!


I have a new Vineyard Project! NATIONAL PIG DAY! Yep, it’s true, we are going to honor the pig at Somerset Ridge. Of course the pig may not appreciate it….we're going to barbecue parts of him! I’m going to plan on working the grill all day, fixing PORK! So, if you don’t have plans for Sunday, March 1st….12 noon to 5:00pm….come on out! If you have never been to Somerset Ridge Vineyard and Winery, you’ve been missing out. Check out our webpage and sign up for our e-newsletter. And directions on how to get there are also available on the webpage. http://www.somersetridge.com/
See you there soon! In case of bad weather, this event will be postponed.


Until then....try this recipe


Roast Loin of Pork serves 12
5 pounds boneless pork top loin roast
2 tablespoons ground red chiles, to taste
1/2 cup lime juice
1 teaspoon salt
1 teaspoon ground cumin
1 teaspoon dried oregano
1/2 teaspoon pepper
2 cloves garlic, crushed
6 ounces frozen orange juice concentrate, thawed
1/4 cup Somerset Ridge Chardonnay
1/2 cup sour cream
1/2 teaspoon sal


1. Place pork roast in a shallow glass or plastic dish.
2. Mix ground red chiles, lime juice, 1 tsp salt, the cumin, oregano, pepper, garlic and 1/4 cup of orange juice concentrate and brush mixture onto the pork roast. Cover and refrigerate at least 8 hours.
3. Heat oven to 325F. Place pork, fat side up, on rack in a shallow roasting pan. Insert meat thermometer so that the tip is in the center of the thickest part of the roast and does not rest in fat. Roast uncovered until thermometer registers 170 degrees F., 2 to 2 1/2 hours.
4. Remove pork and rack from the pan. Strain the drippings from the pan and set aside. Add enough water to remaining orange juice concentrate to measure 3/4 of a cup. Stir juice and wine into the drippings. Stir in sour cream and salt. Serve with the pork roast.


It's Panini time again. Remember, if you don't have a panini grill, you can use a skillet or even a waffle iron!


Italy in the Fog

Vegetarian Mushroom Panini with Carmelized Onions
This vegetarian panini sandwich with mushrooms and carmelized onions is very similar to a reuben sandwich with sauerkruat. Instead of meat, make a low-fat and healthy reuben sandwich with mushrooms.

Ingredients:
4 slices bread
2 tbsp olive oil
1/2 onion
2 portobella mushrooms, sliced
salt and pepper to taste
Swiss cheese
2 tbsp sauerkraut
Thousand Island dressing
salt and pepper to taste
Preparation:In a large skillet, cook the onions in olive oil over medium heat, until almost carmelized, about 10 minutes. Add portobella mushroom slices and cook for 3 to 4 more minutes, until mushrooms are cooked and onions carmelized.
Lightly brush each slice of bread with a bit of olive oil on one side.
Pile the onions and mushrooms on the bread and sprinkle with just a bit of salt and pepper. Drizzle each sandwich with about 1 generous tablespoon of Thousand Island dressing. Spoon a bit of sauerkraut on top, and then a slice of Swiss cheese. Top with another slice of bread to form your sandwich.
Cook until cheese is melted and bread is toasty, about 6 minutes in a pre-heated panini press, or 2 to 3 minutes on each side if you're using a grill.
Serve your vegetarian reuben panini with a bit of extra sauerkraut, if you'd like.
Makes two panini sandwiches.
This recipe is from About.com


Friday, February 20, 2009

A little Mardi Gras History


Chiacchere are one of the classic Carnival pastries that people enjoy before the privations of Lent. As is often the case when dishes are popular, there are many versions of Chiacchere; this is from the Marche.

5 4/5 cups all purpose flour
4 ounces live baker's yeast (the cakes of yeast you will find in the dairy section of the supermarket)
4 eggs
1/2 cup butter
The grated zest (yellow part only) of three organically grown lemons
1 1/2 cups sugar
1 cup warm milk
Oil for frying


Dissolve the yeast in the milk. Make a mound of the flour on your work surface; scoop a well in the middle of it and crack the eggs into the hole, then crumble the butter in and finally mix in the milk. Work the mixture until it is a smooth dough and set it, covered, in a warm place to rise. When the dough has about doubled in volume divide it into three parts. Roll the first out into a thin rectangular sheet and sprinkle a third each of the sugar and the lemon zest over it. Roll the sheet half way from each side to obtained two joined rolls (they'll resemble a heart in cross section). Cut the roll into half-inch (1 cm) slices and fry them in hot oil until golden brown; when you have finished with the first portion of dough do the second, and so on. (recipe and photo from About.com/Italian Cooking)


"Laissez Les Bons Temps Rouler!


"Let the good Times Roll!"

This is the last big weekend of Mardi Gras...are you having a party? Mardi Gras is a major celebration in Europe, particularly in Italy and Germany, and of course, here in the United States down south in New Orleans. The history of Mardi Gras is difficult to pin down, depending who's written history you are reading. Here is what I have come up with. In the 2nd century, Ancient Romans would observe what they called the Lupercalia , a circus -like festival, very similar to present day Mardi Gras. The festivities were to honor the Roman deity, Lupercus. When Christianity arrived in Rome, the dignitaries of the early Church decided to continue a festival rather than anger the people by abolishing the tradition. The Carnival became a time of abandon and merriment which preceded the Lenten period, a 40 day period starting on Ash Wednesday and ending at Easter. They would eat, drink, party until they dropped! Masks and costumes were worn, the majority honoring Bacchus and Venus.

From Rome, the celebration spread to other European countries, each developing their own traditions. In Germany, Fasching began, I've heard, to celebrate the wedding of crazy Ludvig.
Their carnival starts on Twelfth Night and continues until Shrove Tuesday.

The English have a far more reserved celebration, due to the fact their original Festival incorporated fertility motifs and ball games which, more often than not, turned into riots! They would play the games between opposing villages, followed by feasts of pancakes and drinking alcohol. Today Shrove Tuesday is still a tradition with pancake races. The most famous of these started in Olney, Buckinghamshire in 1445. The word Shrove is derived from the Old English word "shrive", which means to "confess all sins." Whoops!
So, the history of Mardi Gras in America began when French Explorer, Sieur d"Iberville, came here in 1699. The festival had been celebrated in Paris since the Middle Ages, and he wanted it to continue here. He sailed into what is now the harbor of New Orleans on the very day the celebration was taking place in Paris, so he named the landing spot Point du Mardi Gras. From
that point until 1833, Mardi Gras history is rather sketchy. Then, in 1833, Bernard Xavier de Marigny de Mandeville (wouldn't you hate to have to learn how to spell that name in kindergarten?) a wealthy plantation owner organized and raised funds to have a proper Mardi Gras. Two years later, the first parade was given with 1 float. Today the Mardi Gras Parade is a huge event with hundreds of entries.


The colors of Mardi Gras are purple (symbolic of justice), green (symbolic of faith), and gold (symbolic of power).

The 2009 date for carnevale is February 24 but celebrations in Venice and many parts of Italy.
If I were going to go somewhere to celebrate the festival, Venice is where I would go. Although carnival is actually one date, in Venice and some other places in Italy the carnival celebrations and parties may begin a couple weeks before.
Masks, maschere, are an important part of the carnevale festival and Venice is the best city for traditional carnival masks. Carnival masks are sold year round and can be found in many shops in Venice, ranging from cheap masks to elaborate and expensive masks. Walking through the streets of Venice, it's a pleasure to view the variety of masks on display in shop windows. People also wear elaborate costumes for the festival and there are costume or masquerade balls, both private and public.
I could enjoy a week in Venice, I could wear a mask, I could eat and drink, sing and dance........


The 2009 Westminster Kennel Club Dog Show


Stump Wins!

A Sussex Spaniel wins the 133rd Westminster Kennel Club Dog Show at Madison Square Garden in New York City.
The wonderful golden-liver colored Sussex Spaniel, named for its place of origin in England, is the longest and lowest of the Spaniel breeds. Its striking characteristics include its massive head and bone, long body, strong, short legs, a rolling gait and a happy tail. These traits made the Sussex ideal for its original purpose as a gentleman's flushing spaniel operating in heavy undergrowth. Among the first nine breeds recognized by the AKC, today the Sussex is one of the most rare, with only about 600 in the USA.
Stump is the oldest dog to ever win the Westminster prized trophy for "Best of Show". At 10 years old, Stump is returning to the Dog Show circuit after a 5 year retirement. In 2002, Stump came very close to death when his whole body stopped functioning. But with outstanding medical treatment at a Texas university vet hospital, Stump is back and a hero!
He will spend the next year making personal appearances. Uno, the amazing Beagle who won the title last year, has just completed his year of touring. Stump starts his journey today.

If you missed the show on television, you can pull up clips and find the results at http://www.westminsterkennelclub.org/2009/results. You will fall in love!


Thursday, February 19, 2009

I think Food History is fascinating! We've all heard about how the slice of potato was accidentally dropped in the hot fat and TA-DA! The French Fry was born. But have you ever wondered what possessed the guy who took the first bite of liver? Or how about the guy who stood and watched a chicken lay an egg and then decided to crack it open and fix a fried egg sandwich? There are foods that can make your shudder at the thought of eating them. If that turns you on, turn on with Bizarre Foods, host Andrew Zimmern travels the world on a fascinating mission to indulge in some of the weirdest foods you can imagine. As for me......

I am too old, too Mid-America, too "into" good food to enjoy such nonsense. Give me a chance to try foods from other countries, to prepare them in my own kitchen, and I am a happy girl! My trips to Italy and Sicily have given me a passion for the food of the Mediterranean. Granted, I gave up the opportunity to "enjoy" a spleen sandwich in Palermo, but I took advantage of everything made of Almonds.
Part of the plum family, the almond tree (Prunus dulcis; Prunus amygdalus) is native to North Africa, West Asia and the Mediterranean. The English word almond is derived from the French amande, which in turn is a derivative of the old Latin word for almond, amygdalus, literally meaning "tonsil plum." Ancient Romans also referred to almonds as "Greek nuts," since they were first cultivated in Greece. Almonds date back in print to the Bible. A recipe from the Forme of Cury, dating back to 1390, uses blanched, ground almonds in a gravy for oysters. Botanically-speaking, almonds are a fruit. On the tree, the fruit or drupe looks like a small, elongated peach with a hard greenish-gray husk. When mature, the husk splits open to reveal the shell which in turn contains the nutmeat. Spanish missionaries are credited for bringing the almond to California, now the world's largest producer of over 100 varieties of almonds.
The moist, cool weather of the coastal missions, however, did not provide optimum growing conditions. It wasn't until the following century that trees were successfully planted inland. By the 1870's, research and cross-breeding had developed several of today's prominent almond varieties. By the turn of the 20th century, the almond industry was firmly established in the Sacramento and San Joaquin areas of California's great Central Valley.Throughout history, almonds have maintained religious, ethnic and social significance. The Bible's "Book of Numbers" tells the story of Aaron's rod that blossomed and bore almonds, giving the almond the symbolism of divine approval.The Romans showered newlyweds with almonds as a fertility charm. Today, Americans give guests at weddings a bag of sugared almonds, representing children, happiness, romance, good health and fortune. In Sweden, cinnamon-flavored rice pudding with an almond hidden inside is a Christmas custom. Find it, and good fortune is yours for a year. thank goodness, the Italians invented the Amaretti!

Amaretti

According to legend, in the early 1700s, a Milanese bishop made a surprise visit to the town of Saronno in Lombardy. A young couple paid tribute to the bishop by welcoming him with their unique homemade cookies, made from crushed apricot kernels and almonds, egg whites, and sugar. The bishop so loved the cookies that he blessed the couple, and the recipe became a local favorite. Today, bakeries throughout the region, and in Italian communities around the world, carry Amaretti di Saronno, but it's worth the (small) effort to make them yourself. The recipe is simple, and fresh from the oven, they have a crisp-yet-tender texture that's beyond compare. This recipe makes about 3 dozen cookies

Ingredients
2 1/4 cups blanched whole almonds (about 12 ounces), plus 15 for garnishing
2/3 cup sugar
2 large egg whites, at room temperature
1/4 teaspoon salt
1/2 teaspoon pure almond extract
1/4 teaspoon pure vanilla extract
15 glacéed cherries


Arrange racks in upper and lower thirds of oven and preheat to 350°F. Lightly oil 2 large baking sheets, then line with parchment paper.
In food processor, combine 2 1/4 cups almonds and 1/3 cup sugar. Process until finely ground, scraping down sides once or twice. Set aside.
In electric mixer fitted with whisk attachment, beat egg whites and salt at high speed until soft peaks form. Reduce speed to medium and gradually sprinkle in remaining 1/3 cup sugar. Return speed to high and beat mixture until stiff, shiny peaks form. Gently fold in ground almond mixture and almond and vanilla extracts.
Roll mixture into 1-inch balls, place 2 inches apart on baking sheets, and flatten slightly. Top each with glacéed cherry or almond. Bake until cookies are golden, switching positions of pans halfway through, about 25 minutes. Cool on sheets 5 minutes, then transfer to racks to cool completely.
Cookies keep, wrapped, several days, or frozen, several weeks. Recrisp in warm oven.


Here is another recipe from Italy, this one for my favorite cake. My Grandmother Johnston used to make all of our birthday cakes, usually foot high Angel Food with at least 2" of Seven Minute Frosting. That was great when I was a child, but now I prefer a cake that is much less sweet, something I can enjoy with a glass of Somerset Ridge Ambrosia Dessert Wine. That is why I am sending you this recipe....my favorite.


Italian Olive Oil Cake


This delicious cake has a hint of orange and a slightly crunchy texture from cornmeal, is moist without being greasy, and is strongly flavored with olive oil.

INGREDIENTS
3 large eggs
1 cup granulated sugar

1 1/2 cups whole milk
1 cup good-quality extra-virgin olive oil
1/4 cup amaretto liqueur, such as Disaronno
1 tablespoon finely grated orange zest
1 1/2 cups all-purpose flour
1/2 cup coarse-ground cornmeal
1/2 teaspoon baking powder
1/2 teaspoon baking soda
1/8 teaspoon kosher salt
Photo by Kate Ramos
INSTRUCTIONS
Heat the oven to 350°F and arrange a rack in middle. Coat a 13-by-9-inch baking dish or 9-inch round cake pan with olive oil and flour; tap out the excess.
In a large bowl, whisk together eggs and granulated sugar until well blended and light in color. Add milk, olive oil, amaretto, and orange zest and mix well.
In another bowl, stir together flour, cornmeal, baking powder, baking soda, and salt. Add egg mixture to the dry ingredients, stirring until just blended (the batter will be slightly lumpy; do not overmix).
Pour batter into the prepared baking dish or pan. Bake until a toothpick inserted into the center of the cake comes out with only a few crumbs, about 40 to 50 minutes. Remove from the oven and place on a wire rack to cool completely.
When the cake has cooled, run a knife around the perimeter of the pan and invert the cake onto a serving plate. Dust with powdered sugar, cut into 12 pieces, and serve.


Sunday, February 15, 2009

Topsail Island, North Carolina


Just received an invitation to my great nephew's graduation from high school . That's Mikey on the left. Actually, the invitation is to their lake house at Smith Mountain Lake, Virginia, for a week of my favorite things....family, fun and food! It looks like there will be a group of us going from Kansas City, Denver, and St Louis! Should be around 22 of us ready to celebrate Mikey's graduation!

This whole group met at North Carolina's Topsail Island 1 1/2 years ago to celebrate my sister and brother-in-law's 50th wedding anniversary. One week at the beach with 30 of my favorite people, a chef from Raleigh to cook for us, and perfect weather!

Topsail Island has a rich and varied history. Local folklore claims the name, Topsail (pronounced Tops’l), originated during the 1700’s when pirate ships roamed the coastal waters.
Historians explain that marauding pirates hid their ships in the channel behind the island and waited for passing merchant ships loaded with goods. The pirates would pursue and attack the merchants, claiming the cargoes as their own. Eventually the merchants became aware of this infamous hiding place and began to watch for the tops of the pirates' sails showing over the rolling dunes - hence the name Topsail Island.
Prior to World War II, the only access to Topsail Island was by boat. Area residents frequently made this short trip and picnicked on the sandy shores of the Atlantic Ocean. Treasure hunters
searched for Blackbeard’s infamous buried treasure throughout the maritime forests which covered the island.
During the war, the U.S. Navy took over the island and began a joint venture with Johns Hopkins University known as Operation Bumblebee. The waterway was dredged, roads were built, and fresh water was piped onto the island. Operation Bumblebee was the beginning of the space program for the United States Government. An arsenal center for the assembly and storage of rockets was built on the sound side of the island, and launching pads were constructed on the oceanfront.
Concrete observation towers were built throughout the island to monitor the experimental launchings. Over 200 rocket launchings took place on the island between 1946 and 1948. When the testing program was dismantled, the government sold the island to the public. Many of the original military structures are still standing.
Incorporated in 1963, the Town of Topsail Beach boasts a friendly, family oriented style of beach living. High rise development is not allowed, beautification is encouraged, and conservation of the island environment is a top priority. There are over 1200 homes, but only about 500 year-round residents.

The seasonal influx of tourists increases the population to about 7,000, which helps sustain the town's motels, restaurants, gift shops, fishing pier and other businesses. The only sea turtle hospital in the state, the Karen Beasley Sea Turtle Rescue and Rehabilitation Center, is located on the sound near Town Hall. The arsenal (Assembly) building from Operation Bumblebee now houses the Missiles and More Museum as well as a meeting room that is available for rental.
All this and more truly make Topsail Beach a wonderful place for a visit.

The house we rented for the week was a four story wonder.....ground level was like a mud room, equiped to handle just about anything you might drag in off the beach. There were game rooms and a small kitchen and bar area and a bathroom along with bedrooms that the teenagers claimed immediately. There was also a hot tub right outside the door.

The 2nd story was comprised of 2 more bunk rooms and several lovely suites. The families with little children occupied this floor to be near the kids.Third floor was made up of 4 more suites and the laundry room, which ran non-stop!

Finally, the top floor.....one huge room with giant kitchen area, a well equiped bar area, 2 large dining areas and a living room area with giant flatscreen television and excellent sound system.

That giant room can and did seat all of us for meals! Speaking of meals...Chef Toy cooked for us everyday at lunch and dinner. What a treat! Not only cooked, but cleaned up!

Needless to say, I am really looking forward to this next gathering. I will be co-hosting the
1st Annual Somerset Ridge Art in the Vines the weekend of June 13. Then on Monday, we are out of here! Smith Mountain...hold on to your hat, we are on our way!
Mimi's Panini
This Panini is a family favorite. When we had our 1 st annual Panini contest, this is the panini my daughter Cindy entered.....so we will call it Cindy's Panini. You will love it! It's for dessert!
1Angel Food cake, loaf style
1 package Brie Cheese
1 jar Nutella, the Chocolate Hazelnut spread
Softened Butter
(No calories here!)
Slice the angelfood cake into 3/4" slices. Spread half of the slices with Nutella, top with slices of Brie, then the other slice of cake. Butter both sides of the panini, place in hot cast iron skillet, turning to brown both sides and melt the brie....OMG!

Saturday, February 14, 2009


Those of who you know me are aware of my feelings for the vineyard. I, of course, am extremely proud of Cindy and Dennis Reynolds, my daughter and son-in-law, who own Somerset Ridge Vineyard and Winery. It isn't just because they are my kids, it's because they are so good at what they do. They have taken acres of farmland and Dennis' dream of making wine, and turned it into a beautiful reality. I have learned from Dennis since that first day, April 1, 1998. He is not only an amazing winemaker, vintner, fieldhand, deliveryman and an attorney, but he is a great father and a great teacher! I don't work in the vines anymore, guess I'm feeling my age. But I still have that amazing feeling come over me everytime I wander down into the vines. The whole wine thing is a miracle as far as I am concerned!

Anyway, Dennis told me I had to watch a movie called Bottle Shock. It is on pay-per-view now. Once again, Dennis was right on the mark! What a great movie! Viniculture is one of the stars, as is humor. Based on a true story, Bottle Shock chronicles the events leading up to the famous 'Judgment of Paris' tastings, told through the lives of father and son, Jim and Bo Barrett. A former real estate attorney, Jim (Bill Pullman) sacrificed everything to realize his dream of creating the perfect hand-crafted chardonnay. His business, however, is struggling, and he's not only trying to overcome differences with his slacker son (Chris Pine), but is also fighting off the creditors. Meanwhile in Paris, unwitting British wine shop owner Steven Spurrier (Alan Rickman) hopes to revive his own failing business by sponsoring a competition which will pit the traditional French powerhouse against the California upstarts. Little did Steven and Jim realize that they were both on course to change the history of wine forever.I recommend it highly! Stay home one evening and enjoy this film.

Now that Valentine's Day is over, I've put away my truffle boxes for now. We featured Port and Chocolate Truffles at the vineyard and at Liquor stores, so I made more than a few!

I wonder what my next project will be.....Oh yes, Art in the Vines!

The date is set, Saturday,June 13th. The list of artists is being compiled now, and it looks like it will be a great show! Art in the Vines is just that. The artists will display their work throughout the vineyard. There will be ART, wine, music and food, a grand way to spend a Saturday afternoon! So mark your calendars to come out and enjoy truly local artists at their best.

------------------------------------------------------------

Panini #3 This recipe is for Becky Pashia of ARTichokes Gallery in Leawood.

Artichoke and Tuna Panini

2 6oz cans imported Italian tuna in olive oil

8 to 12 Marinated Baby Artichokes Hearts

4 large crusty round rolls

4 tablespoons Black Olive Pesto

1/2 lemon (optional)

Drain the tuna. Cut the artichokes into halves or quarters lengthwise. Cut the rolls in half horizontally. Gently remove some of the center of the bread from both top and bottom. Spread the bottom 4 halves with black olive pesto. Top with the tuna and then arrange the artichokes over the top. Next, drizzle some of the juice from the marinated artichokes over each of the sandwiches, then squeeze lemon juice over artichokes if you choose to use it.Cover with the tops of the rolls, then press down on the top of each panini to merge the ingredients. You may grill in the Panini Grill, but it tastes wonderful cold!

Wednesday, February 11, 2009


Meet my newest GrandPuppy........Louie!


Louie makes number 3. I haven't gotten to know him very well yet, but I am anxious to. He has a big brother at home, his name is Murphy. I've asked for a photo of Murphy, but I was told he wasn't in the mood.

Next I will need a photo of Ranger, my GrandKitty. So, that makes 6 grandchildren, 3 grandpuppies and 1 grandkitty. What more could a woman want!
Tonight.....................
I spent the day in the kitchen preparing dinner for my family. I used to have Monday Night at Mimi's every week, but since the holidays, I've been taking a break. But tonight everyone returns to my house for fun, frolic and food. I suppose since this is Thursday, we have to come up with a new name for the evening.
The menu tonight is Braised Pork with Port and Cream, Mashed Potatoes, steamed Asparagus,
Cranberry and Grape Compote, Michelle's Salad, Italian Bread with Sundried Tomato Butter,
and for dessert, Tiramisu. Cindy and Dennis are bringing the brand new vintage of Flyboy Red, the wine named for my dear Arch. I am so anxious to try it! I'll let you know what I think of it!


Happy Valentine's Day!


I realize this is only the 13th, but


since I am going to give you a very special recipe, I thought I'd better do it today.


Some people think of Roses on that special day, some think of a candlelight dinner for two, some think of romance. Me? I think of Chocolate! So, here is one of my favorite chocolate recipes. There is time to make it for that special person! Enjoy!


Chocolate Romance Cake


makes a 10" cake


2 cups toasted almonds


8 ounces semisweet dark chocolate


2 sticks butter, room temperature


1 cup sugar


6 eggs


2 teaspoons baking powder


2 tablespoons Kahlua


2 teaspoons cocoa


Powdered sugar for dusting


Preheat oven to 350 degrees. Grease and flour a 10" springform cake pan. In a food processor, chop the almonds and chocolate together until they are finely ground. In a large bowl, beat the butter and sugar until creamy, In a separate bowl, beat the eggs thoroughly and add to the butter mixture. Add the almond and chocolate mixture, baking powder, Kahlua and cocoa. Beat to mix well. Pour into prepared pan and bake for 45 to 50 minutes, or until a toothpick inserted into middle of the cake comes out just slightly moist. Let cake rest for 10 minutes, then remove side ring from springform pan. Let cool, move to cake plate and dust with powdered sugar. If you want it super chocolate, dust with cocoa instead.


Happy Valentines Day!

Tuesday, February 10, 2009

Jasper's new cookbook is due to be released Fall, 2009!


Jasper J. Mirabile, Jr.


Named One Of Wisconsin's Seven New Cheese Chef Ambassadors


"Jasper J. Mirabile Jr. is bringing his distinctive regional styles to the Wisconsin Cheese Chef Ambassador program. He traveled with 6 other chefs to began his service with an "immersion tour" in Madison, Wis. that included visits to seven cheesemakers, including Carr Valley Cheese, Bleu Mont Dairy and Roth Käse, as well as Wisconsin Cheese tastings.The Chef Ambassador program, sponsored by the Wisconsin Milk Marketing Board, connects Wisconsin Cheese and the state's legendary cheesemakers with the best chefs in the country. The program, now in its sixth year, includes 35 distinguished chefs.The new ambassadors will cook with Wisconsin Cheese and develop innovative menu applications, some of which will be featured in their restaurants. They will also "spread the word" about Wisconsin's specialty and artisan cheesemakers to peers and patrons through a variety of activities. This year, the program has a uniquely Midwestern focus, ideal for the current class of chefs who are passionate about using local products on their menus. "

He just returned today from Boston teaching a pasta seminar for American Italian Pasta Company and Lensi pasta kicking off a new artisan pasta made in Bronze dyes, really a fantastic product, according to Jasper.

As for the rest of the week, he has a sold out wine dinner night with the owners of Castello Banfi Wine from Tuscany and then VALENTINES DAY WEEKEND!!!!
After next week, he is teaching cooking classes at Feb 18 at The Culinary Center of Kansas City, then Williams Sonoma on the 23rd of February.


The following is Jasper's recipe for his wonderful Lobster Cappuccino.


"This is the dish that opened the door for me to the James Beard House (www.jamesbeard.org). I was one of the first chef’s from Kansas City (and one of the first Italian chefs)invited to cook at the prestigious home of America’s infamous cookbook author and chef, James Beard. The dish I created not only had to meet the standards of excellence set forth by the The James Beard Foundation; it had to appeal to the New York critics as well! I started off the event with this Lobster Cappuccino and it has become my signature dish! ".....Jasper


Jasper Jr.’s James Beard House Lobster Cappuccino
Serves 6
1 lb lobster meat
2 to 4 tablespoons butter
2 oz sherry
1/4 cup chopped onion
3 cups heavy cream
1 tablespoon lobster base*
Pinch of tarragon
Fresh whipped cream for topping
1/4 lb pancetta (Italian bacon)
6 cappuccino or espresso cups
*sold at specialty food stores and online.
Mince the lobster meat and onions. Melt the butter in a 2-quart pot, sauté the onions in butter (until onions become translucent). Add the lobster meat and continue to cook for 6 to 8 minutes (adding more butter, if necessary).
Add sherry, bring to boil and reduce mixture to about 1/2. Add lobster base, cream and tarragon. Bring to boil, and then reduce heat to a slow simmer for approximately 12 minutes.
In a large pan, fry pancetta until crispy. Wrap fried pancetta with paper towel (to absorb grease), crumble, and set aside.
Prepare fresh whipped cream.
Pour lobster mixture into cappuccino (or espresso) cups; top with fresh whipped cream and crispy pancetta.


I hope you enjoy this wonderful recipe. Jasper, thank you for following my blog! I love receiving all of your kind comments! You keep shaking up the world with your cooking, I'll keep on blogging.


"Mimi's Panini"


Have you ever eaten Mortadella? Trust me, it is the best meat for a panini! Now don't buy German Mortadella...YUCK! Buy Italian! Carando has it presliced and it is so good. Anyway, Mortadella is perfect for this next Panini.


Mortadella Panini


1 8-inch focaccia
6 tablespoons light garden vegetable cream cheese, divided
1 tomato, thinly sliced
1/2 green bell pepper, thinly sliced
6 to 8 slices Mortadella
2 red onion slices, sliced thin, separated
6 to 8 slices provolone cheese


Slice focaccia in half horizontally. Spread each half with 3 tablespoons cream cheese. Layer one half with tomato, bell pepper, mortadella and cheese. Drizzle inside of top of focaccia with good olive oil, place on top of sandwich. Brush top and bottom with olive il and place in preheated focaccia grill. Close the lid and control yourself while grill does its thing! Soon it will be a delicious, crispy panini for 6!


Tip: I buy my cheese at the deli counter and have them slice it on #12. Perfect slice for a panini, I want the cheese to be evident, I don't want some whimpy little sliver of cheese! If you can't find the Mortadella presliced and packaged, the deli will have it also. It would be lovely also sliced on #12!


See you tomorrow!


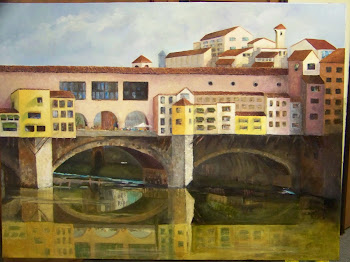
Ponte Vecchio, Florence, Italy

Ponte Vecchio, Florence, Italy
oil painting by Kay Tucker

Somerset Autumn on Wea Creek

Somerset Autumn on Wea Creek
Oil Painting by Kay Tucker, Private Collection

Floral

Floral
oil painting by Kay Tucker

Kansas Storm

Kansas Storm
oil painting by Kay Tucker, Private Collection

Watercolor Collage

Watercolor Collage

Tempo al Tempo....All in Good Time

Tempo al Tempo....All in Good Time
48"x36" sculptural painting by Kay Tucker