Wednesday, April 6, 2011


Billie
  
Special guests at luncheon


Windsor


Today was one of those days when everything went well. I started baking Alsatian Onion Tarts around 6:15am. They were due at the vineyard at 11:00. We had scheduled The Mission Valley Hunt Club for
a wine tasting and luncheon.

Sure enough, the 20 guests began arriving and what a parade we had! Pickup trucks and large SUVs pulled into the parking lot, complete with Horse Trailers! Loaded with Horses! It seems like our guests had been on a ride and were dropping by for lunch on the veranda. The Hunt Club members secured their trailers and opened the trailer windows and doors for air and so the horses could enjoy each other’s company! One pair, Windsor and Billie used to be stall mates and now grab every opportunity to catch up and spend some time together!

Lunch was served; Alsatian Onion Tarts, Baby Greens with Apples, Dried Cherries, and Pecans with a Maple Vinaigrette. For dessert? Somerset Ridge Pound Cake with Strawberries, Raspberries and Blackberries all drizzled with the vineyard’s Ambrosia Dessert Wine.

The Mission Valley Hunt Club and  Cindy Reynolds of Somerset Ridge
The veranda has the new screens now, there to block wind, rain and cooler temperatures. Of course they are clear so those enjoying the veranda can still see the beautiful view! Yep, Somerset Ridge Vineyard and Winery keeps getting better and better!


In the end, everyone had a great day. Just ask Windsor and Billie!


Tuesday, April 5, 2011

Tomorrow I am going to "Let them eat cake!"

We have a luncheon scheduled on the veranda tomorrow. The weather is going to be beautiful, sunny and in the 70s. There are 18 lovely ladies coming down to the Somerset Ridge Vineyard’s veranda, to sip their wine and enjoy a luncheon of Alsatian Onion Tart, and a salad of Baby Greens, Apples, Dried Cherries and Pecans with a Maple Vinaigrette. For dessert I am baking our Somerset Ridge Pound Cake and serving it with Organic Strawberries that have been gently bathed in our Somerset Ridge Ambrosia Dessert Wine. (Did you notice I did not use the word “macerated” for the bathing of strawberries? No, the word macerate sounds like some act of violence! ….instead, I am going to bathe the berries, letting them linger in the cool refreshing liquid.)

Our pound cake is truly what it says it is….The name comes from the fact that the original pound cakes contained one pound each of butter, sugar, eggs, and flour. No leaveners were used other than the air whipped into the batter. In the days when many people couldn't read, this simple convention made it simple to remember recipes. The Pound Cake is a British creation that dates back to the early 1700s.

Somerset Ridge Pound Cake
1 pound butter (4 sticks)
1 pound sugar (2 cups)
9 large eggs
1 pound all-purpose flour (4 cups)
dash salt
2 teaspoons vanilla
1 large lemon, juice only
Preheat the oven to 325 degrees. Grease and flour a 10" tube or bundt pan.
In a large bowl, cream the butter with electric mixer, then gradually add the sugar, continuing to beat until well creamed and smooth. Add the eggs, one at a time, beating well after each addition. Gradually add the flour and salt, beating constantly. Add the extract and lemon juice and continue beating until well blended.
Pour the batter into the prepared pan, gently tapping bottom of pan to distribute batter evenly in pan.,
Bake about 1 hour and 15 minutes, until toothpick inserted into center, comes out clean. Wait 10 minutes before removing cake from pan, placing on serving plate.
For the berries, slice them, then pour the Ambrosia over them. The amounts are up to you, but you do want to have enough liquid to drizzle over the cake and berries. Add a dollop of sweetened whipped cream, maybe even a sprig of fresh mint! Wonderful!

If you are looking for a place to have a luncheon or a wine tasting with wonderful appetizers, call the vineyard! Sitting there on the veranda, watching the breeze ripple through the vines; stroll through the vineyard, see how the sun glistens on the grapes...it is pure joy! And it all happens here in KANSAS! Who knew?! Dennis and Cindy Reynolds knew long before they planted the first of their 9000 vines back in 1998. Since that moment, they have become leaders among the Kansas grape growers and wine makers.

And remember....Budbreak is due within a week or so, depending on the weather and temperature. Come on out and catch the beginning of the whole process. I actually have a favorite vine, one we planted that April 1, 1998. This vine has such character, such a presence in the vineyard. I love to watch him change throughout the growing season. If I am at the vineyard when you come out, I will share my vine with you, then you can watch the magic of the vineyard, too.

Saturday, April 2, 2011

Yesterday my Mom said to me…..”Well, you are a Bohemian, aren’t you.”.

Bohemian! What in the world is she talking about?
I decided to look it up in the dictionary; maybe I didn’t understand the true meaning of the word. ……”a person, such as an artist or writer, who lives and acts free of regard for conventional rules and practices.”


Yep, that is what I thought it meant. But me, living without regard for conventional rules and practices? Somehow, I just don’t think the shoe fits. But then again, maybe I need to take a long look in the mirror…………. Maybe I need to change some things about myself. Could I possibly be walking on a fine line, trying to not be either a “normal” person or a “bohemian”? Hmmmm, something to ponder. I'm thinking maybe my little 92 year old mother knows me better than I know myself. I will be studying this question at greater length....

.So, now for the great evening! First Fridays are so fun, particularly when you have one or more artist friends showing their art in the wonderful galleries. This month I had many artist friends exhibiting! David Gross and I had a full evening planned!
Ada Koch and her newest painting
My dear friend, Ada Koch, has only been in her new studio space for 2 weeks now, but the place looks fantastic. The real surprise was seeing her latest work! When I first met Ada, she was teaching classes at ARTichokes, in fact, she was teaching a class I was taking. Her paintings were generally on smaller canvases covered with delightful florals or landscapes, or, they were larger wonderful portraits. She had told me she was so anxious for me to see her new work. Ada and Kevin went to France last year, and just returned from Italy, so I thought she might move in that direction. Little did I know…
Beautiful, Ada!

Next David and I walked to The Outpost, and media production center that had turned their space over to some of the artists from the Paola area. Included in the show were 3 of David’s watercolors. They looked stunning! Peter Brunke had several of his paintings there also, always bright, colorful and fun. 
Kristin Goering and her Kansas Landscape Triptych
Our next destination was the Leedy-Voulkos Gallery a block away. My last blog included a photo of my dear friend Kristin Goering and her triptych painting. Let me tell you, the photo did not begin to show the painting! It is an amazing landscape showing the Kansas that Kristin knows so well and loves dearly. Having grown up in Western Kansas, Kristin mixes the magnificent colors of the golden wheat fields, the wide blue skies, the billowy white clouds. If some Kansas corporation doesn’t snap this one up, they are crazy!
l to r...me, Winnie Davis, Audrey Benskin and Ada Koch
4 of the 7 Somerset Ridge Painters
We returned to Ada’s studio to meet up with more friends, the Somerset Ridge Painters. From there, we drove (thank God we didn’t have to walk! By this point Old David and Old Kay were a little weary!) to the River Market area to enjoy the paintings of another of our painters, Maria Johnson, known as Majo (or as I call her, Crazy Maria) My dear Colombian friend, who paints with the enthusiasm and colors of the Caribbean, was showing at 509 Delaware. As we gathered and enjoyed her work, we realized we had one more place to go, on foot. Thank goodness it was just across the street to Café Al Dente. This little Italian restaurant and bar has been open since 1991. Arch and I used to meet some dear friends there every first Wednesday for an evening of wine, beer, food, and fun. I was delighted to suggest it for our dinner last night. The Dwyers, owners, were very busy, but very accommodating. Jacqueline, who’s father was Italian and her mother was French, a powerful little dynamo who can cover 100 yards in a flash, managed to corral us at a table for 10 and we were served our beverages. Then we waited for the big moment…..
Majo! aka Maria Johnson

Our Maria was featured on a television program on channel 10, KSMO. This program features Spanish speaking people who have made a difference in our world. The Dwyers turned off the music, turned all of the televisions (4) to channel 10 and hooked the audio into the sound system. As we sat and waited, surrounding tables also waited, not leaving even though they were finished with their dinner! As the program came on, the entire room became still…even those at the bar! Before we knew it, there was beautiful Maria giving the interviewer a tour of her studio and explaining the importance of her home in her paintings. Cheers went up throughout Café Al Dente! Majo strikes again! The star of the evening!
It was a very good evening! My heartiest congratulations to all of the artists!


Maria had one disappointing moment last night. Café Al Dente ran out of Alfreddo Sauce right before we arrived! So, for Maria, here is my favorite recipe, no cream cheese in this one! This is truly authentic!

                                      This delicious pasta recipe is courtsey of Russell Bellanca from Alfredo of Rome.

Fettuccine Alfredo Serves 2 to 4

Ingredients
1 pound fettuccine
Coarse salt and freshly ground pepper
1 cup (2 sticks) unsalted butter, room temperature
8 ounces freshly grated Parmigiano-Reggiano, plus more for serving

Directions
1. Bring a large pot of water to a boil. Add salt; return to a boil. Add fettuccine and cook until al dente according to package directions.
2. In the bowl of an electric mixer fitted with the paddle attachment, beat butter, cheese, and pepper until mixture becomes smooth, about 5 minutes.
3. Drain fettuccine, reserving 1/4 cup of the cooking water. Toss fettuccine with cheese mixture and reserved cooking water until completely incorporated. Serve immediately with additional cheese sprinkled on top, if desired.

Wednesday, March 30, 2011

First Friday!

Isn't it amazing how quickly a month can fly by? Sometimes I wish time would slow down, way down; but I can't help wishing First Fridays would roll around more often!
First Friday is a great celebration here in the Kansas City area. On the first Friday of each month, all of the artists and galleries located in the Crossroads district throw open their doors to exhibit their new shows. All of the restaurants feature wonderful food and there is live music every where you turn. During the warm months, there are literally thousands of people walking through the area, visiting all of the galleries, meeting friends for dinner and/or drinks, and in general...having a great time.
This month I have many reasons to be anxious for First Friday.....let me count the ways (in the order I will be visiting them between 6:00 and 9:00pm. 
1. The Hilliard Gallery, 1820 McGee
2. Outpost Production, 1919 Baltimore, featuring Paola artists, including David Gross
3. Ada Koch's Studio, 19th Ter and Central, 2nd floor
4. Leedy-Voulkos Art Center, 2012 Baltimore, Paintings by Kristin Goering  along with artists,
              Holly  Swangstu, Jim Hesse, and Wil Lala
5. Maria Johnson's Show, 509 Delaware in the River Market area
So, There is my plan...enjoying the work of four very dear friends in a fun exciting setting.
Kristin Goering during the installation of her Trtriptych paintings
at the Leedy-Voulkos Art Center
I love First Fridays!

Know what else I love?  Cake. Cake makes me happy. My Dad used to ask me to bake cakes for a late night snack. He loved them with about 3 inches of 7 Minute Frosting. I love them with 7 Minute, Buttercream, Caramel, or a simple dusting of powdered sugar! Let's  face it, I just love cake.
Here is one of my favorites.
Recipe and photo by Martha Stewart
Breton Butter Cake
1 cup unsalted butter (2 sticks) room temperature, plus more for pan
1 cup sugar
1 tablespoon pure vanilla extract
6 large egg yolks
2 3/4 cups all-purpose flour
1/4 teaspoon salt
1 large whole egg, lightly beaten
1. Preheat oven to 350 degrees. Cream butter and sugar in bowl of electric mixer fitted with paddle attachment until light and fluffy. Beat in vanilla and yolks one at a time, beating well after each addition. Add flour and salt; beat just until combined. Do not overmix.
2. Transfer batter to 9-inch tart pan with removable bottom; with small offset spatula, spread batter and smooth top. (If necessary, chill batter 10 minutes before smoothing.) Place pan in refrigerator 15 minutes.
3. Remove from refrigerator. Brush top with beaten egg, and mark a criss-cross pattern with a fork. Brush again with egg. Bake until cake is deep golden brown and edges pull away from sides of pan, about 50 minutes.
4. Transfer to a wire rack to cool slightly. Remove cake from pan, and slice while still warm. Serve with strawberry compote.

Sunday, March 27, 2011

SNOW? AGAIN? Give me a break!

So, what happened to Spring? Blink and its gone! Here I was, blogging away about warm sunshine, crisp green veggies, painting at the vineyard….and we have had more snow! That is Kansas for you…..however I did see the East coast is expecting a foot of snow today. At least our’s is just blowing, but not sticking. That is good, but I still HATE it!
I went into The Tasteful Olive on Saturday….wow! It was hoppin’! Jeanne and Jay Mackay are such a delightful couple. They had a great idea and are executing it beautifully. I absolutely could not leave there empty handed, so today I have added their Roasted Sesame Oil to my collection. I am thinking up all sorts of ways to incorporate it in tonight’s dinner!
I added to another collection today also. I bought another brand of watercolors today; only problem is now I have to actually paint. David was here for the weekend, so my new German watercolors will be tested. If the color is as vibrant on paper as it is in the pans, I will be thrilled.
Saturday I watched Lidia Bastianich’s program, Lidia’s Italy. On the menu was her Meatloaf with Ricotta, Polpettone di Manzo con Ricotta. I have always loved meatloaf, in fact, my Dad’s meatloaf was truly wonderful. As a chef at Crown Center in the early 90s, I prepared my Dad’s meatloaf and it became famous. So famous that we had Meatloaf Mondays! For several years after leaving Crown Center, I would run into people who would beg me for the recipe. They swore up and down that their lives were just not the same without that meatloaf.
Lidia’s Meatloaf with Ricotta may possibly have the same effect on the world today….it looks and sounds that good! I am sure Lidia won’t be offended if I share her recipe with you.

Meatloaf with Riccotta

Polpettone di Manzo con Ricotta cookbook: Lidia Cooks from the Heart of Italy

 “Most of you have made meatloaf on occasion; you may even have a family-favorite recipe that you make frequently. Well, I want to introduce you to the Marchegiano style of meatloaf, with ricotta added to the mix, which renders the loaf tender and tasty-not heavy and dense, as they so often are. Another textural delight in this loaf are cubes of mozzarella, oozing and moist when the meatloaf is served hot and fresh from the oven. However, if you plan on having extra meatloaf to enjoy the next day (I think it is almost better that way) omit the mozzarella, because the cubes harden and won't melt again. In this case, use an additional cup of ricotta in the loaf mix.” Lidia Bastianich

serves: 8 servings
1 cup milk
3 cups day-old bread, cubed, from a loaf of country bread
3 pounds ground beef
3 large eggs, beaten with a pinch of salt
1 pound fresh ricotta , drained, plus more for the sauce if you like
1 bunch scallions , finely chopped
½ cup Parmigiano-Reggiano, grated
¼ cup Italian parsley, chopped
½ teaspoon nutmeg
1 tablespoon kosher salt
freshly ground black pepper, to taste
½ pound fresh mozzarella, cut in 1/2-inch cubes
¼ cup extra-virgin olive oil
5 cups Tomato sauce, try using Lidia's Marinara Tomato Sauce
Preheat oven to 375 degrees. Pour the milk over the bread cubes in a bowl, and let soak for a few minutes, until the bread is saturated. Squeeze the soft bread a handful at a time, pressing out as much milk as you can (discard milk, or give it to a pet), then tear bread into small shreds and toss back into the bowl. Crumble the ground beef into the bowl, and add the eggs, ricotta, scallions, grated cheese, parsley, nutmeg, salt, and pepper. Fold and toss everything together, and squeeze the mixture a few times between your fingers to distribute all the ingredients evenly. Scatter the mozzarella cubes on top, and fold and mush them throughout the loaf mix.
Brush a roasting pan with 2 tablespoons of olive oil. Gather the meat mixture in the bowl, turn it into the pan, and shape it into a fat oval loaf. Drizzle with the remaining 2 tablespoons olive oil. Cover the pan with foil and bake 45 minutes.
Remove the foil, and continue to bake until the meatloaf is browned all over and completely cooked through, another 1 hour and 30 minutes or so. Remove the roast from the oven, and let it rest for about 10 minutes.
Heat the tomato sauce to a simmer in a saucepan as the meat rests. Turn off the heat, and, if you like, stir 1/2 cup or so fresh ricotta into the sauce. Cut the loaf crosswise in the pan or on a cutting board, in slices as thick as you like. Serve on warm dinner plates, topped with a spoonful or two of sauce, and pass more sauce at the table (or, for family-style serving, arrange the slices on a warm platter, topped with some of the sauce). To accompany this meatloaf, I love braised broccoli rabe or escarole, served on a separate plate or platter. Note: If you love fresh ricotta, as I do, you can stir some into the tomato sauce, too, just before serving the meatloaf.

It wouldn’t be fair for me to give you Lidia’s recipe and not my Dad’s. So here it is.

Note: Lidia’s recipe makes a much larger meatloaf than my Dad’s Meatloaf recipe. If you triple Dad’s, to achieve a meatloaf of the same size and weight, use the baking time and temp recommended in Lidia’s recipe.

TBJ’s Meatloaf (Thomas Bingham Johnston)

1 pound ground beef
1 cup Ritz Cracker crumbs
1/4 cup chopped green bell pepper
1/4 cup finely chopped onion
1/4 teaspoon salt (crackers give the recipe most of its salt)
1/2 cup grated sharp cheddar cheese
1 large egg
1 1/2 teaspoon Worcestershire Sauce
1 teaspoon sugar
1 cup V-8 juice
1/8 teaspoon pepper

Preheat oven to 350 degrees. In a large bowl, combine ground beef, cracker crumbs, bell pepper, onion salt and cheese. In a small bowl, combine beaten egg, Worcestershire Sauce, sugar V-8 juice and pepper. Pour over the meat mixture and blend with your hands, but do not overmix.
Shape mixture into a loaf and place in a greased baking dish.
Bake at 350 degrees for 40 minutes. That's all Folks!

Wednesday, March 23, 2011

Blood Orange!

While in Sicily, I discovered the pure joy of a Blood Orange Bilini for breakfast! Yep, every morning there were picture perfect pastries and bilinis on the table....what a wonderful way to start the day. No wonder I tried to get the pilot to take our return flight straight to the Betty Ford Clinic in California! I decided then that from now on my Blood Oranges would be served fresh, or at least without Champagne.
My friend, Chef Jasper Mirable of Jasper's Restaurant in Kansas City, has long been a fan of Blood Oranges, but I am a slow learner. Who knew they were so delicious! So, when I went into The Tasteful Olive in Overland Park, I was so excited to taste the Blood Orange Olive Oil! It was heavenly. Then I went to a cocktail party at my brother and sister-in-law's and by golly, Vicki served Hearts of Palm drizzled with that very same olive oil! Fabulous!
Shortly after that, I visited with Jeanne Mackay of The Tasteful Olive and we decided it was time for me to develope recipes using her olive oils and balsamic vinegars. I brought 5 different oils and 4 balsamics home with me and sat and looked at them, tasted each again, and put on my thinking cap. The thing about Jeanne's products is they are so excellent on their own it is difficult to think of possibly hiding their perfection by burying them within recipes.  But, that was my mission!
I've been baking with the Butter flavored olive oil, and it works beautifully, but truthfully, none of the recipes set me on my heels....so I moved on to Blood Orange. I am telling you, it is so good that I had to almost threaten myself with bodily harm if I didn't stop sipping it by the spoonful and actually create something with it as an ingredient! I thought I wanted to make something cold, after all, we finally can see spring! Naturally, you can make some incredible vinagrettes with Jeanne's oils, turning the most average salad into a gourmet treat, but can you imagine a Blood Orange Olive Oil Gelato?!  Yep, that is where I was headed
                                                                              
Out came the ice cream machine. Out came a few simple ingredients. 3 hours later I took a spoon and lowered it down into that cold, creamy, delicate orange, soft gelato and fell in love!
The recipe? Tell you what, give Jeanne a day or two to get it posted on her blog and then you can have it! That will give you time to get to The Tasteful Olive to pick up your very own Blood Orange Olive Oil. You can get that ice cream machine's bowl into the freezer so it will be ready when you are. Then go to http://www.thetastefulolive.com/ for the recipe.  Enjoy!

Monday, March 21, 2011

Now that the KU Basketball game is over (The Hawks won! On to the Sweet 16!) I turned the television off and low and behold…..the sounds of spring are outside my back door. The coyotes are yipping and the tree frogs are singing! By Golly, I think winter is gone. I had my doubts yesterday when we had that long day of cold rain, but no doubt about it today!
The Somerset Ridge Vineyard is in full swing…. Today the hillside was covered with people seeking delicious wine and beautiful sunshine. In Paola, later this afternoon, we had the 3 big windows on the front of the studio wide open, welcoming the warm breeze and the glorious sunshine. The whole day made me want to put a canvas on my easel and paint an abstract with bright vibrant colors….but I didn't. But...
                                                          IT IS FINALLY SPRING!

With the arrival of spring come thoughts of asparagus, artichokes, fennel, radishes and lots of greens from leaf lettuces to mustard greens. The pots of soups and braised meats turn into the barbecue grill and big juicy steaks and burgers. Soon, wonderful salads with every kind of colorful veggie we can find will replace plates of warm sauce laden pastas.
What do you want to bet soon we will hear the bell from the ice cream truck!

I’m looking forward to making Sautéed Baby Artichokes
They take a little preparation, but the rewards are worth it. Look for bags of these tiny artichokes at produce counters in the spring and fall. If baby artichokes aren't available, substitute fresh or frozen artichoke hearts.
Serves 6


FotoSeach.com
 24 baby artichokes
Juice of 1 lemon
6 tablespoons butter
2 tablespoons olive oil
4 cloves garlic, minced
⅓ cup parsley, minced
Salt and pepper to taste

Rinse baby artichokes. Peel away outer green leaves until artichokes leaves are yellow on the bottom, green on top. With a sharp knife, cut off the green tops. Cut stems even with the base of the artichokes and cut artichokes in half lengthwise. As artichokes are trimmed and cut, place them in a bowl of water mixed with the lemon juice.
In a heavy skillet, heat butter and olive oil until butter is melted and hot. Drain baby artichokes and add to hot skillet with minced garlic. Sauté artichokes until halves are fork-tender.
Add parsley, salt, and pepper to the artichokes. Serve warm with a big juicy grilled steak and a crisp green salad with spring radishes. Heaven!

Take advantage of all of Spring’s wonderful vegetables! Have you ever had Fiddlehead Ferns? No?
You must, you absolutely must! I have found them at Whole Foods, and they are only available for several weeks in early spring. So, what are they? The fiddlehead fern is a unique delicacy from northern New England, particularly prized in Maine and New Hampshire.
FotoSearch.com
So named because they resemble the carved wood on a violin, fiddleheads are the unfurled shoots of the ostrich fern. Once they open and start to grow, they become inedible; the best are tightly wrapped and dark green. They have a delicious intense flavor which reminds me of the scent of woodland moss. Most describe it as resembling asparagus, but I think this is a reach. Cooked to crunchy tenderness, they are a flavorful and versatile treat. Most recipes call for blanching prior to final preparation, but I preferring to sauté them directly.
photo from FotoSearch.com
Traditionally, fiddleheads are served with only butter or oil and seasoning, but cooked with garlic and/or bacon they develop a more complex flavor. You know, Morel mushrooms are around at the same time, and the two together on one plate….well, I’m sure you, too, will find it hard to describe!

Thursday, March 17, 2011

We are in trouble now!

"If men of wisdom and knowledge, of moderation and temperance, of patience, fortitude and perseverance, of sobriety and true republican simplicity of manners, of zeal for the honour of the Supreme Being and the welfare of the commonwealth; if men possessed of these other excellent qualities are chosen to fill the seats of government, we may expect that our affairs will rest on a solid and permanent foundation."
                                                                                              --Samuel Adams

I'm not ranting, I'm just saying........................

With that done, I am making a new batch of  Limoncello! With warm weather coming around the corner, a big bottle of frosty Limoncello in the freezer will be a welcome refresher. I drank it all over Italy and Sicily, and I love my own homemade just as much! And it could not be easier.....

Limoncello

8 -12 lemons, washed
4 cups Everclear or vodka
2 1/2 cups sugar
6 cups water
note:  Everclear makes the best, but vodka is still very good, and is much less expensive.
My wonderful limoncello glasses
were a gift from my friend Inge!
I keep these in freezer also.

Zest lemons with a vegetable peeler, being careful to avoid the white pith. (Reserve lemons for another use. I usually squeeze them immediately and freeze the juice in ziplock bags or ice cube trays)  Put zest into a large glass jar with a tight-fitting lid and add alcohol (there should be enough to cover the zest; if there isn't, add more alcohol.) Set aside in a cool, dark place for 3-4 days. (The higher the proof of the alcohol, the faster the essence of the lemon will be extracted.) When zest turns pale and alcohol has a deep yellow color, strain through a sieve, and store in another glass container. Discard zest.

Combine sugar and 6 cups water in a medium saucepan over medium heat (do not boil). Stir until the sugar dissolves and the syrup is clear, about 10 minutes. Allow to cool.
Pour syrup into lemon-infused alcohol (mixture will turn cloudy) and sample it. Adjust flavor to your palate by either diluting with water or adding more alcohol in small amounts. Then pour liqueur into two clean, dry 750-ml bottles, using a funnel. Close with corks or screw tops. Set aside for a few weeks to allow liqueur to mellow. Pop into the freezer an hour or so before serving. I actually pour mine into quart canning jars and store in the freezer all the time, and then remove an 30 minutes before serving. 
cin, cin!

Monday, March 14, 2011

Today is a special day….

It is National Pie Day!


Created by the American Pie Council®, National Pie Day is dedicated to the celebration of pie. As part of our American heritage, this day is a perfect opportunity to pass on the love and enjoyment of pie eating and pie making to future generations.
Since today is Pie Day, and “today” is  turning into “this evening”, I realize I am posting this a little late. But I do want to give you a couple of recipes. You can always bake tomorrow!

When my children were little, this was one of their favorite desserts. Red Hot Apple Pie!    I think Cindy and Betsy liked it because it was pink. Chuck liked it because it was a dessert! He is the one who made “deals” with me…a perfect grade card earned him either a Lemon Meringue Pie or Fried Apple Pies!
Photographer unknown
Red Hot Apple Pie
FOR THE DOUGH:
2-½ cups All-purpose Flour
1 teaspoon Table Salt
6 Tablespoons Butter, Chilled
6 Tablespoons Lard, Chilled …YES! LARD! GET OVER IT!
4 Tablespoons Ice Water, Or More As Needed
FOR THE FILLING:
6 whole Apples (I Used 3 Pink Ladies And 3 Granny Smiths)
4 ounces, weight Cinnamon Red Hots
½ cups Water
¾ cups Sugar
1 Tablespoon All-purpose Flour
1 teaspoon Lemon Juice
1 Tablespoon Butter
1 Tablespoon Cream
2 teaspoons Sanding Sugar

For the dough (adapted from James Beard Cookbook, 1970):
Sift together the flour and the salt. Cut butter and lard into the flour mixture with a pastry cutter (or two butter knives) until a coarse meal is formed. Sprinkle over 4 tablespoons ice water, mixing and fluffing with a fork. Use more water if the mixture seems dry. Remember, the less you use, the better. Form into a ball, divide in two equal pieces. Wrap each piece in plastic wrap, forming into disc. Refrigerate for at least 1/2 hour.
For the filling (adapted from BH&G Cookbook, 1953):
Preheat oven to 350ºF. Peel, core, and slice apples. Set aside. In a large saucepan, combine Red Hots, water, and sugar. Heat over medium heat, stirring until candy dissolves completely. Add sliced apples to the pan and simmer over medium-low heat for about 10 minutes. You are looking for the apples to begin to go a little soft and take on a nice, rosy hue. Strain apples, reserving juice. When the liquid cools down a little, whisk the flour and lemon juice into 1/2 cup of the reserved liquid. Set aside.
To assemble:
Roll out bottom crust on a floured surface and place into a clear glass pie plate. Fill with strained apples and pour the slurry over the apples. Dot with butter. Roll out the top crust and fit over the apples. Trim the edges. Roll the top crust under the bottom crust and flute or crimp. Cut vents. Brush with cream. Sprinkle with sanding sugar.
Bake at 350ºF for about 45 minutes to 1 hour. Fifteen minutes into the cooking time, cover the edges with foil or a pie shield. You might need to cover crust completely with foil for the last 15 minutes if your oven is small and browns the top of the pie too quickly. Take out to cool on a rack when the bottom crust is golden-brown.
Serve warm with vanilla ice cream


This next pie isn’t a dessert….but is perfect for St Patrick’s Day. This is a hearty Irish variation on steak and kidney pie, made with Ireland’s most famous beer.
Beef and Guinness Pie
3 tbsp. tomato paste
3 1⁄2 cups beef stock
4 lbs. beef chuck, cut into 1" cubes
1 1⁄2 lbs. white mushrooms, cleaned and quartered
1 large yellow onion, peeled and sliced
6 cloves garlic, peeled and chopped
2 tbsp. fresh thyme leaves, chopped
2 cups Guinness stout
1 1⁄2 cups flour
Salt and freshly ground black pepper
1 egg
1 lb. frozen puff pastry, thawed

1. Preheat oven to 325°. Put tomato paste into a large bowl, add stock, and stir until paste dissolves. Add beef, mushrooms, onions, garlic, thyme, and stout and stir well. Sprinkle flour over beef mixture, season to taste with salt and pepper, and stir well. Transfer to a deep 10 1/2" × 12 1/2" baking dish set on a large baking sheet. Cover dish with foil. Bake, stirring occasionally, until meat is very tender, 3 1/2–4 hours.
2. Beat egg and 1 tsp. water together in a small bowl and set aside. Roll puff pastry out on a lightly floured surface to a 1/4" thickness, 2" wider than baking dish. Remove baking dish from oven and uncover. Drape pastry over dish and brush with egg wash. Return baking dish to oven and bake until pastry is puffed and deep golden brown, about 40 minutes.

Monday, March 7, 2011

Watercolor............PANIC!


Watercolors…..

I’ve been painting forever. I’ve learned a few things during those years and a great number of those things are now under the heading of “Don’t EVER do that again!” It seems that I am one of those hard-headed people who won’t take advice from those who “know”; unfortunately, I have to learn the hard way.

As I scan down that list of things to not try again, I see “Watercolors”. I added that to my list so many years ago that I truly think it happened when I was in high school! I have never been a fan of painting with watercolors, but I admire watercolorists greatly! Anyone who can keep their strokes clean, crisp and pure is to be put on a pedestal. David Gross, my studio partner, is one of those. Not only can he keep those strokes perfect, but he is prolific. I spoke with him around noon today and he had completed 8 paintings this morning!
A month ago, David convinced me I should give it a try. In typical Kay fashion, I needed to have my hand held, needed to be shown exactly how to do it….I was paralyzed the moment I picked up the brush! It is indeed strange how desperate I am to not look stupid! David commented on my hesitation; he said “if that was a new recipe you would dive right in!” How right he was. Cooking is in my comfort zone….
watercolor painting is not.

Now that I have spent the last few weeks working exclusively in watercolor, the panic feeling has disappeared, but I still hesitate before I dip that wet brush into a pan of vibrant color.

So, why am I telling you this? I’m not sure, other than I think I am having fun! It turns out, as I thought in the beginning, I am not a watercolorist, but I am, as I always knew, a freak for collage. As the stack of failures piled up on my desk, I knew I had to salvage them some way. David had provided wonderful (and very expensive) watercolor paper for me to work on and I simply could not just toss them in the trash. Out came the scissors, the glue, the markers. My first watercolor collage is above.
It isn't too impressive, I know, but it is a start.  I just keep repeating those words, my new mantra....
"Clean, crisp pure....Clean, crisp, pure..."
Who knows, it might work.


Posted by Picasa

Saturday, March 5, 2011

WINE, FOOD and ART

You’ve probably said…”A winery in Kansas?”......or maybe “Who ever heard of Kansas Wine?”…..I know, I’ve heard it many times….but there it is. The amazingly talented Dennis and Cindy Reynolds have built a miracle in the hills of Miami County, Kansas, Somerset Ridge Vineyard and Winery.
I have written about Somerset Ridge many times. It is one of my favorite places in the whole world!

I’ve also written about Molly’s Table….a gem of a restaurant in Paola Kansas, just 3 miles west of the vineyard. Donna Nagle, the owner, has turned a small catering business and café into a big business by serving delicious food. Donna is a fearless chef, willing…may I say, even thrilled, to tackle any recipe, any foodie idea or challenge!
Another subject I’ve included here in my blog is that of my paintings. Be they good or bad, I need to paint when I’m not cooking.
So there you have it, WINE, FOOD and ART. Think about them, could three subjects go together more perfectly? I think not!

Donna has been thinking about trying her hand at having her breakfast/lunch restaurant open on Friday evenings for special dinners. Over lunch one day, we discussed the possibility of planning a special dinner paired with Somerset Ridge wines. Within moments the date was set, the menu created. For one night only, we were turning Molly’s Table into a French Bistro!

This event was held last night. I have to tell you, the evening was magical! Donna, her good friend and fellow Miami County foodie and bread baker extraordinaire , Brenda Wrischnik, and I prepared a 5 course dinner for 32 guests.

The wonderful wine was delivered and the bar was set up with gleaming wine glasses. 10 of my paintings were hung in the dining room The tables were draped with glistening white tablecloths, and centerpieces were in place.. The silverware was polished, and in the kitchen, Donna’s wonderful collection of antique dinnerware was stacked, ready to be used.

On the stovetop, a huge pan of Boeuf Bourguignon sat gently simmering. On the nearby cutting board sat beautiful loaves of Brenda’s homemade breads and her crisp cracker bread! Thick slices of her breads were stacked onto plates and placed on each table.

With French music playing quietly in the background, the guests began arriving at 6PM, the Reynolds served glasses of perfectly chilled Traminette wine, a crisp dry white. As they were seated, beautiful and delicately colored French Verrines, a shrimp mousse with avocado, creme fraiche & caviar, were served. The guests were offered the next chilled wine, Somerset’s own Riesling, one of the inspirations for the evening. The diners were delighted with a French Potato Soup, Vichyssoise.

Sicilian Spice Market has a new home!
Next, came Flyboy Red and Ruby Red wines, my all time favorite wines! Through the swinging doors came the servers, carrying steaming plates of Beef Bourguignon, beef braised with Somerset Ridge Ruby Red wine. The world famous French dish of rich beef and sauce, carrots and pearl onions was snuggled into a bed of warm egg noodles. One look at the plate of beefy perfection, the guests, particularly the men at each table, asked the servers for more bread….something to catch every drop of the beautiful beefy sauce! The dining room became a place of joy and conversation about food and wine….and suddenly, about paintings! Donna asked for everyone’s attention as she announced the first sale of a painting…..I was feeling very pleased! The Ruby Red wine was glistening in each glass.

While dining, an invigorating conversation on “this is exactly what we need! Wonderful Foodie events, an exciting change from our day to day routine!” One table of 6 became the “party table”, discussing food, wine, art, and how soon can we do this again!
As the dinner plates were removed, in the true French order, the salad was placed in front of each diner. Chilled plates were laden with crisp greens, juicy slices of fresh pears, crumbles of pungent bleu cheese, and crunchy spiced pecans were drizzled with Donna’s own Balsamic Vinaigrette. Oh, and of course….more of Brenda’s wonderful bread!
As the time for the last course arrived, through the swinging doors came antique dessert dishes of Alsace Apple Riesling Sorbet and a French Madeline dusted with powdered sugar and topped with fresh blueberries. There was some moaning and groaning….”I’m so stuffed now!” In spite of “My stomach is about to explode now! Where am I going to put it?”…..all plates returned to the kitchen were practically licked clean! As were the wine glasses, having held the dessert wine, Ambrosia, and Tawny Port….the perfect ending of a perfect meal.
Now, 18 hours after the event….the next Gourmet Dinner at Molly’s Table is in the works! We are going to go Spanish….Paella, the National dish of Spain and their favorite drink…Sangria, of course!

As one of the chefs involved and as the Artist of the Evening….I could not have asked for a more successful evening. Donna Nagle and her mighty crew are to be congratulated! Cindy and Dennis Reynolds are to be praised for their wines and their ability to talk and share the winemaking process! Brenda Wrischnik is to be revered for her artisanal breads!
Just as wine, food and art make a great combination, these people are a perfect combination when you are looking for a terrific evening!

Here is my recipe for the Alsatian Apple Riesling Sorbet….so simple, so GOOD!
You will need an ice cream maker.

1 cup water
3/4 cup sugar
2 3/4 pounds tart green apples such as Granny Smith, peeled, cored and cut in 1-in. chunks
1 teaspoon lemon juice
3/4 cup Somerset Ridge Riesling Wine, chilled
1/4 teaspoon kosher salt

Heat 1 cup water, the sugar, and apples in a medium saucepan over medium-high heat to a low boil, then reduce heat to low, partially cover pan, and gently simmer until apples are very tender, 10 to 15 minutes. Remove from heat and stir in wine, salt, and lemon juice. Puree the mixture in food processor
Pour purée into a shallow 9- by 13-in. baking dish and put in freezer 20 minutes. Freeze in an ice cream maker according to manufacturer's directions. For a firmer texture, transfer to an airtight container and freeze another 8 hours before serving

Now, back to my easel!

Wednesday, March 2, 2011


Portfolio Kitchen and Home To Open Kansas City Flagship Store


Portfolio Kitchen and Home, recognized throughout the Midwest as the premier kitchen, bath and home design resource, announced  its plans to open their Kansas City Flagship Store. The Portfolio Flagship Store, opening summer 2011, will be located at 215 W. Pershing in the historic Pershing Building, one of the jewels in the Midtown architectural crown that includes Union Station, Liberty Memorial, the original Kansas City Post Office and the Kauffman Center for the Performing Arts. A year in the making, the over 7,000 square foot Flagship Store will represent the most significant example of sophisticated design culture experienced outside of New York, Los Angeles or Chicago—an iconic symbol of great design for the Midwest.
I recently attended a cooking demonstration hosted by Portfolio and found several kitchens I wanted to have wrapped up and sent to my home. Today's materials and appliances give you choices never before available. If you want to go sleek....its available; European?....you can have it;  The best way I can describe today's kitchens is elegantly sexy.  I can just picture Sean Connery and me sharing a late night frittata and bottle of wine in one of these kitchens! Whatever your choice might be, Portfolio has it.  I can only imagine the creative experience that the new Portfolio flagship store will be!
An innovative store design, exclusive merchandise and one-of-a-kind client experience will be the hallmarks of Portfolio’s new destination Flagship Store. The numerous display environments will be designed to create an intimate experience that optimally showcases Portfolio’s signature product collections. Elegantly restrained spaces that translate the quality of materials and finishing apparent in all of Portfolio’s brands. “The Portfolio Flagship Store brings together our heritage of innovative products and design with a dynamic location that will showcase Portfolio’s essence as a unique and exceptional brand,” said Portfolio CEO/Principal Geri Higgins. This dynamic location will showcase the entire collection of Portfolio’s custom cabinetry and value-conscious Studio PKH brands as well as their extensive array of services including space planning, design/lifestyle consultation, product specification and design trend analytics. New and unique products not found elsewhere in Kansas City will also be added to the exclusive Portfolio collection of brands. The Portfolio mission has always been to empower its clients through great design that expresses their personal style and with the opening of the Portfolio Flagship Store, Kansas City will have an even better opportunity to experience all that Portfolio Kitchen and Home has to offer. Another key component to Portfolio’s past and future success is the incredible talent among its seasoned design team and their “client-driven” approach to design. The Flagship Store will allow the Portfolio design team to better engage with clients making the experience totally unique and more relevant to their needs and lifestyle.


The Portfolio Flagship Store represents another celebration of Kansas City’s vibrant, revitalized urban core, an attraction worthy of national recognition for its spectacular aesthetic and exclusive landmark location. The goal for the Flagship Store’s design was to create an interior that matched the beauty and attention to detail of the Pershing building’s elegant exterior - an urban cool setting with a strong nod to the building’s heritage of 1920’s sophistication. Portfolio sought to design elegant interior environments for their Flagship Store that translate

the quality of the products and materials that make up the Portfolio brand - a showplace of fabulous products for kitchen and home that evokes the feeling of being in an exclusive 5th Avenue boutique. “We could think of no better business to occupy this stunning space,” said Pershing Building owner Dan Clothier. “Portfolio has taken the utmost care to respect the integrity of the original structure while creating a distinctly new and exciting creative hub.” The Portfolio Flagship Store will also be a spectacular setting for a variety of activities including gallerias, cooking demonstrations, lifestyle seminars, charitable events, book signings and much more. The supremely equipped demonstration kitchen will be specifically designed to host live demonstrations as well as television and radio broadcast events providing a wonderful resource not only for their local client base but also for others in the architecture and design fields.

Upon its summer 2011 opening, the Portfolio Flagship Store will provide a rich, creative environment for the exploration of exceptional design and products. Through its design, product collections, and artisan materials, accessories and more, the Portfolio Flagship Store is specifically modeled to its clientele and community while elevating their select brands beyond Kansas City to regional and national levels.

About Portfolio Kitchen and Home:

Over the past six years Portfolio Kitchen and Home has specialized in providing premium design and cabinetry for residential and commercial clients throughout the Midwest and beyond. Recipients of numerous awards and accolades for their work, including the prestigious Edward Tanner Award for interior design, Portfolio designers work daily with Kansas City’s foremost architects, developers, builders and designers on projects ranging from residential homes to commercial hospitality kitchens and multi-unit lofts and condos. In addition to design and cabinetry, Portfolio’s core competencies include product specification, space planning, design trend analytics and design/lifestyle consultations. Portfolio Kitchen and Home is a member of the National Kitchen and Bath Association (NKBA) and have had numerous projects featured in local, regional and national design publications.
Contact Information:

Portfolio Kitchen and Home
8027 State Line Rd.
Kansas City, MO 64114
816-363-5300
http://www.portfolio-home.com/

Now, for that frittata, may I suggest my
Sweet Pepper, Tomato, Onion, Basil & Sausage Frittata

9 large organic eggs, beaten, organic eggs, beaten
4 potatoes, scrubbed
1 large onion, diced
2 medium-sized sweet peppers, chopped
A large handful of cherry tomatoes, cut in half or quartered, depending on their size
6 oz salami, sliced or cubed
4 oz cheddar cheese, grated
4 oz Parmesan cheese, grated
2 Tbps fresh basil, rinsed, dried and coarsely chopped
1 tsp sea salt
Several grinds of black pepper
2 tsps olive oil

1. Boil or steam the potatoes until just tender when pricked with a fork. Drain and let sit until cool enough to handle. Dice the onions and slice up the peppers.

2. Preheat the oven to 350 degrees. In a medium-sized frying pan or cast iron skillet, heat the olive oil over a medium flame (you will be baking the frittata in this dish so be sure to choose one that is both oven-proof and large enough to hold all the ingredients.) Sautee the onions in the oil for 5 minutes then add the peppers and cook another 3-5 minutes, until softened.
3. Grate the cheese, cut the salami and cube the potatoes, then chop the basil. Beat the eggs in a bowl, throwing in the basil, cheeses (but keep a little bit of the cheddar aside to top the dish with) and salami and seasoning with the sea salt and pepper (use enough salt to season the whole dish but keep in mind that the Parmesan and the salami are also salty.)
4. Grease a baking dish (you can use a pie dish, gratin dish or small lasagna pan) then arrange the potatoes, onions and peppers in a single jumbled layer and pour the egg, cheese, salami, basil mixture evenly over them. Top with the reserved cheddar. Bake for 15 minutes or until the eggs have set. Transfer the skillet to the oven and brown it under the broiler for 2 or so minutes (keep it at a bit of a distance from the flame if you can and be sure to keep a close eye on this since things can burn very quickly under the broiler) to brown the top.
5. Remove from broiler and allow to cool slightly then cut into generously sized wedges, and serve, right there in your gorgeous new kitchen. I know Sean is going to love it!

Saturday, February 26, 2011

Okay, between my fall on Christmas day,  a dreadful cold that has left my ribcage screaming,  and our lousy, snowy bitterly cold weather, I have decided this was my “winter of discontent”. I usually don’t give into bad things without a fight, but for some reason, all of the above have truly gotten to me. But I am officially tired of sitting in my chair, feeling lousy, wishing for warm weather. I will beat this thing.....Thank God the weather forecast is looking good, my cold is on it’s way out, and other than a periodic twinge in the knee, the body is healing and ready to kick some butt. (Please, no jokes about me not tall enough to reach someone's butt)
Now, if gas prices would quit jumping up, I would start spending more time at the studio in Paola. It is a pain to have to consider what it is going to cost me to drive down and back, then compare that to what I “might” accomplish while there. With that “winter of discontent” attitude I’ve been living with, I haven’t found it absolutely necessary to go to the studio. However....
The Kansas City Artist Coalition events of last week have my creative side eager to paint again, and that is good. There are gallery show “possibilities” in my future….if I paint. So, starting this week, paint I will!

While I am on the subject of painting, the date has been set for the next Art in the Vines at Somerset Ridge Vineyard. I can’t believe “The Third Annual“ is approaching. June 11th is the date scheduled, stay tuned for updates.

There is another event in the works also. The Miami County Art and Artisans weekend is being planned for the weekend of June 4th and 5th. I am thinking the vineyard will be involved in some way. I will keep you posted.

Now for our favorite part of this blog....Eating and Cooking


Wine by Somerset Ridge, label by Kristin Goering
  I am about to make an Apple Riesling Sorbet for a French dinner to be held at Molly’s Table in Paola next Friday evening. The evening is a joint effort between Molly's and Somerset Ridge Vineyard.
 The Alsace region of France is a favorite of mine, so when choosing the recipe for dessert, I naturally turned to Alsace.. Dennis and Cindy recently released their new Riesling wine. It turns out they have a love of the Alsace also. My little ice cream makers will be busy this week! If you are interested in attending the dinner, email Donna Nagle, owner of Molly’s, at donna@mollys-table.com The last time I checked on reservations, there were 6 seats still available, but that was 4 or 5 days ago. If it is full, tell her to put you on the list for the next one!

One of my favorite French recipes is for French Country Pâté. You may not call it a “simple” recipe, but the simplicity of the pate is stunning. If I could, I would eat this 3, maybe even 4, times a day. Strange, but I think my 2 favorite things to eat are French…this pâté and my Alsatian Onion Tart. People are generally cold or hot when it comes to the French….but no one can say their food isn’t magnificent! Don’t let the recipe scare you, it is worth every moment, every ingredient.


This recipe is from Molly Wizenberg and the Photograph is by Misha Gravenor.
French Country Pâté
3/4 cup Cognac
3 tablespoons unsalted butter
1 cup minced onion
2 1/2 pounds ground pork
12 ounces bacon (8 to 10 slices), finely chopped, plus 14 bacon slices (for lining pan)
3 garlic cloves, pressed
2 1/2 teaspoons salt
2 1/2 teaspoons dried thyme
1 1/2 teaspoons allspice
1 teaspoon freshly ground black pepper
2 large eggs, lightly beaten
1/3 cup whipping cream
1  6-ounce piece ham steak, cut crosswise into 1/4-inch-thick strips
Coarse sea salt
Cornichons
Dijon mustard

Preparation

Set rack at lowest position in oven and preheat to 350°F. Boil Cognac until reduced to 1/2 cup, about 1 1/2 minutes. Cool.
Melt butter in heavy medium skillet over medium heat. Add onion and sauté until soft and translucent but not brown, about 8 minutes.
Combine ground pork and chopped bacon in large bowl. Using fork or fingertips, mix together until well blended. Add sautéed onion, garlic, 2 1/2 teaspoons salt, thyme, allspice, and pepper to bowl with pork mixture and stir until incorporated. Add eggs, cream, and reduced Cognac. Stir until well blended.
Line 9x5x3-inch metal loaf pan with bacon slices, arranging 8 slices across width of pan and 3 slices on each short side of pan and overlapping pan on all sides. Using hands, lightly and evenly press half of meat mixture (about 3 1/4 cups) onto bottom of pan atop bacon slices. Arrange ham strips over in single layer. Top with remaining meat mixture.
Fold bacon slices over, covering pâté. Cover pan tightly with foil. Place pan in 13x9x2-inch metal baking pan and transfer to oven. Pour boiling water into baking pan to come halfway up sides of loaf pan. Bake pâté until a thermometer inserted through foil into center registers 155°F, about 2 hours 15 minutes.
Remove loaf pan from baking pan and transfer to rimmed baking sheet. Place heavy skillet or 2 to 3 heavy cans atop pâté to weigh down. Chill overnight. DO AHEAD Can be made 4 days ahead.

Place loaf pan with pâté in larger pan of hot water for about 3 minutes. Invert pâté onto platter; discard fat from platter and wipe clean. Cut pâté crosswise into 1/2-inch slices. Serve at room temperature with a sprinkling of salt, cornichons, Dijon, and a baguette.

Je l'aime!

Monday, February 21, 2011

Today was a day full of vinegar….Balsamic that is. In my quest to develop some new recipes for Jeanne Mackay of The Tasteful Olive, I have been scouring the cookbooks and cooking blogs to see what is already out there. No use developing something that has already been developed! After several hours of reading close to 50 recipes, I was starving. There is nothing like a quick little splash of aged balsamic to pep up your dish….and just reading about it made me want to splash it on everything I saw!

In my research, I ran across a web page called Steamy Kitchen. It is written by Jaden Hair, a food columnist, television chef, and recipe developer. Her program is The Steamy Kitchen and is shown on TLC, however, I’ve never seen it. What I did see was a recipe that looks pretty good to me. Jaden calls it Cassoulet-Style Italian Sausages and White Beans

I am sure most of you are familiar with a Cassoulet. I am just as sure that you have never cooked a cassoulet. Your traditional cassoulet takes hours to prepare; calls for ingredients that are not found in your typical kitchen….do you keep duck confit in your refrigerator?
Me neither.
The confit is prepared in a centuries-old process of preservation that consists of salt curing a piece of meat (generally goose, duck, or pork) and then poaching it in its own fat. The Cassoulet is a rich, slow-cooked bean stew or casserole originating in the south of France, containing meat (typically pork, sausages, goose, duck and sometimes mutton), pork skin and white haricot beans. See what I mean? We just don’t make much cassoulet in American kitchens!

Jaden’s recipe was accompanied by a photo of her finished dish….definitely looked good enough to eat!

This recipe is on my list of things to prepare this week. If anyone wants to prepare it and compare notes with me on Saturday, just drop me a line at kaytucker@kc.rr.com to let me know what you think of it.


Cassoulet-Style Italian Sausages and White Beans
Serves 8
2½ pounds sweet Italian sausage links (Naturally, I recommend Jasper's brand)
3 pints cherry tomatoes
1 medium-large onion, cut into 1½-inch chunks
4 large garlic cloves, sliced
3 tablespoons extra-virgin olive oil (The Tasteful Olive's Herbs de Provence)

1½ tablespoons balsamic vinegar (The Tasteful Olive's Balsamic, of course)
2 teaspoons dried thyme
3 bay leaves
Salt and freshly ground black pepper
3 cans (about 16 ounces each) white beans, undrained

Adjust oven rack to lowest position and heat oven to 425 degrees.
Mix sausages, tomatoes, onion, garlic, olive oil, vinegar, thyme, bay leaves, and a generous sprinkling of salt and pepper in a large heavy roasting pan. Set pan in oven and roast until sausages are brown and tomatoes have reduced to a thick sauce, about 45 minutes. Remove from oven, stir in beans, and continue to cook until casserole has heated through, about 10 minutes longer. Serve.

If there’s time, sprinkle buttered bread crumbs over each plated portion for a nice touch. Heat a medium skillet over medium-low heat. Toss 2 cups fresh bread crumbs (made in the food processor from a good European-style loaf) with 2 tablespoons melted butter and a light sprinkling of salt. Add the crumbs to the skillet and cook, stirring frequently, until golden brown, about 15 minutes.
Stored in the refrigerator and warmed on the stove top or in the microwave, this dish means instant dinner later in the week.

For comparison, here is an authentic Cassoulet. Yes, it might be better, but it is also a lot of work! You will notice that the authentic cassoulet does not have balsamic as an ingredient. The addition of balsamic to Jaden's cassoulet gives the dish a deep rich flavor with out all the many hours and ingredients necessary to prepare an authentic dish.

1 lb dried white beans (preferably Great Northern)
8 1/4 cups cold water
2 cups beef broth
1 tablespoon tomato paste
2 cups chopped onion (3/4 lb)
3 tablespoons finely chopped garlic (6 large cloves)
1 (3-inch) piece celery, cut into thirds
3 fresh thyme sprigs
1 Turkish or 1/2 California bay leaf
3 whole cloves
3 fresh flat-leaf parsley sprigs plus 1/2 cup chopped leaves
1/4 teaspoon whole black peppercorns
1 (14-oz) can stewed tomatoes, puréed or finely chopped with juice
4 confit duck legs (1 3/4 lb total)
1 to 2 tablespoons olive oil (if necessary)
1 lb cooked garlic pork sausage or smoked pork kielbasa, cut crosswise into 1/3-inch-thick slices
2 cups coarse fresh bread crumbs (preferably from a baguette)
1 1/2 teaspoons salt
1/2 teaspoon black pepper

Special equipment: an 8-inch square of cheesecloth; kitchen string; a 4 1/2- to 5-quart casserole dish (3 to 4 inches deep)

PreparationSoak and cook beans:
Cover beans with cold water by 2 inches in a large bowl and soak 8 to 12 hours. Drain in a colander.
Transfer beans to a 6- to 8-quart pot and bring to a boil with 8 cups cold water, broth, tomato paste, onion, and 2 tablespoons garlic. Put celery, thyme, bay leaf, cloves, parsley sprigs, and peppercorns in cheesecloth and tie into a bundle with string to make a bouquet garni. Add bouquet garni to beans, then reduce heat and simmer, uncovered, until beans are almost tender, 45 minutes to 1 hour. Stir in tomatoes with juice and simmer until beans are just tender, about 15 minutes more.
Prepare duck and sausage while beans simmer:
Remove all skin and fat from duck legs and cut skin and fat into 1/2-inch pieces. Separate duck meat from bones, leaving it in large pieces, and transfer meat to a bowl. Add bones to bean pot.
Cook duck skin and fat with remaining 1/4 cup cold water in a 10-inch heavy skillet over moderate heat, stirring, until water is evaporated and fat is rendered, about 5 minutes. Continue to cook, stirring frequently, until skin is crisp, 3 to 6 minutes more. Transfer cracklings with a slotted spoon to paper towels to drain, leaving fat in skillet. (You should have about 1/4 cup fat; if not, add olive oil.)
Brown sausage in batches in fat in skillet, then transfer to bowl with duck meat, reserving skillet.
Preheat oven to 350°F.
Make bread crumb topping:
Add remaining tablespoon garlic to fat in skillet and cook over moderate heat, stirring, 1 minute. Stir in bread crumbs and cook, stirring, until pale golden, about 2 minutes. Remove from heat and stir in chopped parsley, 1/2 teaspoon salt,
1/4 teaspoon pepper
cracklings.
Assemble casserole:
Remove bouquet garni and duck bones from beans and discard, then stir in kielbasa, duck meat, remaining teaspoon salt, and remaining 1/4 teaspoon pepper.
Ladle cassoulet into casserole dish, distributing meat and beans evenly. (Meat and beans should be level with liquid; if they are submerged, ladle excess liquid back into pot and boil until reduced, then pour back into casserole dish.) Spread bread crumb topping evenly over cassoulet and bake, uncovered, in lower third of oven, until bubbling and crust is golden, about 1 hour.

As for other Balsamic ideas, I will keep researching and then move to the kitchen to test.
For now, check out The Tasteful Olive’s webpage and blog for existing recipes, and then check periodically for additions. www.thetastefulolive.com
I also encourage you to visit Jeanne’s store in person if you are in the Kansas City area. What a treat! It is located at 7945 Santa Fe Drive in historic Overland Park, Kansas. While you are there, go several doors north of Tasteful Olive and visit the helpful ladies at Penzey’s Spices. Trust me when I say the ideas, recipes and help you get from Jeanne and those from the Penzey’s crew will pep up your dinner!

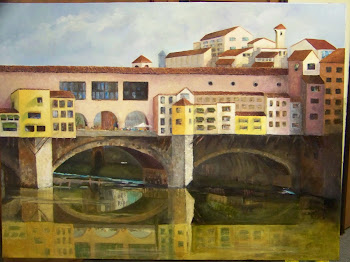
Ponte Vecchio, Florence, Italy

Ponte Vecchio, Florence, Italy
oil painting by Kay Tucker

Somerset Autumn on Wea Creek

Somerset Autumn on Wea Creek
Oil Painting by Kay Tucker, Private Collection

Floral

Floral
oil painting by Kay Tucker

Kansas Storm

Kansas Storm
oil painting by Kay Tucker, Private Collection

Watercolor Collage

Watercolor Collage

Tempo al Tempo....All in Good Time

Tempo al Tempo....All in Good Time
48"x36" sculptural painting by Kay Tucker