Tuesday, June 30, 2009


Have you ever eaten Frogmore Stew? Pretty sick name as far as I am concerned...I picture a big pot of stew with 50 pair of little frog's eyes looking up at me! The recipe is a favorite of my family, but we choose to call it Low Country Boil. After all, frogs have nothing to do with it!


If you are looking for a big dish to feed a crowd on the 4th, this might be your answer. This recipe feeds 12, but can be doubled, even tripled if you have a pot large enough! It can be adjusted to serve any number. Allow 2 tablespoons of seasoning per quart of water. If you cannot find hot smoked sausage, use another smoked sausage such as kielbasa and add crushed hot red pepper to the pot."
Ingredients:
6 quarts water
3/4 cup Old Bay Seasoning TM
2 pounds new red potatoes
2 pounds hot smoked sausage links, cut into
2 inch pieces
12 ears corn - husked, cleaned and
quartered
4 pounds large fresh shrimp, unpeeled
Directions:
1.
Bring water and Old Bay Seasoning to boil in a large stockpot.
2.
Add potatoes and cook for 15 minutes. Add sausage and cook for 5 minutes more. Add corn and cook for another 5 minutes. Stir in the shrimp and cook until shrimp are pink, about 5 minutes. Drain immediately and serve.


Traditionally, this should be served outdoors, drained then dumped out on a big table covered in several layers of paper. All you need is cocktail sauce, crusty bread and butter, and a big green salad...oh and lots of rolls of paper towels!


31


Part of the joy of being together with my family at Smith Mountain Lake in Virginia were the games and challenges that popped up spontaneously , sometimes for hours! The whiffle baseball games were a hoot to watch….kids and adults joining in. The adults had to hold a full glass of liquid in one hand while playing to “make it fair for the children” In reality, the kids could and did do some serious butt-kickin’ out there. I believe the adults choice of liquid in their glass might have had something to do with it!

I personally was a spectator for the ball games and the fishing contests, but I did participate in the game called “31”. The back of the house overlooked the beautiful lake, and the veranda ran across the entire back. The table was often the scene of marathon 31 games. From the veranda we could watch the fishing, cheering and yelling for each little fish the children caught. My wonderful nephew, Neal, is an avid fisherman from Colorado, and spent most of his time on the dock, keeping the little ones safe and their hooks baited with worms!

The games of “31” were not without drama, suspense and loads of laughter! It was a new game to me, but my friend Winnie played it as a child during their family reunions! When I first sat down at the table, everyone else knew the game; maybe I’m just slow!

Now that I am home, I want to play, so I Googled the game rules, to make sure I remembered them correctly. They are:

How to play the card game thirty one :
Thirty-one is a card game played between two and seven people but is usually best played with at least four players. The object is to obtain a hand with a point value closer to 31 than the hands of one's opponents. Using one standard 52 card deck, cards rank as follows: aces are high, counting 11, face cards count 10, and all other cards count face value. Each player gets three cards and the rest of the pack is set in the middle of the table to act as the stock for the game, and the top card of the stock is turned over to begin the discard.
After the hands in the first round are dealt out, each player receives a previously chosen number of tokens, or, most commonly, coins. Play proceeds as in Gin Rummy, with each player, starting with the player to the immediate left of the dealer and going clockwise around the table, taking the top card of either the stock or the discard and afterward discarding a card. Play continues clockwise around the table until any player knocks or obtains a blitz.
When it is one player's turn, and that player believes his or her hand is high enough to beat those of his or her opponents individually, he or she knocks on the table instead of drawing and discarding. All other players, going clockwise from the player who knocked, have one more turn to draw from the stock and discard, or they have the option of keeping all three cards in their hands (i.e. standing, staying). A round ends when the player to the right of the player who knocked has had his or her final turn. If no one knocks by the time a player exhausts the stock, the At the end of the round, each player shows his or her hand and totals it up. The player whose hand scored the lowest has lost the round, and must place one of his tokens or coins in the center of the table.
If, at any time in the round, a player attains a hand made up of an Ace, King and Ten of the same suit (a blitz), he must immediately show it, the round ends and all other players must place one token on the center of the table.When a player has lost all of his or her tokens or coins, he or she continues to play until that player loses again; at that time, he or she must leave the game. The last player to stay in the game wins all of the tokens on the table.


Friday, June 26, 2009


If you are interested in taking my class on writing your own Heirloom Cookbook, call or email ARTichokes today, enrollment closes next week! I'd love to have you in my class...and we will eat, too!
Go to artichokeskc.com or call 913-322-9481
While you are browsing their webpage, check out the painting classes and special events, it is a great place to be!


Friends, I know I’ve blogged about my trip to Sicily several times, and I have mentioned my friend, Judy Witts Francini. I want to pass this on to you, because when you take a trip organized by
Mariann Vandenberg of Travels with Taste and you meet Judy when you land in Italy, you are in store for a trip of a lifetime!
Trust me, you will have a ball! You will eat the best food! And your trip will run like clockwork with Mariann in charge!
I spoke to Mariann today, and there are very few spots open. So if you want to go to Italy, this is your opportunity! Judy will be your guide and as a resident of Tuscany and the owner/chef of her cooking school
She knows exactly where to go and how to get there.
This might be YOUR TIME!
To reach Mariann Vandenberg, email her at
mariann@travels-with-taste.com


To check out Judy's Blog, go to http://divinacucina.blogspot.com/


Enjoy! Kay

A THYME FOR EVERYTHING
PRESENTS
CHIANTI CLASSICO
CULINARY EXPERIENCE
November 1-7, 2009

Join Jet Pabst of A Thyme For Everything on a culinary excursion to Tuscany. Led by the “Diva” of Tuscany, Judy Witts Francini, this specially designed program will take you to the heart of the most famous region of Italy for an in-depth exploration of hearty fall food, wine and lively markets.

Sunday, November 1 -- Arrival day in Florence where we stay at the lovely Hotel Santa Maria Novella in the heart of the old city. In the evening we meet Judy at the hotel and walk to a nearby Trattoria for dinner.

November 2 thru 5 -- After a luscious buffet breakfast we’ll head for the bustling Central Market of Florence for a tasting and shopping tour. We will meet many of Judy’s long time friends who supply the city with some of the finest products of the region. Then it is off to Chianti to begin our exploration of the great foods of Italy and meet more of Judy’s friends…grappa makers, cheese makers, balsamic vinegar makers, wine makers, a great butcher, local artists and artisans. Our hotel for four nights is Palazzo Squarcialupi in Castellina-in-Chianti.

Friday, November 6 -- Return to Florence for a final night at the Santa Maria Novella. There will be time for shopping and museum visits before dinner at one of Florence’s finest Ristorantes.

Saturday, November 7 -- The program concludes after breakfast this morning. Consider extending your stay in Florence or with a visit to another great Italian location.

This is an ALL-INCLUSIVE package…accommodation, transportation, meals, wines, cooking classes and the fun and informative services of Judy Witts Francini. Space is limited and the price is based on 12 participants.
Now for a recipe.....this one is from Judy Francini. It is for her own blend of Italian herbs.
Recipe for Erbe Toscane:
(names to right of forward slash mark is the name in Italian)
1 cup fresh rosemary needles/Rosmarino
1/2 cup fresh sage leaves/Salvia
2 cloves fresh garlic, sliced/ Aglio
Fine Sea salt/ Sale fine

Remove the rosemary needles from the branches and the sage leaves from the stems.
Spread out the herbs on a wooden cutting board, add the garlic, and sprinkle with 1 teaspoon of sea salt.
Using a mezzaluna or large knife, chop in a rocking motion until the herb mixture is almost a powder.If the mixture seems too wet, add another teaspoon of salt. Spread the mixture on a wooden cutting board and let dry over night. When dry, the Tuscan herb mixture can be kept in a tightly sealed jar on your shelf; it does not need to be refrigerated.
It mixes well with olive oil to make a dipping sauce, and I personally like to heat in oil, which then becomes perfect for drizzling on my bean soup.
Many Tuscan butchers use a similar combination of herbs, to which they add fennel seeds, black pepper, and a hearty amount of garlic, thus creating a wetter consistency ideal for the inside of roast pork or as a rub on the outside of beef. Look out for the prepared roasts at the Sant’ Ambrogio and San Lorenzo markets, and you will see how the Tuscan masters season their meats.

Thursday, June 25, 2009

Whew! I’m back! After two very busy weeks, my life has settled down again. Let’s see, the Art in the Vines was the 13th , Metis performed in the Battle of the Bands on the 14th, then I left for beautiful Smith Mountain Lake in Virginia to spend 8 days with 27 of my closest relatives! I loved every minute of all three events, but so glad to be without my calendar in hand every moment. I love staying busy but I like a little breathing room every now and then! The amazing thing is...I haven't cooked in 2 weeks! (other than nachos!)
Art in the Vines was a huge success.
Somerset Ridge Vineyard and Winery was the perfect spot for our art show. The artists displayed their work throughout the vines on a glorious day! It had threatened rain all morning, making the show questionable at best. Suddenly at 1:00pm, just as the show opened, so did the clouds!
The crowds were wonderful; they wandered through the vineyard with glasses of wine while seeking out their favorite paintings. They talked to the stained glass artist, they had lots of questions for the sculptor. They shopped, they partied, they had fun!
There were 15 artists present and there were 23 pieces sold! I feel our First Annual Art in the Vines was a wonderful success! Thank you to everyone who attended!


Next was the Battle of the Bands in Westport. My grandson, Alex, and the band, Metis, performed beautifully! Let me say this….it is difficult for a grandmother to watch young women fall all over her gorgeous grandson! The 4 members of the band performed for approximately 20 minutes for the enthusiastic crowd. There were 5 professional judges and when the votes were counted, the vote was 3 to 2, with Metis coming in second. It was an amazing job by a new band! And they are so cute!


Smith Mountain Lake Reunion The next morning I drove to the airport in a raging storm. I was completely wet by the time I checked in at the gate. By the time I landed in Washington D.C., I had dried off and the sun was shining. I had a quick little flight into Roanoke, then a 45 minute drive to Smith Mountain Lake in the Blue Ridge Mountains. It was beautiful! We gathered to celebrate Mike Pote's graduation from high school! What a week of celebration!
The next 7 days were full of water sports, children, teenagers, Rock Band (complete with some terrible vocals provided by my two daughters!) wine, nachos, hot tubs, wave runners, fishing and a great card game called “31”. The house was spectacular. On Wednesday, Chef Toy, the chef who fed us so well when we were all at Topsail Island, North Carolina, 2 years ago, came one day and prepared a whole roast pig with all the fixings! Back to this week..............Wednesday evening, the winery had a special event at JP’s Wine Bar, a Sangria Party! Great fun and I loved the White Sangria, made with our Traminette wine and peach schnapps. Traminette is a rich, spicy dry white wine with a floral bouquet. Made from grapes grown in our hillside vineyard. Traminette is a close relative of the German/Alsastian grape Gewurtztraminer. Wonderful with cheese, fruit and Asian dishes. Now it turns out to be a perfect wine for Sangria!

So, there you have it, a play by play accounting of my time since I last blogged. I am starting some new projects, am in the middle of a painting class at ARTichokes with Ada Koch (the class is called Wine, Dine and Paint so you can imagine how much fun it is!) and I am puppy sitting with Rudy, my “nephew/dog!

I start painting at open studios this weekend at ARTichokes. I have my plan, I am anxious, I’m ready. Maybe I will paint something to take the place of my recently sold “Lago di Como”!

Sunday, June 14, 2009

Art in the Vines was a big success! The weather cleared at 1:00pm on the button! The sunshine greeted visitors to both the art show and winery. The 15 artists participating in the 1st Annual show enjoyed their afternoon as much as the guests of the vineyard! It was fun!

Vicki Johnston with two of her paintings exhibited at the

1st Annual Art in the Vines

Somerset Ridge Vineyard and Winery


Kristin Goering, Painter,

enjoying the beautiful day in the vineyard


Winnie Davis adding her special talents to a group painting of the vineyard
Pastel artist, Marcia Streepy, at her easel

Friday, June 12, 2009

painting by Kristin Goering
Art in the Vines is HERE!

The Sun is Going to SHINE!
The Birds are Going to SING!
The Wine is Going to FLOW!
The Artists are Going to WORK!

All for your enjoyment!
Please join the festivities at the very 1st
Art in the Vines
at
Somerset Ridge Vineyard and Winery
directions at somersetridge.com
Saturday, 1 to 6pm
winery opens at 10am
please join us for a glass of wine while wandering through the vineyard where the artists will be displaying their work.

Thursday, June 11, 2009


Just wanted to let you know... Kay Tucker will be teaching a class at:

Class Name: Create an Heirloom Cookbook
Class Dates: July 9, July 16, July 23 and July 30
Time: Thursdays, 10:00 am - 12:00 pm
Location: 10557 Mission Rd, Leawood, KS

Visit the
class schedule on the website to reserve your spot!
www.artichokeskc.com

Speaking of Artichokes.........


My Favorite Artichoke Fritters
Artichoke Fritters

about 15 fritters

Ingredients
Vegetable oil
1 (18-ounce) can artichoke hearts, drained
2 garlic cloves, minced
3 scallions, chopped
1/4 cup milk
1 large egg, beaten
1 teaspoon lemon zest
2 teaspoons lemon juice
1 cup all-purpose flour
3/4 teaspoon baking powder
1 teaspoon salt
1/2 teaspoon pepper
1/2 lemon, to squeeze over fritters
Kosher salt, to sprinkle
Lemon Cream, recipe follows, optional
Directions
Pour 3 inches of vegetable oil into a heavy bottomed pot and place over medium heat until a bread cube placed in the oil browns within 1 minute.
Coarsely chop the artichokes (or alternatively crush by hand) and put them in a large mixing bowl. Add the garlic and scallions, milk, egg, lemon zest and lemon juice. Mix the flour, baking powder, salt and pepper in a separate bowl and quickly mix the dry ingredients into the artichoke mix. Drop the fritters by the heaping tablespoonful into the hot oil and fry until golden brown, about 5 minutes. Work in batches until all the batter is used. Keep warm in a low oven until ready to serve. Immediately before serving, squeeze a little fresh lemon juice over all and hit with a bit of kosher salt. Serve with a dollop of Lemon Cream on top, if desired.
Lemon Cream:
1 cup sour cream
1 lemon, juiced
1 teaspoon kosher salt
Whisk all ingredients together in a small bowl. Refrigerate until ready to serve.

Wednesday, June 10, 2009


No time to Blog!
I'm working like a mad woman! Cookbooks!....Art in the Vines!....Classes!

Don't forget this Saturday, (if weather permits!)


Somerset Ridge Vineyard's 1st Annual
Art in the Vines!


Sunday, 14th

METIS performing at the Beaumont Club"s Battle of the Bands! My Grandson, Alex, is vocalist for the band METIS!


Members of Metis are from left to right.....


Miles McDonald, guitar
Alex Reynolds, vocals
John Xenos, Bass
Max Weinberg, drums


Sunday, June 14th 5:00pm!

All ages are invited to this event!


Friday, June 5, 2009

Art in the Vines is one week from today! Please join us for a day of Art, Wine, Music and Fun in the beautiful Somerset Ridge Vineyard! The date is Saturday, June 13th, hours are 1:00 to 6:00pm. The artists are some of Kansas City's finest, the wine of Somerset Ridge is award winning, the music is by Kathryn Lorenzen. Come and enjoy the afternoon! Visit the Somerset Ridge Tasting Room, stroll through the vineyard with a glass of wine while visiting with the artists.
For directions to the vineyard and winery, please go to www.somersetridge.com


Tried and True


With the Art in the Vines only a week away and the Wyandotte ’59 cookbook due to the printer very soon, I’ve been remiss in my blogging! I thought once my new laptop arrived I’d have time to write…funny how just going upstairs to the office makes it seem like a much bigger job!
Today while I was out running errands, my mind was busy plotting and planning my next few blogs. Too bad my memory is shot, can’t remember a thing except they were great ideas! Oh well, I’ve been thinking about baking, which is nothing new for me….it is my first love in the kitchen.
I think I covered biscuits pretty well last week! This week I want to talk about pie crusts.

Grandmother Ogg’s was made with lard, Grandmother Johnston’s was made with shortening…..mine? I’m afraid more often as not, I use Jiffy Pie Crust Mix! SHAME!
But honestly….they are good! Now I must admit, when I am baking for company, yes,
I make a homemade crust. I make mine with butter!

Butter Pie Crust
1 cup unsalted butter, chilled
3 cups flour
3 tablespoons sugar
1/3 cup ice water
Combine flour and sugar into the bowl of an electric mixer. Cut butter or margarine or butter and shortening into tablespoon pieces; add it to the flour and butter. Use the paddle beater to cut the butter and flour together. Alternatively, this can be done by hand with a pastry blender. With the mixer on low speed , or while stirring the mixture with a fork, pour in the cold water. When the dough starts to clump, and before it turns into a ball, stop stirring.
Lightly knead dough in the bowl until it forms a ball. Divide dough into two parts. Flatten each part into a disk, and chill for about 30 minutes before rolling.

If I am making a pastry dough for a savory tart I use the following recipe with no sugar.

Basic Tart Pastry - Savory
1 1/4 cups all-purpose flour
1/4 teaspoon salt
7 1/2 tablespoons chilled unsalted butter,
cut into pieces
2 1/2 tablespoons ice water

In a bowl, combine the flour and salt. Using a pastry blender or the tips of your fingers, cut the butter into the flour mixture until mixture resembles coarse cornmeal. Using a fork, stir in the ice water just until dough comes together nicely. Form pastry into a ball and chill for 1 hour.
Roll pastry out on a lightly floured work surface into a circle slightly larger than the tart pan, place in pan and press onto bottom and edge of pan, then firmly roll the rolling pin across the top of the tart pan to trim away the excess pastry. (Or a quick and easy method is to simply omit chilling the dough first and firmly press dough evenly against the bottom and side of an ungreased tart pan with your fingertips).
Fill and bake the pastry according to directions of the recipe you are using, or if a pre-baked pastry is required, bake at 400*F (205*C) for 10 to 12 minutes or until golden brown. (You can help prevent the pastry from becoming too puffy and bubbling by cutting out a circle of parchment or waxed paper and placing it on the tart pastry, then filling it with pastry weights, beans or rice. Remove the paper and weights a few minutes before the end of the baking time.
Makes enough pastry for one (10-inch) round tart or 6 individual tart shells.

One of my son’s favorite treats as a teenager was Fried Apple Pies. For that I used the following recipe.
Fried Pie Pastry
3 cups all-purpose flour
1 teaspoon salt
3/4 cup shortening
1 egg, beaten
1/4 cup ice water
1 teaspoon white vinegar

Combine flour and salt. Cut in shortening with pastry blender until mixture resembles coarse meal. Combine egg and water; sprinkle lightly over flour mixture. Add vinegar and stir with a fork until dry ingredients are moistened. Shape into a ball. Wrap dough in wax paper. Chill for at least one hour. Use as directed in any fried pie .

One last crust recipe…maybe my favorite. Why? Fill it with sweetened whipped cream and fresh berries and see if you don’t love it!
Meringue Pie Crust
2 egg whites
1/4 teaspoon cream of tartar
1/4 teaspoon salt
1/2 teaspoon vanilla extract
1/2 cup sugar

In a large bowl, beat egg whites, cream of tartar and salt until soft peaks form. Add vanilla; beat in sugar until very stiff and glossy. Spread mixture into a 9-inch pie plate to form a shell. Bake at 300*F (150*C) for 50 minutes. Turn oven off without opening oven door and leave crust in for 1 hour. Cool before filling. Makes one 9-inch pie crust.

Thursday, May 28, 2009


"The Nature of Perception and
The Perception of Nature"

Wednesday evening I attended a lecture by Stuart Shils, an American artist. A graduate of the Pennsylvania Academy of Fine Arts in Philadelphia, in recent years Shils has shown his work in solo exhibitions in Philadelphia, New York, Boston, Los Angeles and San Francisco, as well as in Israel and Ireland.
The subject, the nature of perception and the perception of nature, was just what I needed. I've been learning to not only look at the subject of my paintings, but to see them! Shils re-enforced
what I have learned from both Becky Pashia and Ada Koch, and then, made my mind go a few steps further, and that is not an easy job!

Shils has a delightfully dry sense of humor that was scattered throughout his lecture, making it possible to not become so totally bogged down with technical information. He stood before the large screen pointing out how an area of light related to an area of dark, but would then toss in a humorous comment on the mental stability of the artist. He discussed many such areas in probably 30 to 40 paintings. He talked on not only light and dark, but line, shape, hard and soft edges and color relationships.

Stuart Shils provided an extremely interesting lecture at ARTichokes. It was a privilege to take part in the evening and as I've been thinking about the lecture this morning, it is exciting to realize how much I learned! I will be looking at both my subject and my painting with a different eye from this point on.

Shils has a number of paintings being shown at ARTichokes gallery. Visit the gallery soon and enjoy the soft beautiful work of Stuart Shils. ARTichokes is located in the new and beautiful area of Mission Farms at 10557 Mission Road, Leawood, KS 66206

Tuesday, May 26, 2009

Southern Beaten Biscuits and Boone County Country Ham


Have you ever had a Beaten Biscuit? Have you ever heard of them? I actually grew up enjoying these baked wonders, a cross between a cracker and a biscuit. In Columbia, Missouri, where I grew up, we ate them with a thin slice of Boone County Country Ham tucked inside. My Grandmother Johnston was the only one in town that still made them as far as I remember. They were such a treat and I can still remember the way the surface of the biscuit felt, the texture in my mouth, and above all, the taste.
Forget about a nice fluffy hot biscuit, the kind you slather with butter and honey. Beaten biscuits are a whole different story. Actually, the story, or history, of the Beaten Biscuit is very interesting.


Beaten biscuits originated in Virginia and traveled across the mountains to Kentucky and then north to Maryland. Chuck wagon cooks also made them, recruiting a gullible new cowhand for help. They were considered the pride of the South, and in earlier days no Southern hostess would fail to offer these at any and all times of the day. They are one of the delicious hot breads that have made Southern cooks famous. They were basically considered an upper-class status symbol dish that depended on a lot of labor. Making the beaten biscuits was the daily duty of the plantation cook.
To achieve the right texture and lightness, the dough had to be beaten hard (usually with a mallet) for at least 30 minutes. The purpose of the beating was to incorporate air into the mixture (this was a time in history before the invention of baking powder). They were a very heavy biscuit, not like our present day baking powder biscuits.


Grandmother finally found a “Biscuit Brake”, a work table with a roller that did the beating for you. It saved her a great deal of time and an amazing amount of effort!
There are recipes today, saying you can use a food processor for the mixing and beating of the dough. I’ve tried several, but somehow they fall way short of Grandmother’s biscuits! But I keep searching, keep experimenting, keep hoping. Maybe someday I can whip out a batch and teach my children and grandchildren what Beaten Biscuits and Boone County Country Ham are all about.
If you want to try one of today’s recipes for these old time Southern favorites, here is a recipe for you. And yes, there is a small amount of baking powder added to help with the modernization of a very old recipe.

Beaten Biscuits
Yield 2 dozen (serving size: 1 biscuit)
2 1/2 cups all-purpose flour (about 11 1/4 ounces)
1 teaspoon sugar
1/2 teaspoon salt
1/2 teaspoon baking powder
1/4 cup vegetable shortening, chilled
1/2 cup cold 1% low-fat milk
1/3 cup ice water
Preheat oven to 400°.
Lightly spoon flour into dry measuring cups; level with a knife. Combine flour, sugar, salt, and baking powder in a food processor; pulse 4 times. Add shortening; pulse 6 times or until well blended. Add milk and 1/3 cup ice water; process 1 1/2 minutes. (Dough should have a shiny appearance.) Turn dough out onto a lightly floured surface. Cover and let stand 5 minutes.
Uncover dough; roll to about 1/2-inch thickness. Cut dough with a 2-inch round cutter. (Reroll scraps.) Place dough circles on a baking sheet. Pierce tops of dough circles with a fork. Bake at 400° for 18 minutes or until just barely lightly browned.

Now, for the Country Ham! They are available on line at
And of course, there are always the wonderful country hams from Smithfield Hams! (see link below)
Step 1: Clean and Soak Your Ham
Aged hams, like cheese, mold in the process. If there is mold on your ham's surface, don't be alarmed. The mold is not harmful. It simply needs to be cleaned off. You will also need to soak the ham to remove excess salt.
Wash the ham in warm water.
Scrub the mold from the surface of the ham with a stiff brush.
Rinse the ham well.
Two days before you plan on serving the ham, place it in a large pan.
Cover the ham with cold water.
Let the water-covered ham stand at room temperature.
Depending on the saltiness of the ham, crystals will begin to form on the ham's surface.
If crystals begin to form, change the water every 4 to 6 hours. Let the ham soak for at least 12 hours.
If crystals do not form, change the water every 6 to 10 hours. Let the ham soak for 6 to 12 hours.
Once the ham has been scrubbed and soaked, it is ready to cook.
Step 2: Bake Your Ham

Add bay leaves and peppercorns to the boiling water. (
There are several different ways to prepare a country ham. The following directions outline a method which involves boiling and oven-browning. Other preparation methods are available via downloadable PDFs at Smithfield Hams' website.
What You'll Need
Whole or half dry-cured ham
Bay leaves and peppercorns (Optional)
Cloves (if scoring)
1 large pot
Roasting pan
Aluminum foil
Meat thermometer
Sharp knife (if trimming and scoring)
Scrub and soak ham according to the directions is
Step 1.
In a large pot, cover ham with water.
Add bay leaves and peppercorns to pot. (Optional)
Boil for 20 to 25 minutes per pound.
Preheat oven to 400 degrees towards the end of the boiling process.
Drain ham.
Trim, score and glaze ham if desired.
Insert meat thermometer into the ham.
Place ham in roasting pan.
Brown at 400 degrees for 15 minutes.
Remove the ham from the oven.
Do not overcook the ham. It's internal temperature should be 160 degrees F.
Let stand 15 minutes before carving.
For Southern style Ham Biscuits, slice the ham as thin as you possibly can.
Place some on a beaten biscuit and lean back, close your eyes and get ready for what dreams are made of!

Sunday, May 24, 2009

Leavenworth
National Cemetery
Memorial Day
May 25, 2009


Today, Sunday, May 24, 2009, was bright and sunny, clear and warm. It was a beautiful day in Leavenworth National Cemetery. It is one of the most restful, serene places I know. The stark white headstones, in perfect formation, spread across the summer green grounds with pride and honor. By each of the almost 34,000 graves, there stood an American flag fluttering in the breeze.
Memorial Day, originally called Decoration Day, is a day of remembrance for those who have died in our nation's service. Traditional observance of Memorial day has diminished over the years. Many Americans nowadays have forgotten the meaning and traditions of Memorial Day. At many cemeteries, the graves of the fallen are increasingly ignored, neglected. Most people no longer remember the proper flag etiquette for the day. While there are towns and cities that still hold Memorial Day parades, many have not held a parade in decades. Some people think the day is for honoring any and all dead, and not just those fallen in service to our country.
To help re-educate and remind Americans of the true meaning of Memorial Day, the "National Moment of Remembrance" resolution was passed on Dec 2000 which asks that at 3 p.m. local time, for all Americans "To voluntarily and informally observe in their own way a Moment of remembrance and respect, pausing from whatever they are doing for a moment of silence."
The Moment of Remembrance is a step in the right direction to returning the meaning back to the day. What is needed is a full return to the original day of observance. Set aside one day out of the year for the nation to get together to remember, reflect and honor those who have given their all in service to their country. To listen to a sound file of Taps performed by SGM Woody English, U.S.Army Band, playing on a B flat Bach Stradivarius Field Trumpet, go to http://www.tapsbugler.com/WoodyEnglishTaps.mp3

Lt.Colonel Arch W. Tucker, USAF (Retired) did not die in a battle while protecting and defending his country. His final battle was with cancer, but if they would have taken Arch back into the Air Force on September 12, 2001, he would gone in a heartbeat. Having gone to Leavenworth National Cemetery with Arch several times before he died, I know the respect and reverence Arch felt for those that did die in the line of fire. His pride and adoration, his love and respect for each and every military soldier, sailor and airman was overwhelming.
So, today, I visited Arch’s grave and placed flowers there to honor him, but I also took the time to read many of the headstones on the long walk from the road to Arch’s grave. I have no idea how many of the over 33,000 buried there, died while defending America, but the majority of those I read did die in battle. Arch served in three wars, WWII, Korea and Vietnam. He was a United States Air Force Fighter Pilot who put his life on the line for 33 years so we Americans can have the freedom we take for granted. Thank God there are more Americans today, young men and women, who believe as Arch did. May God protect them.

Friday, May 22, 2009


Preserving our Family’s Heirloom Recipes
A pinch of this, a dash of that. Or how about a saucer of flour? Would you know how much to add? Probably not. Actually, a saucer is 1 heaping cup. A kitchen spoonful is 1 teaspoon while a dessert spoonful is 1 tablespoon. If the recipe called for you to bake in a moderately slow oven, would you know to set the oven at 325 degrees? Have you avoided trying an old family recipe because it confused you, so you stuffed in the back of the recipe box?

Most of us have at least one hand written recipe that brings back a flood of memories. The photo here shows 3 recipe cards hand written by my Grandmother, Ann Baker Robnett Johnston. She was a wonderful cook! She provided me with memories of holidays and Sunday afternoons. A hot sweltering July day and a big bowl of Homemade Peach Ice Cream. Or Thanksgiving Day and a turkey stuffed with Grandmother’s Cornbread Dressing. Maybe you remember Sunday dinner at Nonna’s and Nonno’s with homemade Sunday Gravy over spaghetti, using a recipe Nonna’s mother brought over from Italy in the late 1800s. Or Oma’s recipe for Lebkuchen, those spicy soft cookies she used to eat in Germany and introduced you to when you were a baby. Or how about the recipe for English Trifle that your Granddad fell in love with while stationed in England. Will your great grandchildren have those memories and stories if you don't share them?


Have you considered how important that hand writing is? What it could mean to your grandchildren to see a recipe written by their great great grandmother? If you have a recipe hand written by your grandmother, that is exactly whose recipe it will be to your grandchildren, their great great grandmother’s.

There are bits and pieces of history right under our noses, just waiting to be protected and shared. They are yellowing, they are tattered and torn, maybe a little stained with ingredients from years ago. I am well aware that my own children think maybe I’m a little nuts…have carried this “genealogy stuff” too far, but what if I just let it die with me? What if future generations didn’t know who I was, how important our family history was to me, how much I loved to cook? Once again… they would surely know where they are going, but if our descendants don’t know our history, they will never know where they came from.

Sitting and reading genealogy reports would be like reading that chapter in the Bible…
Abraham begat Isaac; and Isaac begat Jacob; and Jacob begat Judas and his brethren; And Judas begat Phares ….on and on, and on. Too much “begattin’ going on!

But, on the other hand, if you compiled a book of heirloom recipes and scattered photos and stories throughout the book, you would have something wonderful to leave to your children and grandchildren! It doesn’t have to be a book with hundreds of recipes, but if you have that many, you really need to consider preserving them some way. A cookbook with heirloom recipes, photos of previous generations, photos of your grandmothers by their handwritten recipes, would truly be a work of art.

I will be teaching a 4 week class in July at ARTichokes, (a wonderful gallery and painting studio at 105th and Mission Road in Leawood, Kansas) where each person will compile just such a cookbook! We will design your cover, the layout of your recipes and history, and discuss a possible translation of your recipes, if needed. At the end of the 3rd class, I will take the books to the printer, and then at class #4 you will receive your very own Heirloom Cookbook to leave for future generations!

This might seem like too much of an undertaking if you were to do it alone, but as a group, wewill feed each other’s fires, so to speak. We will share ideas, and maybe even recipes!
The class will be posted on my blog as soon as I know the exact dates, so stay tuned! Start going through all those recipes now, get them organized along with some photographs. Bring them to our 1st class……..You are going to love your book!


One of the cards pictured above is my Great Great Grandmother Harriet Lyle Whaley's (b.July 3, 1862 in Fulton, MO) recipe for Blackberry Shrub. I did not know what a "shrub" was until I did a little research. It turns out maybe Great Great Grandmother Whaley liked to have a little toddie everyday! A Fruit Shrub is a drink.

Her recipe calls for 3 gallons of berries in a large crock, to which she added 3 ounces of "tarbic acid" dissolved in 1 quart of water. She let it "stand" for 24 hours, then she strained the mixture, added "measure to measure of sugar; bottle and seal." A bottle was opened and rum was added and Granny had herself a drink! One little note:
On the recipe card there is one word underlined; Fine!

Thursday, May 21, 2009


I’ve written several blogs about the painting classes I’ve taken at ARTichokes, the wonderful gallery and painting school in Leawood. I took my first class in November and have painted consistently since them, and must admit…having the time of my life! It is true that professional chefs are artists. Very often, their artistic talents can be expressed outside the kitchen also. I was in my 30s when I discovered after years of painting and sculpture, it was a plate of food I wanted to arrange into a work of art. Now, I’m in my mid 60s, creeping up on late 60s, and I’ve discovered it is time for me to leave the kitchen and spend my time at ARTichokes painting. I must be honest….I have just as many mistakes and failures in the painting studio as I have had in the kitchen. I have to work at being creative! But I am having a wonderful time!
Today I completed a 2 week class taught by Ada Koch, a wonderful painter and a great teacher. My first class at ARTichokes was taught by Ada, and she truly did make me want to paint again. She makes me not only look at my subject, but she makes me see it! It is amazing what I see now!
My next class was taught by Becky Pashia, the co-founder of ARTichokes. The woman is brilliant! She is walking talent and creativity! She has actually taught me a technique that I love, and I am going to continue using from now on. Becky’s own paintings are so exciting to me, and you can see them on display at ARTichokes everyday.
ARTichokes has “Open Studio” painting on Friday nights and Saturday afternoons. Very often, there is live music on Friday nights, and with a glass of wine and a vision of my next painting, I spend the evening with people who love art, music and wine! Friday nights are usually under the guidance of Kristin Goering, one of the cutest, bubbliest, fun painters you will ever meet! Kristin works in acrylics and is a print maker.
She is usually working on one of her paintings on Friday nights, but is always there to assist, to help, to answer any questions. And did I mention her great colors and eye for design?
I am thrilled that all three of these women are joining us at Somerset Ridge Vineyard and Winery’s Art in the Vines on June 13th. It should be a wonderful art fair in an absolute beautiful setting…AVineyard! The art work will be displayed among the vines! Please mark your calendar and plan on joining us in the vineyard for the afternoon! There are 16 artists that will be there with their paintings, sculpture, jewelry, stained glass, pastels and floral arrangements. There will be live music, food and face painting…and of course, Wine!
There are 4 of us participating in the art show that are students of ARTichokes. We will be showing our paintings for the first time! Talk about pressure! But, we are all excited about the opportunity, and I am sure it will be yet another learning experience for us! It is less than a month away and I have lots of work to do, not only in the painting studio, but at the computer spreading the word about the show. Please, come spend the day with us! Bring your friends, your kids, your Mom and Dad!

Wednesday, May 20, 2009


My Trapani Sea Salt
Today I baked sugar cookies to take to painting class with me. The recipe is my Mom’s and I have printed it here before, but will again at the end of today’s blog.
I have started using some of my sea salt from Sicily, Trapani to be exact, to add an additional layer of flavor to an already tasty cookie. I have developed quite a taste for sweet and salty together. A sugar cookie with a tiny dash of sea salt is an amazing thing!
But then, I’ve discovered so many of my old recipes are so much better with my Trapani Sea Salt. I’ve also discovered there is a worlds of difference in sea salts…..Read on for a short class on the amazing crystals from the sea.
Fine Sea Salt & Artisan Salt From All Over The World
While any sea salt is going to be tastier than supermarket table salt, it’s also much pricier. Just like “wine,” the label “sea salt” doesn’t mean the product is an outstanding sea salt. Any evaporated sea water will produce sea salt: It’s the particular mineral content and quality of the water that makes a great sea salt. For your first foray into the category, you might get a better handle on sea salt by sticking to some of the standards. A good “starter kit” would be one of the great French salts, Fleur de Sel de Guérande or sel gris; a flake salt like Anglesey, Maldon or the pink Murray River salt; a smoked salt; and if you love to present with flair, alaea red volcanic salt and one of the black salts from Cyprus or Hawaii
AMERICAN SEA SALT ….Caution!
Not to be confused with fine natural sea salts, American sea salts, often found in grocery and healthy food stores, are manufactured products that have been totally refined until they are no better than sodium chloride—ordinary table salt. Yet, because they originally derived from sea water, they can be labeled sea salt. It is because they are harvested from general sea water, not pristine sources like those of fine natural sea salts, that refining, bleaching, and additives are required.
ARTISAN SALTS
Salts that are produced more extensively than by simple evaporation of seawater. These include smoked salts and sea salts that are created in solar houses rather than evaporated naturally outdoors in evaporation ponds, basins or pans. Artisan techniques are popular in countries like Japan where high humidity and/or frequent rainstorms preclude efficient natural evaporation.
BLENDED SALT
Salt that is mixed with other flavoring like herbs, berries or seaweed. As opposed to seasoned salt, which mixes different everyday seasonings with the salt for convenience, blended salts are more gourmet in concept.
FIOR DI SALE or FIOR DI SALE DI SICILIA
Like fleur de sel, this “flower of salt” is so-named because the delicate salt “flowers,” or crystals, comprise the top layer of the salt pans that rest on the surface of the sea. Fior di sale comes from the Trapani area of Sicily, and is harvested by master salt makers. Fior di Sale can only be harvested on windless mornings, when the surface waters of the Mediterranean are unruffled. Fior di sale is a very white crystal with a much lower percentage of sodium chloride than regular table salt and rich in fluorine, magnesium, potassium and all the trace elements contained in sea water. It has a delicate, sweet flavor with good taste, not too strong or salty. A finishing salt, it should be sprinkled on salads, tomatoes, fish, to finish roasts and sauces, on buttered bread and bruschetta, and on sugar cookies! It is extremely soluble and will dissolve even on cool foods. In my estimation, it is the very best! It is, by far, my favorite!
FLEUR DE SEL
French for “flower of the salt.” Like sel gris, it is also raked by hand from the salt ponds (“fields”) of the village of Guèrande, Brittany, on the coast of France. It is harvested from May to September; artisan paludiers patiently wait as the shallow pools of water evaporate, creating the precious salt crystals. The slightest movement will cause the “flower” to sink to the bottom, so salt can only be collected when the weather is warm and the sea is calm. For every 80 pounds of sel gris produced, only three pounds of fleur de sel is harvested. The salt rises to the top of the water, forming delicate flakes that, upon drying, are white and can acquire a pinkish hue. Long prized by chefs and gourmets for its high quality, fleur de sel provides a very delicate and somewhat earthy flavor. Like sel gris, it is an excellent cooking and finishing salt, smooth with a light crunch.
Now you have a little more information to help you make a wise choice when shopping for a new saltAs for the sugar cookie recipe….here it is.


Sugar Cookies with a Sprinkling of Sea Salt


2 sticks of butter, at room temperature


1 cup vegetable oil


1 cup granulated sugar


1 cup powdered sugar


1 teaspoon vanilla


4 cups flour


1 teaspoon baking soda


1 teaspoon regular salt


1 teaspoon cream of tartar


1 teaspoon freshly grated nutmeg


Cream the butter, oil, sugar and powdered sugar until light in color and smooth.


Mix in the vanilla.


Measure out the 4 cups of flour, then blend in the salt, soda, nutmeg and cream of tartar. Stir the flour mixture into the creamed mixture, being as gentle as possible. Over beating this cookie dough makes a tough cookie.


Using a small ice cream scoop, about 1 1/2", shape the cookies and drop from the ice cream scoop into a bowl of regular granulated sugar. (You can shape cookie dough into 1 to 1 1/2" balls if you don't have the ice cream scoop) Using your fingers, press the dough down into the sugar, coating the underside of the cookie with the sugar. Turn sugar side up and place on ungreased cookie sheet, about 1 1/2" apart. Now, take a pinch of sea salt and just like Emeril does his Bamm! thing...toss the pinch of salt at the cookie sheet covered with unbaked cookies. Hopefully it will scatter across the entire surface of pan and not end up on just one or two cookies!


Bake in a preheated 375 to 400 degree oven, and bake 8 to 12 minutes, until golden brown around edges. Makes about 5 dozen cookies. Store in covered container.

Monday, May 18, 2009

Sicily's Capers


I signed up for Kyle Phillips' Food Blog on Italian food and wine in 1998, and have devoured every one of them! He lives in Italy and writes daily. The other day, his blog had a section on Capers. I've used capers for years, I knew they were flower buds, etc. but it wasn't until I traveled to Sicily that I saw them growing, that I truly learned to appreciate the beautiful "zing" of a caper! The Caper plant struggles to emerge from the cracks in rocks! They thrive hanging down out of rocky cliffs. They are amazing, and the bud we call a caper adds a powerful flavor to your food. This is a photograph I took of caper plants growing out of the rocky cliff overlooking the ancient Greek ruins in Siracusa.


I bought them by the pound in the market in Catania, Sicily, and have a few left. They are heavily salted to preserve them, I just rinse them in a strainer and they are ready to enliven your taste buds! The recipe below is one of Kyle's and uses the pickled variety of capers, available in our grocery stores.


Here is what Kyle said.....
Kyle's Italian Food Blog
By Kyle Phillips, About.com Guide to Italian Food since 1996
Capperi! Or, Capers!
Monday May 11, 2009
If you have visited Southern Italy you have almost certainly seen them, green flowery (in the right season) bushes growing out of the cracks in walls or cliffs; what one eats are the buds, which are collected and either salted or pickled; they add a pleasant zesty zing to meats and vegetables, and are also a welcome addition to salads (I especially like them added to a refreshing Insalata Caprese made with tomatoes and mozzarella). I prefer salted capers because the acidity of the pickled variety covers some of the more caper delicate nuances, and also because the flavored salt is nice in salads. Regardless of which you prefer, do remember to rinse them before using them. And what to do with them?


Vitello Tonnato, chilled veal in tuna sauce, is one of THE classic summer dishes, and is also the traditional centerpiece of the Ferragosto dinner in Milano (Assumption Day, August 15). It takes a while to make but is well worth it. To serve 6-8 you will need:
Prep Time: 1 hours, 00 minutes
Cook Time: 2 hours, 00 minutes
Ingredients:
2 1/4 pounds(1 k) boned veal, cut from the rump.
3/4 pound (320 g) tuna packed in oil
3 eggs
6 salted anchovies (the canned variety, sold by delicatessens)
A handful of pickled capers
1/2 cup (approx.) olive oil
1 tablespoon white wine vinegar
A bottle of dry white wine
The juice of a lemon
A rib of celery, thinly sliced crosswise
A few leaves of sage
2 bay leaves
3 cloves (some people omit these)
Salt
A few more perfect capers, some lemon slices, and sprigs of parsley for garnishing
Preparation:Put the meat in a bowl with the bay leaves, cloves, sage and celery, and pour the wine over it. Cover and marinate in the refrigerator for 24 hours, turning the meat occasionally. The next day place the meat in a Dutch oven. Strain the wine and add it to the meat, then add enough water to cover. Lightly salt the pot and simmer the meat for an hour. In the meantime, wash, scale and bone the anchovies. When the hour is up add them to the pot and continue boiling for another half hour; the liquid should be reduced by half. Hard boil the eggs, run them under cold water, peel them, and extract the yolks (you can discard or fill the whites as you prefer). Rinse, squeeze dry, and mince the capers. When the meat is fork-tender remove it from the pot and strain the broth into a bowl. Transfer the fish filets to a clean strainer and press them through it, together with the tuna and the yolks, into another bowl. Stir in the minced capers, the vinegar, the lemon juice and the olive oil, and then dilute the sauce to your taste with some of the reserved broth. When the veal has cooled slice it finely and lay the slices out on one or more platters (you want just one layer). Spread the sauce over the meat, garnish the platters with the lemon slices, capers and parsley. Cover them with plastic wrap and chill them in the refrigerator before serving.


Art in the Vines

June 13th 1 to 6:00pm at the beautiful Somerset Ridge Vineyard and Winery.


Come enjoy and support the work of local artists, a local musician, and enjoy a glass of truly delicious local wine!


Artists: Becky Pashia, painter


Ada Koch, painter


Kristin Goering, painter


Brownie Hayek, floral arrangements


Rich Hayek, pastels


Claudia Tru, painter


Mike Driggs, sculptor


Amy Thomas, jewelry


Marcia Streepy, painter


Diane Boone, painter


Ellen Sweeney, painter


Brian Stewart, stained glass


Winnie Davis, painter


Vicki Johnston, painter


Kristin Howard, painter


and Kay Tucker, painter


Music will be by Kathryn Lorenzen.


There will be Face painting for the kids, Food and Wine, and the incredible views of the vineyard and surrounding countryside.

Somerset Ridge Vineyard is the perfect place to spend an afternoon, please join us.


I want to thank Becky Pashia and all of the staff at ARTichokes Gallery in Leawood for their assistance in the planning for the
1st Annual Art in the Vines.

Tuesday, May 12, 2009

Yesterday it was Fried Froglegs....today it is

Pan-Fried Catfish
On Mother’s Day, my Grandson, Bing, helped feed the catfish that are abundant in the vineyard pond. It was a great treat for him; his eyes were as big as saucers! The fish are fed a special food and look forward to meal time. So much so, that when they hear the 4 wheeler approaching the pond, they come rushing to the water’s surface, tails and fins flipping and flapping, making quite a splash!
Catfish used to be considered a “junk” fish, a “bottom-feeder” fish not worthy of being prepared for a fancy meal. Today’s farm-raised catfish are a different story. I think a platter of crispy, crunchy crusted fried catfish makes a delightful meal, particularly when paired with homegrown sliced tomatoes and a very special sauce. Hush puppies are wonderful little morsels, but I prefer hot buttery cornbread. It’s true, fresh corn on the cob, dripping with butter and sprinkled with sea salt and freshly cracked black pepper would be delicious, but I think with the breading on the fish and the cornbread, you don’t need another starch on the plate. But, that is your choice to make.
Living in Kansas, farm-raised catfish are always available, but ocean fish are a different story. You need to take the time to find a great source for fresh fish and seafood. Here in Overland Park, we are fortunate to have Whole Foods. These beautiful stores have some of the best fresh fish and seafood because they have their own fishing fleet. They supply their own stores with the very best. Their fresh catfish is so much better than that you find in the chain grocery stores. You want to buy the very freshest.
When shopping for catfish, you first must decide if you are serving a whole catfish to each guest, or will there be a big platter of fillets on the table. I love a whole catfish myself, but with guests, you may not want to get into the whole bone thing. When being served a whole catfish in a good restaurant, the waiter will offer to de-bone your fish for you, right there at the table. At home, you must also consider your pan situation and stove top space. Frying whole fish takes a lot of room, a lot of pans, a lot of oil.
These two decisions made, you are ready.

Pan-Fried Catfish Fillets
Serves 4
1 cup unbleached all-purpose flour
½ cup fine-ground cornmeal
Salt and pepper
1/8 teaspoon cayenne pepper
2 large eggs
2 to 3 cups vegetable oil
2 12 ounce catfish fillets

Here we go again, another decision. What pan to use. Let me suggest you use a Dutch oven for frying. A skillet is simply too shallow to protect you and your stovetop from hot splattering grease! Pour the oil into the pan, adding enough to make ½” oil in bottom of pan.
Next, preheat your oven to 200 degrees. Set a wire rack over a rimmed baking sheet, place the sheet on the middle rack in the oven.
Now for the fish; trim the skin and the dark fatty flesh from the fillets. Cut each fillet in half lengthwise. This gives you 4 equally sized fillets to insure they all cook in the same amount of time.
Place ½ cup flour in a wide shallow dish. In a separate wide shallow dish, mix together the remaining ½ cup flour, cornmeal, 1 teaspoon salt, ¼ teaspoon pepper and cayenne. In a third shallow dish, whisk the eggs with 1 tablespoon oil until uniform.
Pat each fish fillet dry with paper towels. Lightly salt and pepper each side of fillets, then drop into the bowl of flour. Pat the fillets to dust each lightly. Next, dip in the egg, turning to coat well. Hold each fillet over the bowl to let excess drip off. Next coat the fillets in the cornmeal mixture. Shake off excess and lay on another wire rack set over a baking sheet (not the one in the warm oven!)
Heat the oil in the Dutch oven over high heat until the temperature reaches 400 degrees. Do not let the oil reach the smoking point.
Place 2 fillets in the hot oil and fry, turning one time, until golden brown, about 4 minutes. Adjust the heat as necessary to keep the oil between 385 and 390 degrees. Remove the fillets with a slotted spoon, and lay them on a plate lined with several layers of paper towel. Blot to help remove any excess oil. Transfer fried fish to the wire rack in the warm oven. You do not want to keep the fish on the paper towel very long because it will make the bottom crust turn soggy.
Bring the oil back up to 400 degrees and fry the remaining two fillets.
To serve these fillets, prepare lemon wedges and/or a dipping sauce.

Most of us have had our fried catfish with tartar sauce, an excellent choice. But there are other sauce ideas you might prefer. Here is one I think is delicious, it is rich and complex.

Creamy Chipotle Chile Sauce
½ cup mayonnaise
½ cup sour cream
4 teaspoons minced canned chipotle chiles in adobo sauce
2 cloves garlic, minced
4 teaspoons minced fresh cilantro leaves
2 teaspoons fresh lime juice
Mix all ingredients in a small bowl. Cover and refrigerate until flavors blend, a minimum of 30 minutes. I make mine early in the day. This sauce can be refrigerated for up to several days.

To make your own Tartar Sauce:
¾ cup mayonnaise
1 ½ tablespoon minced cornichons (tiny French pickles) plus 1 teaspoon cornichon juice
1 tablespoon minced scallion
1 tablespoon minced red onion
1 tablespoon capers, minced
Mix all ingredients in a small bowl. Cover and refrigerate, just as in Chipotle recipe.


What’s for dessert? A natural!
Lemon Meringue Pie
Lemon Filling:
4 egg yolks (reserve whites for meringue)
1/3 cup cornstarch
1 1/2 cups water
1 1/3 cups sugar
1/4 teaspoon salt
3 tablespoons butter
1/2 cup lemon juice
1 tablespoon finely grated lemon zest
1 (9-inch) pre-baked pie shell
1 recipe Meringue, recipe follows
Directions
Adjust the oven rack to the middle position. Preheat oven to 375 degrees F.
Whisk egg yolks in medium size mixing bowl and set aside.
In a medium saucepan, combine cornstarch, water, sugar, and salt. Whisk to combine. Turn heat on medium and, stirring frequently, bring mixture to a boil. Boil for 1 minute. Remove from heat and gradually, 1 whisk-full at a time, add hot mixture to egg yolks and stir until you have added at least half of the mixture.
Return egg mixture to saucepan, turn heat down to low and cook, stirring constantly, for 1 more minute. Remove from heat and gently stir in butter, lemon juice, and zest until well combined. Pour mixture into pie shell and top with meringue while filling is still hot. Make sure meringue completely covers filling and that it goes right up to the edge of the crust. Bake for 10 to 12 minutes or until meringue is golden. Remove from oven and cool on a wire rack. Make sure pie is cooled completely before slicing.
Meringue Topping:
4 egg whites
1 pinch cream of tartar
2 tablespoons sugar
Place egg whites and cream of tartar in the bowl of a stand mixer fitted with the whisk attachment. Beat egg whites until soft peaks form and then gradually add sugar and continue beating until stiff peaks form, approximately 1 to 2 minutes. Use to top lemon filling.
Yield: topping for 1 (9-inch) pie

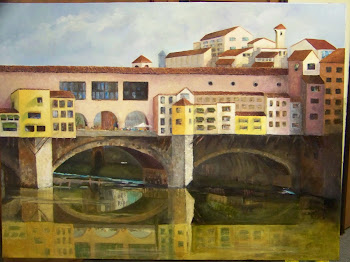
Ponte Vecchio, Florence, Italy

Ponte Vecchio, Florence, Italy
oil painting by Kay Tucker

Somerset Autumn on Wea Creek

Somerset Autumn on Wea Creek
Oil Painting by Kay Tucker, Private Collection

Floral

Floral
oil painting by Kay Tucker

Kansas Storm

Kansas Storm
oil painting by Kay Tucker, Private Collection

Watercolor Collage

Watercolor Collage

Tempo al Tempo....All in Good Time

Tempo al Tempo....All in Good Time
48"x36" sculptural painting by Kay Tucker