Monday, March 30, 2009


A Woman with Power Tools!

Today I bought a saw….not some pathetic hand operated saw…I bought an electric saw. I would imagine bets are being placed in Vegas as to how soon they will nickname me “Stubby Kay”! I really need this saw. I am painting like a wild woman and can’t afford to have a professional framer make a frame for each of my paintings, so, I have to learn to build my own. They can be as simple as lattice board cut to correct lengths, painted or stained, then nailed to the stretcher boards of the canvas. Or….I can get fancy with moldings and build some more intricate frames. I think I will stick to the former, basic frames until I know what I am doing! Even lattice boards are $5.00 each for 8’ length. The fancy molding is $12.00 to $30.00 each….Until my new saw and I become great friends, I’ll save my money!

Painting is going very well, and I am looking forward to joining the artists showing at our very own Art in the Vines at Somerset Ridge Vineyard on Saturday, June 13th! Hope you have marked your calendars!

Today I found a recipe for German Beer Coffee Cake. I emailed it to my good friend Inge Richter, who was born in Germany and is an excellent cook. I asked if she remembered her Mother using beer as a leavening agent when baking. She replied that she did not remember her Mom ever using beer in any cooking.

I thought about it and decided to ask you, my loyal followers, if you would give this recipe a try and let me know what you think of it. I, too, am going to bake this coffee cake. If you will, please, try this recipe, then send me an email telling me about the experience and what you thought of the coffee cake. Could be fun…and the recipe does sound good, full of good things!

So, that’s the challenge….here is the recipe:

German Beer Coffee Cake
2 cups packed dark brown sugar
1 cup butter, softened
2 eggs
1 teaspoon cinnamon
1/2 teaspoon allspice
1/2 teaspoon ground cloves
3 cups sifted all-purpose flour
2 teaspoons baking soda
1/2 teaspoon salt
1 cup chopped walnuts
2 cups chopped dates
2 cups beer

1. Combine brown sugar and butter in a mixing bowl. Cream until smooth and well-blended. Add the eggs, one at a time, beating well after each addition.

2. Sift cinnamon, allspice, cloves, flour, baking soda, and salt together. Dust walnuts and dates with a small amount of this mixture.

3. Add remaining flour mixture alternately with beer to creamed mixture, blending well after each addition. Stir in walnuts and dates. Spoon batter into large, well-buttered and floured tube or Bundt pan.

4. Bake in preheated 350-degree oven for 1-1/4 hours or until cake tester comes out clean. Let stand 5 minutes, invert onto a wire rack. Sprinkle with powdered sugar and place on a serving plate.

Looking forward to hearing from you very soon…let’s say by Saturday..Have fun!

Sunday, March 29, 2009

The snow and ice are melting! We are all praying this was our last winter storm; but, if it isn’t, we will plow ahead through whatever…people from the Midwest are pretty flexible!
I stayed in all day yesterday during the beautiful snow storm, it was gorgeous if you didn’t have to be out in it. I didn’t even walk to the mailbox. My mail mostly consists of renewal notices for magazines nowadays. I’ve decided to not renew any of the monthly publications I’ve taken for years. I found I was receiving so many that I didn’t get them all read before the next batch started to arrive! I do remember how anxiously I awaited my copies of Gourmet, Bon Appetit, and Food and Wine. Now, all are on line and I read far more of each issue….of course, they are not posted as early as the printed copies are sent out, but most are not time sensitive, so it doesn’t matter. Bon Appetit and Gourmet are available on line at http://www.epicurious.com/ and Food and Wine is www.foodandwine.com . I do like to go to the bookstore and buy the Thanksgiving and Christmas issues just to keep. Great photography of food and table designs!
On line food and cooking pages are non-stop! New pages are popping up everyday. Many are pretty bad, but some are really good and have great archives storing many year’s worth of recipes. I particularly like the foreign sites that can be pulled up in English. I look at them for food ideas, but also as an educational tool for language and travel.
You can sign up for newsletters from some of the pages, then daily or weekly you will receive a newsletter via email. It is a great way to keep up with food trends at home and abroad.
Some of my favorites are:
http://www.kingarthurflour.com/
http://www.foodnetwork.com/
http://www.marthawhite.com/
http://www.recipes4us.co.uk/Cooking%20by%20Country/Germany.htm
http://www.williams-sonoma.com/recipe/index
http://www.colincowie.com/recipes
http://www.about.com/food

Eureka! The About.com page is a fantastic site for regional American and foreign food sites. You can sign up for newsletters, my favorite being http://italianfood.about.com/ by Kyle Phillips, who lives in Italy.
As you see, I did list the Food Network link. I personally feel this network and web site has been bastardized. If you can get through the all of the ads and the junk programs like “Unwrapped” with that idiot Marc Summers as host, you can find excellent information and recipes from the world class chefs they have on their schedule. The problem with the Food Network is they over-do everything. We’ve had Emeril shoved down our throats for too long….One more “BAMM!” and I am going to go BERSERK! And Rachel Ray’s cutesy little cooking terms are wearing on my nerves also. I’m not a two year old, a sandwich is a sandwich, not a “Sammie”.
Okay, so maybe I am showing signs of cabin fever already…getting kind of bitchy! What would make me happy?.....Lets see, something from Colin Cowie is bound to do the trick!

Colin Cowie’s Tortilla Soup

Vegetable oil for deep-frying
8 6-inch flour tortillas, julienned (cut into thin strips)
1/4 cup olive oil
1 cup finely chopped white onion (from 1 1/2 to 2 medium onions)
1 tablespoon ground cumin
1 tablespoon paprika
1/2 teaspoon cayenne pepper
1 teaspoon ground coriander
6 cups chicken stock
4 medium garlic cloves, crushed
4 cups chopped tomatoes
1 bay leaf
3 tablespoons chopped fresh cilantro
2 boneless, skinless chicken breasts (about 3/4 pound)
1 tablespoon coarse sea salt
1 large ripe Hass avocado, cut into 1/2-inch cubes
1 cup shredded, aged cheddar
1/2 pint sour cream, for garnish
1. Fill a large pot to a depth of 3 to 4 inches with vegetable oil. Heat the oil over medium-high heat until it reaches 350 F. The temperature of the oil should not exceed 375 F, nor should it begin to smoke. Once the oil is hot enough, lower the heat to medium. Add the tortilla strips and fry until crisp and golden, about 1 minute. Remove the strips with a skimmer or slotted spoon and drain well on paper towels.
2. Heat the olive oil in a large stockpot over medium-low flame. Add the onion, cumin, paprika, cayenne, coriander, and half the tortilla chips. Sauté for 8 to 10 minutes.
3. Add the stock, garlic, tomatoes, bay leaf, and 2 tablespoons of the chopped cilantro. Season the chicken breast with 1/2 tablespoon of the salt. Add to the pan with the remaining 1/2 tablespoon of salt. Reduce the heat to low and simmer for 1 hour.
4. Remove the chicken and bay leaf with a slotted spoon. When cool enough to handle, shred the chicken and set aside. Discard the bay leaf.
5. Purée 2 cups of the soup in a blender or food processor, taking care not to overload the bowl. Return the blended soup, to the pot and continue cooking for an additional 2 minutes. (Or purée additional batches of soup, 2 cups at a time, depending upon your desired consistency - even purée all of it if you like.)


Oh yes, I'm feeling better just looking at the photo. It was taken from Cowie's webpage along with the recipe! Thank you Mr. Cowie!

Friday, March 27, 2009


Painting by Sue Haynes


I still have email coming in concerning the Pig 101 dinner! Thank you, everyone for your support and interest Here are a few comments from those emails….
From Jan in Colorado….I just read your blog describing the success of your Pig 101 night at Jasper's. I'm so proud of you! You're certainly making a name for yourself (and it's a good one!). Congratulations of the Smithfield offer--that'll be quite an experience for you. They obviously know a good thing when they see it! I'm sure Arch is smiling down. No, actually, Arch would be laughing his big, hearty laugh!
We're going to Williamsburg, Virginia, in early May. Maybe our paths will cross. I can't remember if you said when you'd be going to Smithfield.
The thanks part of the subject line is for the French bistro menu I made for company. It was a huge hit and our guests were effusive in their praise. I told them I'd pass it on to you!
You go, girl!

This one is from Donna, who attended the dinner…..

I know Bill sent an email out to your class regarding the Pig 101 event but I must tell you, it was a total WOW experience for us. We've never done anything like that before but it won't be the last.
My question for you is: Are these dinners really for just members of the Slow Food KC Chapter or is anyone invited? Do you ever do cooking classes/dinners at the Culinary Institute? I know Jasper does.
Again, thanks for a great evening. I never expected to be served that much food nor drink that much "good" wine from a local vineyard. We also had a fun time with Derek Donovan from the Star - hearing about his family, his work, his hobbies and his appreciation for good food and wine. Plus I get to see his face every morning in the paper; however, he's much cuter in person. Again, a totally WOW evening.
Great pictures of you and Jasper on your blog-
Donna

And finally, from Sam in Omaha…..
Kay, we love your blog and wish we were closer to attend some of your events. The Pig 101 dinner must have been a very special evening. Just reading your blog building up to the dinner had both Debbie and me anxiously awaiting the news about its success. Congratulations!
Will you ever come up to Omaha to teach and cook? We will be there if you do!


Thanks to all of you who have written , but now it is time for Spring Time Menus! Just because we are expecting up to 12" of snow doesn't mean it isn't Spring...I hope!

I know not all grills and smokers are made by Weber, but the care of a grill and the need for a new recipe for smoking are an important part of (God, I hate this term!) Spring Cleaning!

So, go to http://www.weber.com/ and check out their whole webpage. You can even order parts for your Weber grill. I have a Weber gas grill, wish it was charcoal, but live in a condo attached to other codos and we all have wooden decks....so, gas grills are the way to go for me. On Weber's page, check out their Grilling tips section...great grilling charts for meats.


Large Abstract Class is completed

What happened to our beautiful springtime weather? We’ve been threatened with this crud for several days, but the storm took its time getting here. I expected to wake up this morning to at least 6” of snow….but all it was doing was raining. It is now 2:20pm and it has finally begun to snow. They have backed off the 8 to 12” forecast, now saying 2-4”. Whatever! Just get on with it, get it over!
I was so worried about the vines at the vineyard, but Cindy reminded me that the vines do not bud out until the 2nd week in April…..how they know the date beats me! Anyway, the vines love this moisture, they will soak up all they can and be ready for bud break in 2 weeks. Hopefully the super cold weather will be long gone and our sunshine will be back!


Painting by Vicki Johnston


I am spending this cold wintery day in my pajamas with a paint brush in my hand. I decided to take advantage of a day at home and do at least one more canvas. I am painting 3 to 4 days a week now, which I love….just worried about running out of ideas.
Backy Pashia, co-owner and resident artist at ARTichokes in Leawood, has gotten me hooked on abstract design. I just completed her Large and Small Abstract class, and I loved it. I was pretty shaky in the beginning, but I am actually proud of my large abstract.
The entire class, all 8 of us, learned a lot about abstracts. At the beginning of our last class, we had a critique period before we completed our paintings, each telling what we liked about our painting, what was giving us trouble, etc then Becky spoke a moment on each painting. She is an amazing teacher and instructor. I use both terms because she can instruct you how to do it, then she can teach you why, the reasoning behind each brush stroke, each color on your palette. She will advise you on your painting, but she will not do your painting for you; that is another thing I admire about Becky.

Painting by Kay Tucker


Friday evenings at ARTichokes are always fun. It is “open studio” time, meaning you can go in and paint for a small studio fee. There is live music about every other week, wine, appetizers and some wonderful art to see. The gallery part of ARTichokes is a great place to see what artists from across the country are doing. An added advantage of coming to ARTichokes on Friday evening is the connection with Room 39, one of the excellent restaurants in Mission Farms. A doorway has been opened up through to the restaurant. Go in and put your name on the waiting list, then step through the doorway into the gallery. They will buzz you when your table is ready; what a concept!
Painting by Audrey Benskin

Here is a recipe just for all you ARTichoke painters and definitely for Becky. It is a very old recipe, one brought over from the old country. It can easily be called Italian immigrant cooking.


Carciofi Ritti also known as Stuffed Artichokes
6 large artichokes
2 ½ cups Italian seasoned bread crumbs
2 large eggs
¾ cup grated Romano cheese
¼ cup minced fresh parsley
1/8 cup minced garlic
½ cup plus 1 tablespoon olive oil
½ teaspoon pepper and salt to taste

Wash the artichokes well in a cold saltwater bath. Cut off the stems and slice off a thin layer from the bottom of each artichoke. Lightly cut each artichoke bottom crosswise. This allows the juices to penetrate the artichokes from the bottom of the pan. With a sharp knife or kitchen shears, cut off the pointy tips around each artichoke, as well as the very top. Spread the leaves apart like a flower. Set aside.
In a medium bowl, combine the bread crumbs with the eggs, cheese, parsley, garlic, ½ cup olive oil, pepper and salt. The stuffing should be crumbly, not sticky. Loosely stuff each artichoke up to the top with some of the stuffing, taking care not to overload them. The artichokes should still look like flowers, even with the leaves stuffed.
Fill a large pot with about an inch of water and add the remaining tablespoon of olive oil. Stand the artichokes in the pan, making sure you don’r get any water in the stuffing. Bring the water to a boil, cover tightly, then bring down to a simmer. Cooking time will vary from 30 to 60 minutes, depending on size and thickness of artichokes.. Pull a leaf off periodically to see if the artichokes are tender. Serve while hot as an appetizer or as a vegetable side dish.
Serves 4 to 6


One more recipe featuring Artichokes.....
Artichoke Pie, an appetizer
1 8-oz package frozen artichoke hearts, 8- to 9-ounce package
4 each eggs
1/2 cup diced pepperoni
1 cup shredded mozzarella cheese
1/2 cup grated cheese such as Fontina or Monterey Jack
1 each 9" pie shell

Cook artichokes, drain and cut. Beat eggs thoroughly and add all ingredients. Mix well and pour into 9" pie shell. Bake at 375 degrees for 45-60 minutes. May be frozen after baked. Serve as part of antipasto or as a first course.
The great thing about this recipe is that you can keep all of the ingredients handy to throw this great appetizer together at the last minute! To make it even more convenient...bake several and freeze them. Remove from the freezer several hours before you want to serve them. I've even popped thawed pies into the a very low oven for 10 minutes, just to insure they are warm and delicious.


Wednesday, March 25, 2009

The Ogg Farm and Old Nell, plow horse extraordinaire!

The Ogg Farm……
I was going through some family photos the other day and saw some 50 plus year old pictures taken at the farm….there were my aunts and uncles standing outside the side door of the farm house. It was probably on a Sunday afternoon after consuming a huge lunch….everyone looks a little out of it! Anyway, among the photos were pictures of my 2 uncles, Clarence and Russell Ogg.
Uncle Clarence was accepted and enrolled at William Jewell College in Liberty, Missouri, but at the last minute decided he didn’t need to go, he just wanted to be a farmer! He figured he didn’t need that degree to be a farmer, A farmer he became, complete with farmer’s tan.
Uncle Russell, on the other hand, became a nationally known photographer who lived in BelAir and Palm Springs, California after leaving the School of Journalism at the University of Missouri.
The sons of Clyde and Florence Ogg were as different as night and day!
When they were just young boys, my Granddad, William Clyde Ogg, informed them one morning that the three of them were going to replace the fence that surrounded the entire farm. They started by scouring the woods on the farm for appropriate fence post material. They finally had enough cut to start the actual re-fencing, which ended up taking every Saturday for many months. I understand Russell, who loved to read, stuffed his bib overalls full of books, just in case he got a break!
Now, come back to the early 1990s. After my Aunt Zelma died, I would drive to Richmond, Missouri to visit Uncle Clarence. He would put me in his car and we would drive by the long section of fence along the embankment above the gravel road. It wasn’t until I was a 50 year old woman that my uncle told me about the “fence story”. I discovered the fence I had seen for many years was the same one Grandad, Clarence and Russell spent the summer building. Those posts, which always seemed so flimsy to me, had three rows of barbed wire strung between them and the overall impression I had was a small calf or a 25 mile an hour wind could have taken the entire fence down. I suppose that idea was one of a city girl! The fence had remained just the same, same posts, same wire for over 70 years! I would imagine if I drove down there today, it would still be wrapped around the “old Ogg homestead”. I have a photograph taken in the 50s that shows part of the fence surrounding the horse pasture, and there stands old Nell in her retirement. She had pulled a plow and my Granddad around the farm for years.
My Uncle Russell was the 4th of the Ogg siblings, my Mom being the 5th. She and Russell were a handful, I’m thinking. I’ve heard her tell the story of the two of them making doughnuts. They covered the entire farmhouse with a heavy dusting of flour by the time they had a plateful of rock hard doughnuts!
When my Grandmother made them, they were heavenly, as was everything she made. Her homemade noodles that she fixed with chicken were amazing. The slick texture, or I suppose the “no texture”, on today’s packaged noodles is so
disgusting! They are maybe 1/3rd the thickness of homemade and have a pale, sickly color to them….now Minnie Florence’s noodles were an experience to remember!
To make the best homemade noodles, go find yourself a country stand where they are selling fresh farm eggs. They will be the most glorious colors from blue to brown, with an occasional ivory colored one mixed in. The exciting thing about farm eggs is the yolk…like looking at a beautifully polished orb of gold. If you crack open a farm egg on to a flat surface, then crack a store egg next to it, you can immediately tell the difference. The yolk on the store egg is flat and pale yellow in color. Now, get down eye level with the eggs and you can see the farm yolk standing up tall and mighty, while next to it lies the poor, pathetic, wimpy store yolk.
So, you ask, what is the difference when you use them in pasta dough? Just try to picture chicken and noodles made with each….pale white chicken meat, pale white noodles made with wimpy pale eggs, or, glorious golden noodles wrapping themselves delicately about the perfectly cooked, succulent chicken, all snuggled in a rich, naturally thickened gravy. See what I mean? Food you can get excited about! I know you are going to make homemade noodles soon!


Minnie Florence Ogg’s Homemade Egg Noodles
4 cups all-purpose flour
1/2 teaspoon salt
1/2 teaspoon baking powder
8 egg yolks

1. Sift together the flour, salt and baking powder. Add egg yolks and mix until dry ingredients are moistened.

2. Press into a ball and cut in quarters. Roll out on floured surface 1/8 to 1/4 inch thick; cut to desired width and length. Lay on linen dish towel or wooden dowel to dry.
Add to broth such as chicken or turkey and cook until done.

So, are you wondering what ever happened to Uncle Russell? As I said he graduated from MU, married a girl from Trenton, Missouri who he met in the Journalism school. Her name was Norma Lee Browning. You can Google both names and up will pop some pretty impressive information on them.
They traveled the world, she wrote about it, he photographed it.
After many years of being diabetic, Russell finally lost his eyesight. That is a terrible thing to happen to anyone, but when you are a photographer….
There is a book written about his experience as he lost his vision, written by my Aunt Norma. The title is “He Saw a Hummingbird”. It is an amazing and inspirational story.
Of course, I think the Ogg Farm Fence story is pretty amazing!

Things are looking bad….the sales are up on Ramen Noodles by 12 to 15%. A cup of Ramen Noodles will cost you about 50 cents.
That’s pretty cheap eating…..and what college student, past and present, doesn’t know about Ramen! I bet they aren’t as good as my Grandmother’s!

It has been 2 days since Pig 101….buying pork tomorrow!

Tuesday, March 24, 2009


Chefs Jasper Mirabile and Kay Tucker at Pig 101 Dinner


Pig 101 is over, Pig 102 is now in the works….and I thought I was going to rest a few days and then purge pork from my refrigerator for a day or two! Ha! Testing in the kitchen begins right away; there are stacks of cookbooks, reference books and my laptop all piled up and surrounding my chair in the living room. There are more cookbooks on the kitchen table!
The evening at Jasper’s was, in my estimation, a great success; I had a ball! I am in my element when I am surrounded by family, friends and food!
One of the things that made the evening so special was we celebrated my Grandson Alex’s 19th birthday. Another was, there were many attending the dinner that I shared the trip to Sicily with. Let’s see, reason #3 is Jasper’s mother’s pastry cream! OMG! The list goes on and on because there was not one reason for it to not be a perfect evening! Jasper was in fine form and his kitchen staff deserve medals for putting up with me for 2 weeks! It isn’t that I am demanding of them…I’m just used to doing everything myself. I needed to be hands-on with each course. They probably thought I was a pain in the butt! I am also shorter and wider than all the men in that kitchen, they tried so hard to not run over me and to be respectful to an elderly lady!
There was a reporter from the Kansas City Star there to take notes for an upcoming article. I’ll let you know, if I find out, when it will be printed.

Our menu was:
Receptione
Jasper Jr.’s Califlower & Crispy Pancetta Soup en Cappuccino

Antipasti
Chef Kay’s Pork Pate & Head Cheese
Crostini & Foccacia

Primi
Lensi Artisan Pasta alla Carbonara

Piatti del Giorno
Wild Boar & Soft Polenta
Archibald Sauce

Sicilian Mama’s Neck Bones & Sunday Sauce

Zampone & Cotechino
Zuppa de Lentiche

Brick Oven Roasted Pork Belly
Tuscan Beans

Doice
Nana Mirabile’s Olive Oil & Polenta Torta
With Pancetta Candy
(and Nana’s Pastry Cream!)

Somerset Ridge Vineyard and Winery
Oktoberfest Wine
Flyboy Red Wine
Ambrosia Dessert Wine

See what I mean….lots of food and wine!

I have to tell you one more thing…probably the most exciting thing for me….George Richter of Smithfield Foods was a guest at the dinner and he asked Jasper and I to go to Smithfield, Virginia and recreate this meal for them. I did not hesitate….YES! Don’t know when yet, but I am going! Thank you again, George, for the Farmland Pork we used for this dinner, it was perfect.
And I certainly thank you for the opportunity to cook for you in Virginia! When does the company jet pick us up?
So Cool! And for those of you that follow my family history and Ogg Farm posts... do you think my two grandmother's are smiling?

Sunday, March 22, 2009


Another memory from the 1950s…….
Did your Mom used to make Salmon Croquettes for you when you were growing up? Mine did and I loved them! Of course, in land-locked Boone County, Missouri, canned salmon was our only choice. And she served creamed peas with them, made with canned peas! Maybe it was because I was a kid, maybe it was because I’d never eaten fresh from the garden peas and beautifully grilled fillet of Salmon, but to me, that particular menu was one of my favorites. In the late 1940s, my Dad went to work as a salesman for Birds-Eye Frozen Foods and we discovered the joys of frozen vegetables. Peas were one vegetable that changed dramatically with freezing. They are not bad in cream sauce either!
Salmon croquettes and crab cakes are so much better with the real thing. Salmon is available everywhere, and as for crab, you can check with your fish and seafood manager at your grocery store for availability of fresh or frozen crab meat.
Here is my recipe for the Salmon Croquettes….

2 ounces onion, small dice
3 ounces whole butter
3 ounces flour
8 ounces milk
1 pound salmon, poached and flaked
fresh dill, chopped, to taste
salt and pepper, to taste
1 tablespoon lemon juice
flour as needed for breading
egg wash as needed for breading
Panko bread crumbs as needed for breading

1. Sauté the onion in the butter until translucent.

2. Add the flour and cook to make a white roux.

3. Add the milk to make a heavy béchamel sauce. Cook the sauce until very thick, approximately 5 minutes.

. 4. Remove the sauce from the heat and transfer it to a mixing bowl. Add the flaked salmon. Season the mixture with dill, salt, pepper and lemon juice and mix well.

. 5. Cover and refrigerate until cold.

. 6. Divide into 12 equal portions. Form each portion into a cone or patty shape. Bread the croquettes using the standard breading procedure, first in flour, then egg wash, followed by bread crumbs

. 7. Using the basket method, deep-fry the breaded croquettes until done, if possible. If not, use a deep saucepan with

Yield: 12 Croquettes

The traditional sides with Salmon Croquettes are Buttered New Potatoes and Creamed Peas, but in today’s world you might wish to go lighter. Whatever you choose as sides, I hope you enjoy the croquettes!

Back to my memories of the early 1950s

My Dad left Bird’s Eye Foods in 1951 and we moved from Columbia to Kansas City, Missouri. We moved into a three-story house at 3519 Campbell, right behind Central Presbyterian Church
at Armour and Campbell. The house was built many years before, around 1890, by the Swift family. They had just arrived in the Kansas City area having opened their packing plant here. It
was constructed with 18” thick stone walls. The fireplace in the living room was of green Italian marble with a stained glass window on each side above mantle. The crown molding in this
house was a minimum of 12”deep, very dark and heavy. There was an additional stained glass window in the entry hall. I loved that house! I could have lived there forever. Always cool in
the summer, warm in the winter…18” stone walls will do that for you! The front porch, all stone, was L shaped and huge. It was such a great place to sit and read. The house was surrounded by
giant trees and was situated on a street that was covered by a “tunnel” of trees.
You will never guess what happened to that house…when Central Presbyterian Church bought the house, they did so to have the land for a parking lot!....Yep, the house was demolished! So sad, a parking lot!
I haven’t driven to the old neighborhood in close to 25 years, but I am sure I would be saddened by what I would see. I wonder how many of those big beautiful houses have been torn down....

I don’t know anything about the church’s history since we moved from the neighborhood, not sure if the building is still home to the same congregation. I do know it was a beautiful sanctuary, rich woods, gorgeous windows, and a massive pipe organ. How I loved Christmas Eve Midnight service at Central Presbyterian! I’ve tried to find a church in my neighborhood that has the traditional services and music that I grew up with, but I can’t find one. They are all so contemporary in their style and thinking, I guess I’m just too old to change.

Friday, March 20, 2009

Don't you just love the smell of a cobbler baking in the oven? That aroma is so wonderful that it is hard to wait for it to cool down enough to eat!
Do you know the difference between
a Cobbler, a Crisp, a Crumble, a Brown Betty, a Buckle, a Grunt, or a Slump?


It is a heavy question!


Well, let me try to clarify this for you.

All of these desserts are simply baked fruit with a crust!

Some are under a crust of flaky pie crust, some under biscuits, some under a crumble mixture, I've even had some under crunchy buttered granola!


My recipe for Strawberry Rhubarb Cobbler has a biscuit topping. I hope you enjoy it...and don't forget the vanilla ice cream! It is like unAmerican to eat warm cobbler without a big scoop of vanilla ice cream!

FILLING:
1 1/4 cups sugar
3 tablespoons all-purpose flour
1 1/2 teaspoons cinnamon
1 1/2 teaspoons orange rind
6 cups rhubarb, coarsely chopped
3 cups sliced strawberries
TOPPING:
1 1/2 cups all-purpose flour
3 tablespoons sugar
1 1/2 teaspoons baking powder
1/2 teaspoon baking soda
1/4 teaspoon salt
3 tablespoons margarine, chilled
1 cup buttermilk

1. In large bowl, combine sugar, flour, cinnamon and orange rind. Add rhubarb and strawberries; toss well. Spread mixture in 13 x 9 in. baking dish. Bake in 400F oven 10 minutes.
2. In large bowl, combine flour, sugar, baking powder, baking soda and salt. Using fingers or two knives, cut in margarine until mixture resembles small peas. With fork, stir in buttermilk just until soft dough forms.
3. Drop by tablespoonfuls in 12 mounds on top of hot fruit filling. Bake in 400F (200C) oven 25 minutes or until topping is golden brown and has risen.


Tuesday, March 17, 2009


Catching up……..

One week from tonight is the big Pig 101 dinner, which means the rest of this week I will be knee deep in pork! While Jasper is in Arizona, I will be stuffing the Zampone, making the Pork Pate and of course, babysitting with the marinating boar.
Reservations are filling up! I am so pleased to have some very dear friends coming to share the evening with me. It is going to be a great evening!

I am looking forward to moving away from pork as soon as the dinner is over….I think my next obsession will be over spring vegetables and seafood. I hope you love both! I know I have an evening with friends coming up and I have promised a big pot of cioppino. I also have a dinner for friends coming up on April Fool’s Day….have to think of something fun for that one! One of my guests is anxious to hear about Taormina, Sicily, so I suspect it will be a Sicilian menu.

Painting is still my ”high” for the week, I absolutely love it! Spending time at ARTichokes, surrounded by incredible paintings, and learning from the talented instructors is just what I need. I have a makeshift studio downstairs here at home, but I just don’t do well down there by myself. I need to have questions answered, I need to be encouraged…let’s face it, I need someone to coddle me, to praise me! I’m such a baby!
It has been years did I worked on Abstracts, I’m not sure I understood the process then, but with Becky Pashia’s help, by golly, I think I’m catching on!
I am painting Thursday nights, Friday nights and Saturday afternoons at ARTichokes this month. The open studio session on Friday nights is a favorite of mine. This last Friday evening there were canvases, oil paints, live music, wine and fellow painters. What more could I want?

The plans for the 1st Annual Art in the Vines are moving right along. I am pleased with the artists that have committed to the show. Somerset Ridge Vineyard and Winery is going to be a beautiful setting for the show. The buds are out, everything is beginning to turn green. By June, it will be a magical setting.

I scheduled my trip to Smith Mountain Lake today; bought my airline tickets on line. I’m not real thrilled with having to go through Washington, DC on the way to Roanoke, but I’m even less thrilled having to change planes in Chicago on the way home. Air travel is difficult at its best, but it is a two day drive each way and I am just not up to that by myself! I am looking forward to having the family all together again. The last time we were all at Smith Mountain Lake, the kitchen was a very busy place. We have, over the last few years, started new family traditions

with food, feeding 30 people gives you plenty of opportunities! Our first year there, we gave the teenagers meals they were responsible for. One morning two of them made German Pancakes and another day, 2 of them made Sloppy Joes for lunch. On the last evening, my nephew Neal and his son Josh fried all the fish that had been caught during the week. That was 4 years ago....just imagine what great cooks they will be this summer!


Cookies are always a big part of the cooking and baking at family reunions, and with the many hollow legs attached to teenage boys, they help stretch the time between meals. I think this is a cookie that everyone will enjoy.


Hazelnut-Nutella Sandwich Cookies


2/3 cup roasted and salted hazelnuts
2 1/2 cups all-purpose flour
1/2 teaspoon baking soda
1/2 teaspoon salt
2 sticks unsalted butter (1/2 pound) softened
1 1/4 cups sugar
1 large egg yolk
1 teaspoon pure vanilla extract
Nutella or another chocolate spread


1. In a food processor, finely grind hazelnuts. In a medium bowl, whisk the flour with the ground nuts, baking soda and salt. In a standing electric mixer fitted with a paddle, or using a hand mixer in a large bowl, beat the butter with the sugar at medium speed until light and fluffy, about 3 minutes. Beat in the egg yolk and vanilla, scraping the side and bottom of the bowl. Beat in the dry ingredients at medium-low speed. Divide the dough in half. Pat each half into a round, wrap them in plastic and refrigerate for 15 minutes.
2. Preheat the oven to 350°. Position the racks in the upper and lower thirds of the oven. On a lightly floured surface, roll out each piece of dough 1/8-inch thick. Using a 2-inch biscuit cutter, stamp out rounds as close together as possible. Arrange the rounds on large baking sheets, about 1 inch apart. Gather the scraps and reroll, cutting out more cookies.
3. Bake the cookies in batches for about 20 minutes, until golden; shift the pans from top to bottom and front to back halfway through baking. Let the cookies cool on the sheets for 5 minutes, then transfer to racks to cool completely.
4. Sandwich the cooled cookies with Nutella or another chocolate spread.
5. Make Ahead: The cookie dough can be wrapped in plastic and aluminum foil and refrigerated for up to 1 week or frozen for up to 1 month. Thaw in the refrigerator before using. The baked cookies can be stored in an airtight container for up to 1 week or wrapped in plastic and foil and frozen for up to 1 month.

Sunday, March 15, 2009


It’s crazy, I know. Here it is, the week of St Patrick’s Day, and I am thinking Mexican! How about Tamales? No, not corned beef tamales, but deliciously spicy pepper pork tamales. My sister, Ann, gave this recipe to me several years ago and they were a big hit with my kids and grandkids. So, overlook the timing, save the recipe until the corned beef and cabbage are all gone, then, steam a big batch of my favorite tamales.
Pepper Pork Tamales


26 to 28 tamales

Ingredients
· 12 ounces boneless pork sirloin roast cut into 2-inch chunks
· 1 medium onion, quartered
· 2 cloves garlic, sliced
· 1/2 teaspoon cracked black pepper
· 2 dried ancho or poblano chile peppers
· 1 dried New Mexico or pasilla chile pepper
· 26 to 28 dried corn husks (about 8 inches long and 7 to 8 inches wide at the top)
· 1 clove garlic
· 1/2 teaspoon salt
· 1/4 teaspoon cumin seeds, toasted*
· 4 cups Masa Harina (corn tortilla flour)
· 2 teaspoons baking powder
· 1/2 teaspoon salt
· 1/2 cup cooking oil
Directions
1. For filling: In a 4-quart Dutch oven, combine pork, onion quarters, sliced garlic, and cracked black pepper. Add enough water to cover (about 4 cups). Bring to boiling; reduce heat to medium-low. Cover and simmer for 1 to 1-1/4 hours or until meat is very tender. Remove meat from broth. Let meat and broth cool slightly. Remove and discard any fat from pork; shred pork. Strain broth and reserve 2-1/2 cups broth for the dough (save remaining broth for another use). Cover and chill meat and broth separately until ready to use.
2. Meanwhile, in a dry medium skillet, cook ancho and New Mexico peppers over medium heat for 4 to 5 minutes or until they have a toasted aroma, turning frequently. Let cool..
3. Wearing disposable plastic gloves or small plastic bags, remove and discard pepper stems, seeds, and ribs. Tear peppers into pieces and place in a bowl. Cover peppers with boiling water; let stand for 30 to 60 minutes to soften. Meanwhile, soak corn husks in hot water about 30 minutes or until soft.
4. Place a fine sieve over a bowl; pour softened peppers into sieve. Drain well; reserve peppers and liquid. In a blender, combine the soaked peppers, the 1clove garlic, 1/2 teaspoon salt, and the cumin seeds. Add 1/2 cup of the pepper soaking liquid; cover and blend until nearly smooth.
5. Transfer blended pepper mixture to a medium saucepan. Bring to boiling; reduce heat. Simmer, uncovered, about 10 minutes or until reduced to 1/2 cup. Stir shredded pork into hot pepper mixture in saucepan.
6. For dough: In a large bowl, stir together Masa Harina, baking powder, and 1/2 teaspoon salt. Add cooking oil; beat with an electric mixer or a spoon until combined. Stir in enough of the strained pork broth to make a mixture that resembles a thick creamy paste. To prevent dough from drying out, cover with a damp paper towel while assembling tamales.
7. To assemble each tamale, drain a corn husk well; pat dry with paper towels. Starting about 1 inch from the top edge of the husk, spread about 2 tablespoons of the dough into a rectangle 3 inches wide and 4 inches long, spreading so one of the long sides is at the long edge of the husk. Spoon about 1 tablespoon of the pork filling down the center.
8. Fold the long edge of each husk over the filling so it overlaps dough slightly. Wrap husk around outside of filled dough. Tie ends with strips of corn husk or heavy kitchen string.
9. To steam tamales, in a very large Dutch oven, stand half of the tamales upright in a steamer basket. (Don't pack them in too tightly, but fill all the spaces.) Place at least 1-1/2 inches of water in the bottom. Bring to boiling. Cover Dutch oven. Reduce heat to medium. Steam for 30 to 35 minutes or until tamales easily pull away from corn husks and dough is spongy.Makes 26 to 28 tamales.
Make-Ahead Directions: Prepare tamales as directed. Cool slightly. Wrap tamales in plastic wrap. Store in an airtight container in the refrigerator for up to 2 days or in the freezer for up to 3 months. To reheat refrigerated or frozen tamales, steam them as directed above, allowing 8 to 10 minutes for refrigerated tamales or about 15 minutes for frozen tamales or until heated through. Tamales can also be reheated in the microwave still wrapped in the husks. Cook each refrigerated tamale on 100 percent power (high) about 1 minute or until heated through. Cook each frozen tamale on 70 percent power (medium-high) for 1-1/2 to 2 minutes or until heated through.

Saturday, March 14, 2009


Dessert does not always mean Chocolate


While having a working lunch yesterday with Jasper, I had a few bites of creamy Ricotta Cheese with Olive Oil and Sea Salt, one of my two favorite ways of eating Ricotta. The other? Somerset Ridge Vineyard’s Port Mulled Cherries with Ricotta! It is so simple and so wonderful, right up there with sinful!


Somerset Ridge Vineyard’s Port-Mulled Cherries With Ricotta
2 cups Somerset Ridge Vineyard’s Ruby Red Port
1 1/2 cups pitted fresh cherries or one 10-ounce bag of thawed, drained frozen cherries
1 cup fresh ricotta

In a medium saucepan, simmer the port over moderately high heat until a thick syrup forms, about 10 minutes. Stir in the cherries. Scoop the ricotta into four bowls, spoon the cherries and syrup on top and serve.

I think the following cookie recipe is the perfect match for the Ricotta with Mulled Cherries….

Pine-Nut Cookies with Rosemary
3 1/2 teaspoons coarsely chopped fresh rosemary
1/4 cup pine nuts, toasted, plus more for topping cookies
2 1/4 cups all-purpose flour
1 teaspoon baking soda
1/2 teaspoon ground ginger
1/4 teaspoon coarse salt
10 tablespoons unsalted butter (1 1/4 sticks) softened
1 cup plus 2 tablespoons granulated sugar
2 tablespoons extra-virgin olive oil
3 tablespoons heavy cream
1 large egg
Fine sanding sugar, for sprinkling

Preheat oven to 325 degrees. Finely chop rosemary in a food processor. Add pine nuts; pulse until coarsely ground. Transfer to a large bowl. Whisk in 2 cups flour, the baking soda, ginger, and salt; set aside.

. Put butter and granulated sugar into the bowl of an electric mixer fitted with the paddle attachment. Mix on high speed until pale and fluffy, about 5 minutes. Mix in oil. Reduce speed to low. Mix in flour mixture. Add cream; mix until well combined, about 2 minutes. Mix in egg, then remaining 1/4 cup flour.

Shape dough into 3/4-inch balls, and space 2 inches apart on baking sheets lined with parchment paper. Flatten slightly with fingers, and top each with a pine nut. Sprinkle with sanding sugar.

Bake cookies, rotating sheets halfway through, until edges are golden, about 13 minutes. Let cool 10 minutes on sheets on wire racks. Transfer cookies to racks to cool completely. Cookies can be stored in airtight containers up to 3 days.


The big Pig 101 Dinner is just over a week away! Jasper and I have been working hard to bring to you some great ways to serve pork. I’m still playing around (in a very serious manner, of course) with pig trotters! It is going to be a fun evening and I am confident the food will be delicious…after all, we are holding this dinner at Jasper’s! If you are planning on attending and haven’t made your reservation yet, call the restaurant soon, reservations are cutting off at 45 guests! 816-941-6600.

My friend and the great chef from Tuscany, Judy Witts Francini, will be here in the Kansas City area for several events April 5-7th. I hope I see some of you at at least one of them. There will be a cooking class/book signing event at Jasper’s restaurant on April 6th and an event at a Thyme For Everything in downtown Lee’s Summit on the 7th. Check their webpage for information http://athymeforeverything.com/. I’ll post the information about the class at Jasper’s as soon as it is finalized.
In the meantime, check out Judy's blog. http://divinacucina.blogspot.com/
Port photogrph is property of Kay Tucker. All other photos from Fotosearch.com.

Thursday, March 12, 2009


I’ve always been intrigued by the French word Clafouti, although, it is not a particulary attractive sounding word, it brings to mind something warm and delicious. To me, Clafouti is a custard-like baked French dessert that is typically made by baking fresh fruit (traditionally cherries) and a batter, somewhat similar to pancake batter, in a baking dish.
Having used the Julia Child cookbook, Mastering the Art of French Cooking, for many years, I turned to it again to find out about this dessert. According to Julia, Clafouti is a Flan. According to the dictionary, a flan is an open pie filled with sweet or savoury ingredients; also, a Spanish dessert of baked custard covered with caramel.
I have always been a big fan of Spanish Flan, I rate it just a few notches below Crème Brulee. But now I had to convince my poor tired brain to divide the Flan category into several sub-categories. (Why can’t life be easier on the elderly?) Here it is….Flan: 1. Sweet 2. Savory
I suppose that wasn’t too hard.
My next challenge was to take all of my hundreds of recipes that now suddenly fit into one of these two sub-categories and separate them accordingly. I found the sweet ones easily enough, I had them under “Desserts”. Then the real search began. I found most of them hiding in “Appetizers”, 3 dozen or so under “Brunch”, maybe 10 or 12 of them under “Vegetables” (such as Gratins).
My next step was to return to the research stage….There I was, joyfully reading about fresh Cherries and plump sweet Figs; juicy, drippy Mangoes, and big fat red Strawberries. I was so happy finding photos of these delicious fruits tucked gently into beautiful, rustic dishes, and baked into a rich creamy clafouti. Then it happened, Brussels Sprout Clafouti…was I surprised? Yes. Was I repulsed, YES! YUCK!!!!! .....But, I didn’t give up, because I remembered I had several recipes that suddenly fit into “savory”. One of them, My Crabmeat and Tomato Gratin was suddenly a Clafouti. All the work ahead of me!.....


Then it hit me. I was making work for myself, changing things that I already had in neat compartments. Why would I disrupt my thought process (I can hear my kids laughing at that one!) by trying to reorganize something that did not need to be reorganized?
So, here it is…. Flan is Flan! Gratins are Gratins! And finally, Clafouti is a French Cherry Custard Dessert. Period.

Julia Child's Clafouti

serves 6-8
1 1/4 cups milk
1/3 cup sugar
3 eggs
1 Tablespoon vanilla
1/8 teaspoon salt
1/2 cup flour
3 cups cherries, pitted
1/3 cup sugar
powdered sugar

In a blender, blend the milk, sugar, eggs, vanilla, salt and flour. Pour a 1/4 inch layer of the batter in a buttered 7 or 8 cup lightly buttered fireproof baking dish. Place in the oven until a film of batter sets in the pan. Remove from the heat and spread the cherries over the batter. Sprinkle on the 1/3 cup of sugar. Pour on the rest of the batter. Bake at 350 degrees for about for about 45 minutes to an hour. The clafouti is done when puffed and brown and and a knife plunged in the center comes out clean. Sprinkle with powdered sugar, serve warm. Enjoy!
All photos from www.fotosearch.com
My Top 10 Perfect Foods

I decided to do a little Google-ing as research for today’s blog. You see, I have a list of foods that I feel are the “Perfect Food”, perfect for me. I thought it might be fun to see what other people think. So, I Googled it and figured I would see “the egg” and “milk”…but I got the following….
Acai…fruit from the Amazon's "tree of life"….
Salba… the seed of South America’s legendary salvia hispanica plant….
Hempseed…still legal here in the United States….

This is about the time I decided “they” don’t know how to pick “perfect foods.”
You see, my list goes something like this….
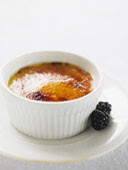
#1…Crème Brûlée
2.. Cioppino
3.. Polenta
4…Jasper’s Lobster Cappuccino
5.. Warm Homemade Ricotta Cheese
6.. Grilled Cheese Sandwich
7… My Mom’s Sugar Cookies
8… 1 ½” thick Rare Rib Eye Steak, grilled over an open flame
9… Havarti Cheese
10…Flourless Chocolate Cake

Of course, there is always fried chicken, lasagna, mashed potatoes with rich beef gravy, apple pie, eggnog, chocolate truffles, fried catfish and hushpuppies, etc. I suppose no one will ever accuse me of being into health foods! For some reason, Acai, Salba and Hempseed just don’t exist in my world.
Try this recipe and see if you don’t agree that it is #1 on my list for a good reason! Remember, Creme Brulee or "burnt cream" is satiny custard. It is served chilled yet glistens with a crisp caramelized sugar top, which when tapped with the back of a dessert spoon, shatters like glass, revealing that cool, vanilla-infused custard hidden below.


Crème Brûlée
8 egg yolks
1/3 cup granulated white sugar
2 cups heavy cream
1 teaspoon pure vanilla extract
1/4 cup granulated white sugar for caramelizing


Preheat oven to 300 degrees. In a large bowl, whisk together egg yolks and sugar until the sugar has dissolved and the mixture is thick and pale yellow. Add cream and vanilla and continue to whisk until well blended. Strain into a large bowl, skimming off any foam or bubbles. Divide mixture among 6 ramekins or custard cups. Prepare an oven-going water bath by placing a paper towel in the bottom of a pan large enough to hold the six ramekins without touching. The towel keeps the ramekins from sliding. Put the ramekins in the pan and put on the center rack of the oven, then carefully fill the pan with warm water until the level reaches halfway up the sides of the ramekins. Close the door and begin timing. Bake until set around the edge but still loose in the center, about 40 to 50 minutes. Remove from the oven and leave in the water bath until cooled. Remove cups from water bath and chill for at least 2 hours or up to 2 days. When ready to serve, sprinkle about 2 teaspoons of sugar over each custard. Caramelize the sugar with a small hand-held torch or place the ramekins under the broiler until the sugar melts. Re-chill custards for a few minutes before serving.
Yield: 6 servings
All photos from www.fotosearch.com

Tuesday, March 10, 2009


The Ogg Family Farm
We all know that aromas and smells trigger memories, but I heard a sound over the weekend that made me remember someplace special. I stopped by the Louisburg Cider Mill; I am unfortunately addicted to the caramels they sell by the cash register. As I stepped outside with my treasure in my hand, the screened door closed behind me. You know the kind, made of a wood frame with two large sections of screen. Don’t think security, don’t think pneumatic door closer, just remember your grandparent’s screened door. It might have had a simple metal door pull or a hand carved wooden door pull, or maybe a large thread spool. There was probably a spring, one end connected to the door, the other to the door frame. Without that, the flies and mosquitoes would have moved in! Anyway, as the door quietly “whooshed” behind me, followed by a wood on wood “clack” as it closed , I remembered the back screened door at the farm. I’m not sure why, but the farm, my Mom’s childhood, and my Grandparents have been on my mind a great deal lately. Maybe it is all the talk about pigs and pork, maybe my working on the genealogy, maybe it is just yearning for the old days, but I am once again overwhelmed with memories of the home of my great grandparents, Napoleon Boneparte and LouEmma Ogg; my grandparents, William Clyde and Minnie Florence Ogg; my uncle and aunt, Clarence and Zelma Ogg. Three generations of my family created a perfect place for me to spend some of the more important moments of my childhood.
The farm was auctioned off when my Uncle Clarence died. My aunt had passed away several years before. None of his survivors are farmers, none of us live in Richmond, Missouri, so we had an auction company come, and the house and contents were sold. Actually, the old farmhouse and the main part of the land had been sold years before when my uncle needed to retire from farming. Uncle Clarence and Aunt Zelma kept one corner section and built a new home where they lived until their deaths. So now, when I talk about the farm, I’m talking about the original farm where we spent time as children, spent holidays. The house with the giant pine tree in the front yard. I used to lie under that tree and listen to the wind softly brush its way through the pine needles. You just don’t get sounds like that here in the city. They may be there, but there are too many other sounds to overtake that soft beautiful whisper.
Other sounds I remember fondly are those of cattle mooing in the pastures, roosters crowing from the chicken yard, the sound of the pump handle being moved up and down, followed by the gurgling of the best tasting water in the world, splashing into our hands. And is there a sound anything like playing with the barn kittens in the hayloft? I don’t think so,! After an afternoon of running through the knee high pastures, it was time to head for that backdoor. That wonderful “whoosh….clack” was quickly followed by those memory coaxing aromas….fried chicken….mashed potatoes…homebaked breads….green beans and country ham…..cherry pie…..!
No wonder I miss the farm! No wonder I am as wide as I am tall!
I think these memories call for one of my grandmother’s recipes. Of course, it has to be….

“Minnie Florence’s Biscuits”
2 cups self rising flour
1/2 tsp salt
1/2 cup lard chilled, yes, LARD! No substitutions!
2/3 cup buttermilk, yes, the real thing
2/3 cup heavy cream, absolutely!
all purpose flour for shaping biscuits
Melted butter for brushing tops after baking
4 tablespoons Melted butter for greasing pan
Preheat oven to 475. Throw out your cooking spray! Grab that melted butter for the pan, and pour it into your baking pan. Mix flour and salt in a medium bowl with a whisk. Add lard and crumble with your fingers until it crumbles with no pieces bigger than a pea. Just rub the flour/lard between your fingers. Make a well in the center and pour in the buttermilk and heavy cream all at once and mix with a fork
until JUST MIXED. Do not over work. The dough will be
very sticky. Dust your hands with the all purpose flour and also your work surface…I use a pastry cloth. Turn out the dough onto the flour surface and work with it so it is just coated with a very light covering of flour. Pat it out…fold it over on itself from the right, turn a half a turn and pat out again…this gives you the layers. Pat out to a 8 inch by 6 inch rectangle and cut with a 2″ biscuit cutter - DO NOT TWIST the cutter. Cut straight down and lift up. Twisting will seal the edges and your layers will be gone! Every cookbook I have gives this same warning! Grandmother Ogg knew her “stuff”!
This should give you 10-12 biscuits…you can pat your scraps out once but no more. Re working will cause the dough to become tough. Take one biscuit at a time, dip it in melted butter in baking pan, turn it over and lay it in pan. Do this to each biscuit, then bake for 15 minutes more or less…watch them so they don’t get too brown. As soon as they are perfectly golden, take them out.

My apologies to all who are on diets, be it low-fat, low-carb, low-LARD! There are recipes in the world that should remain pure, unchanged…this is one of them!
Wasn't my Grandmother Ogg a beauty!

Monday, March 9, 2009


Slow Food Kansas City
Presents
Pig 101
"From Snout To Tail"

Eat & Drink Local
Local Duroc Pork, Local Wine & Local Chefs

Join Slow Food Members Kay Tucker & Jasper Mirabile
for a small plate dinner & cooking class featuring Pork Belly,
Jowl, Trotter, Neck Bones & more.

Our Mission: To teach the home cook how
to use the whole hog from snout to tail.

Learn to prepare Pancetta, Zampone Wild Boar & More.

Slow Food members Dennis & Cindy Reynolds will be offering their
Somerset Ridge wine produced locally in Somerset, Kansas.

March 23, 2009
6:30 PM

Jasper's Ristorante
1201 W. 103rd. Street
Kansas City, MO 64114

35.00 per person includes wine.
Tax & gratuity extra

Sign up today, seating is limited
5.00 from every purchase will go directly to Slow Food KC Chapter.
------------------------------------------------------
I was just emailing back and forth with Jasper, checking to see who is on pig flipping duty today! Everyday one of us has to turn the giant leg of boar to make sure the marinade is evenly distributed. This is a 2 to 3 week process, but definitely worth it!
Our guest list is growing! I am so pleased at the response. If you plan on coming, make your reservation soon, we only have room for 45 guests.
The event will be covered by the KC Star, as well as Flourish Magazine.

Sunday, March 8, 2009

I know I’m partial to Italian recipes, but today, I am going French! So, put on some Edith Piaf recordings and join me in the kitchen. It’s BISTRO Time!

Maybe you are under the impression French cooking is expensive, but never fear, this is French country cooking and it need not be costly.
My first recipe is for Boeuf Bourguignon, or as we say here in Kansas, Beef Burgundy. Marinated then slow cooked to ensure tenderness and flavor, this famous French dish is divine!

It is much better to cook this in a large cast iron casserole so that all the flavor from the browning stage is not lost. I know the recipe looks long and scary, but it truly isn’t! This dish should be started the day before!
Boeuf Bourguignon
2 ½ pounds Chuck Steak, cut into 4”pieces
Large carrot roughly chopped
Large onion chopped
Two fresh bay leaves
Two cloves garlic crushed in their skins
Two cloves
One bottle Somerset Ridge Ruby Red Wine
Ten black peppercorns
1Tablespoon Madeira
Beurre manie (1 teaspoon flour and 1 teaspoon
butter mashed together)
1 Tablespoon butter
Chopped parsley
Olive oil

Put the pieces of beef in a large glass bowl and add the next seven ingredients making sure that the beef is covered. Cover the bowl and allow to marinate for 24 hours. When ready to start cooking, take the meat out of the marinade and dry it thoroughly on kitchen paper. In a casserole heat a tablespoon each of oil and butter until the butter stops foaming and then add the meat pieces four at a time. Brown them over a high heat on all sides – they should look really crusty almost like a steak – and then take them out of the pan and add the next four, until you have a pile of fragrant beef.
Add the drained vegetables from the marinade to the casserole and brown those too and then pour in the wine marinade. Bring the liquid to a gentle simmer and pile the meat back in. The meat should be entirely covered by liquid. If not add a little beef stock or more red wine if you have a bottle handy, bring back to a simmer and place in a 300 degree oven for three hours. It is worth checking the meat every hour and if the level of liquid has dropped and the meat looks a little exposed, turn it over gently in the liquid. Even if the meat looks burned, don’t be alarmed and don’t add more liquid – you need the gentle reduction of the sauce and the darkening of the meat for flavor – if the pan looks totally dry, your oven thermostat has broken!
Towards the end of the cooking time, gently poke the meat with a fork – it is done when it starts to break apart when you do this. Take the casserole from the oven and carefully lift out the meat into a warm dish and set to one side.
Strain the sauce into a clean pan and place it over a low heat. Allow it to come to a gentle boil. Add the Madeira and reduce until it tastes as strong as you like – the sauce should become almost syrupy. Whisk in the butter and flour mix and keep whisking until blended.Add the meat back to the sauce to heat through and serve a couple of large chunks per person with the sauce poured over, scattered with chopped parsley.
With this great saucy dish, I think you need polenta but garlic mashed potatoes are commonly served in Bistros, so that is next. I know most cooks don’t need a recipe for mashed potatoes, but I want to do the whole deal.
Roasted Garlic Mashed Potatoes
1 medium head garlic
1 tablespoon olive oil
2 pounds russet potatoes, peeled and quartered
4 tablespoons butter, softened
1/2 cup milk
salt and pepper to taste
Preheat oven to 350 degrees F (175 degrees C).
Drizzle garlic with olive oil, then wrap in aluminum foil. Bake in preheated oven for 1 hour.
Bring a large pot of salted water to a boil. Add potatoes, and cook until tender, about 15 minutes. Drain, cool and chop. Stir in butter, milk, salt and pepper.
Remove the garlic from the oven, and cut in half. Squeeze the softened cloves into the potatoes. Blend potatoes with an electric mixer until desired consistency is achieved.
serves 8

Caramelized Onion, Green Bean, and Cherry Tomato Tian
This slightly sweet vegetable dish takes its name from the French term (pronounced tee-AHN) for mixed vegetables prepared gratin-style. With spring approaching you may want to skip the hot dish and substitute a cool refreshing salad.
5 cups (1-inch) cut green beans (about 1 pound)
Cooking spray
3 cups thinly sliced onion
6 garlic cloves, minced
2 teaspoons sugar
1/2 teaspoon salt
1/4 teaspoon black pepper
2 tablespoons balsamic vinegar
1 teaspoon dried basil
1/2 teaspoon dried oregano
4 cups cherry tomatoes, halved
1/4 cup (1 ounce) grated fresh Parmesan cheese
Preheat oven to 400°.
Cook beans in boiling water 3 minutes. Drain and rinse under cold water; set aside.
Heat a nonstick skillet coated with cooking spray over medium-high heat. Add onion and next 4 ingredients (onion through pepper); saute 8 minutes or until lightly browned, stirring frequently. Stir in vinegar, basil, and oregano; cook 2 minutes. Remove from heat.
Arrange beans in an 11 x 7-inch baking dish coated with cooking spray. Top with onion mixture. Arrange tomatoes on top of onion mixture, and sprinkle with cheese. Bake at 400° for 35 minutes or until the cheese is lightly browned. Serves 6

And for dessert…….

Chocolate Mousse au Grand Marnier
1 (4-ounce) package sweet baking chocolate
4 (1-ounce) squares semisweet chocolate
1/4 cup Grand Marnier or other orange liqueur
2 cups whipping cream
1/2 cup sifted powdered sugar
Combine 8 ounces of chocolate and Grand Marnier in a heavy saucepan; cook, stirring constantly, over low heat until chocolate melts. Remove from heat, and cool to lukewarm.
Beat whipping cream until foamy; gradually add powdered sugar, beating until soft peaks form. Gently fold about 1/2 cup of whipped cream into chocolate; fold in remaining whipped cream. Spoon into individual serving dishes. Chill until ready to serve. Must be kept cold.
Serves 6

“Nothing would be more tiresome than eating and drinking if God had not made them a pleasure as well as a necessity.”
Voltaire French Philosopher
all photos from www.fotosearch.com

Saturday, March 7, 2009


How does a Warm Banana Cupcake sound?


I am such a lucky person! I have had so many wonderful emails and comments on my blog. I consider blogging to be part of my creative therapy; blogging, cooking and painting at ARTichokes.
I am happy in the studio, the kitchen and at my desk….all I need is a visit from my kids and grandchildren to make a perfect day!
Here is the latest note I have received, from my friend Winnie who also paints at ARTichokes.

"Hi Kay......... I’m really enjoying your blog! I love bread........and I am a baker’s daughter & grand-daughter. I grew up in a small town in Ohio – where my folks (and grandparents before them) owned a small mom & pop bakery. We moved into an apartment above the bakery when I was three months old (Jan. ‘46)......and lived there until moving to KC just before my senior year in high school (Labor Day ‘62).I’ve got lots of wonderful bakery memories........but unfortunately since I had it all made for me (hot banana cup cakes were a favorite), I didn’t really pick up the skills. I worked the store front – restocking the trays, cash register, washing the glass cases, helping customers, ...... or iced cupcakes, filled bismarks, & sliced buns. I did acquire a little cake decorating skills. My baby sister was only two when we moved, but she remembers my grandfather setting her on the long wooden work bench & pulling out the bins below full of raisins, nuts, chocolate chips,.......Less than ten years ago, when the people who bought the bakery from my parents were selling, they found some old wax paper bread wrappers behind daddy’s desk. They gave them to my nephew and now I have one framed in my kitchen: Wilson’s Bakery Hande Dande Bread!Hope to see you over @ Artichokes......... Your fan, Winnie"

All of us have a story! Can you imagine the wonderful smells coming from Winnie’s family’s bakery!

Spent some time this past week in the kitchen at Jasper’s, prepping the Wild Boar for our dinner to be held on March 23rd at the restaurant. The huge fresh leg has been rubbed down with Arch’s special rub and is hanging out in the walkin refrigerator, floating in Arch’s marinade. To make it extra special, the marinade is made with Arch’s wine, Flyboy Red by Somerset Ridge Vineyard and Winery. Arch would be so proud!

So, for my recipe today….Winnie’s comment about Warm Banana Cupcakes sent me to the kitchen! So here it is….

Warm Banana Cupcakes

1/2 cup shortening
1 1/2 cups sugar
2 eggs
1 teaspoon vanilla extract
1 cup mashed ripe bananas
1/4 cup buttermilk
2 cups all-purpose flour
1 teaspoon baking powder
3/4 teaspoon baking soda
1/2 teaspoon salt
FROSTING:
1/2 cup lightly salted butter, softened
2 1/2 cups confectioners' sugar
3 tablespoons milk
1/2 teaspoon vanilla extract

1. In a large mixing bowl, cream shortening and sugar. Add the eggs, vanilla, bananas and buttermilk. Combine the flour, baking powder, baking soda and salt; add to banana mixture. Fill 18 paper-lined muffin cups two-thirds full.

2. Bake at 350 degrees F for 15-20 minutes or until a toothpick comes out clean. Remove to wire racks to cool completely. In a small mixing bowl, cream the butter, sugar and enough milk to achieve desired spreading consistency, add vanilla. Frost cupcakes. Try to eat at least one while it is still warm!
all photos from www.fotosearch.com

Ponte Vecchio, Florence, Italy

Ponte Vecchio, Florence, Italy
oil painting by Kay Tucker

Somerset Autumn on Wea Creek

Somerset Autumn on Wea Creek
Oil Painting by Kay Tucker, Private Collection

Floral

Floral
oil painting by Kay Tucker

Kansas Storm

Kansas Storm
oil painting by Kay Tucker, Private Collection

Watercolor Collage

Watercolor Collage

Tempo al Tempo....All in Good Time

Tempo al Tempo....All in Good Time
48"x36" sculptural painting by Kay Tucker